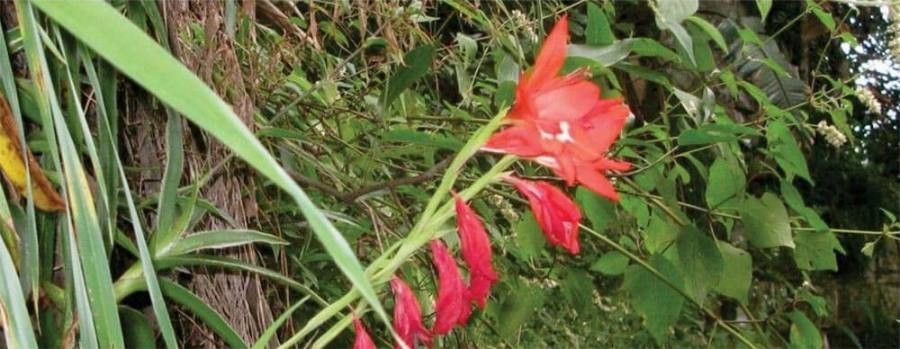
Hello there! It’s so lovely to have you join me in my little corner of the garden today. We’re going to talk about something truly special: Gladiolus cruentus. You know, those statuesque beauties with their bright, almost fiery flowers? They bring such vibrant color and elegance to the garden, and the thought of multiplying them fills me with such joy. And the best part? Propagating them is a really rewarding process. Now, if you’re just dipping your toes into the world of plant propagation, I wouldn’t say Gladiolus cruentus is for the absolute beginner, but with a little care and these tips, you’ll be amazed at what you can achieve. It’s definitely doable!
The Best Time to Start
Timing is everything in gardening, and for Gladiolus cruentus, the sweet spot is early spring, just as the plant is waking up from its winter slumber. You want to catch it when it’s full of energy and ready to grow. If you missed that window, don’t fret! You can also have success later in spring or even into early summer. The key is to work with the plant when it’s actively growing, not when it’s stressed or dormant.
Supplies You’ll Need
Before we get our hands dirty, let’s gather our toolkit. Here’s what you’ll want to have on hand:
- Clean, sharp pruning shears or a sharp knife: For making clean cuts.
- Well-draining potting mix: A good starting point is a mix of equal parts peat moss, perlite, and compost. You can also find specialized corm or bulb mixes.
- Small pots or trays: With drainage holes, of course!
- Rooting hormone powder (optional but helpful): Dip your cuttings in this to give them an extra boost.
- Watering can or spray bottle: For gentle watering.
- Labels and a marker: To keep track of your new babies!
- A warm, bright location: But out of direct, scorching sun initially.
Propagation Methods
While Gladiolus cruentus can be propagated by seed, the most reliable and quickest way to get new plants is by working with its corms. Think of these as the plant’s underground storage units – essentially modified stems. Over time, a mature corm will produce smaller cormels, which are your starting points for new plants.
Division of Cormels:
This is your primary method for Gladiolus cruentus.
- Gently excavate: In early spring, before new growth gets too vigorous, carefully unearth the mother corm. You’ll likely see clusters of small cormels attached to it.
- Separate the cormels: Using your fingers or a gentle nudge with your knife, carefully detach the smaller cormels from the main corm. Be patient; you don’t want to damage them. Older, shriveled cormels can usually be discarded.
- Inspect and clean: Give the cormels a quick check for any signs of disease or damage. Gently brush off any excess soil.
- Planting: Fill your small pots with your well-draining potting mix. Make a small indentation in the soil. Plant each healthy cormel about 1-2 inches deep, pointed end up if you can discern it (though they’ll usually figure it out).
- Watering: Water gently to settle the soil around the cormels.
It’s that simple! We’re essentially giving these little powerhouses the right conditions to grow into their own magnificent plants.
The “Secret Sauce” (Pro Tips)
Over the years, I’ve learned a few little tricks that can really make a difference.
- Let them cure a bit: After you’ve dug up your corms and separated the cormels, it’s actually beneficial to let them air dry in a warm, dry place for a week or two. This helps any small nicks or cuts heal over, reducing the risk of rot before they even go into the soil.
- Consider bottom heat: If you’re starting early in spring and your environment is a bit cool, placing your pots on a heated propagator mat can significantly speed up germination and root development. It mimics the warmth of the soil after a spring rain.
- Don’t overwater early on: It’s a common mistake! While they need moisture, cormels can easily rot if kept too soggy before they’ve established roots. Check the soil moisture regularly and water only when the top inch feels dry.
Aftercare & Troubleshooting
Once your cormels are planted, keep them in that bright, but not intensely hot, location. Water them when the soil starts to feel dry to the touch. You should begin to see little shoots emerge within a few weeks.
The most common issue you’ll encounter is rot. If you see a cormel turning mushy, black, or developing mold, it’s best to remove it immediately to prevent the problem from spreading. This is often a sign of overwatering or poor drainage. If the new shoot wilts and the cormel under the soil is soft and rotten, that’s a clear indicator. Don’t be discouraged; sometimes nature just doesn’t cooperate with every single one. It’s part of the process!
A Encouraging Closing
Propagating Gladiolus cruentus is a journey, and like all good journeys, it’s about enjoying the steps along the way. Be patient with your new little plants. They’ll take their time to grow and mature, and eventually, you’ll be rewarded with those spectacular blooms. Happy gardening, and may your new gladioli be ever so glorious!
Resource:
https://identify.plantnet.org/k-world-flora/species/Gladiolus%20cruentus%20T.Moore/data