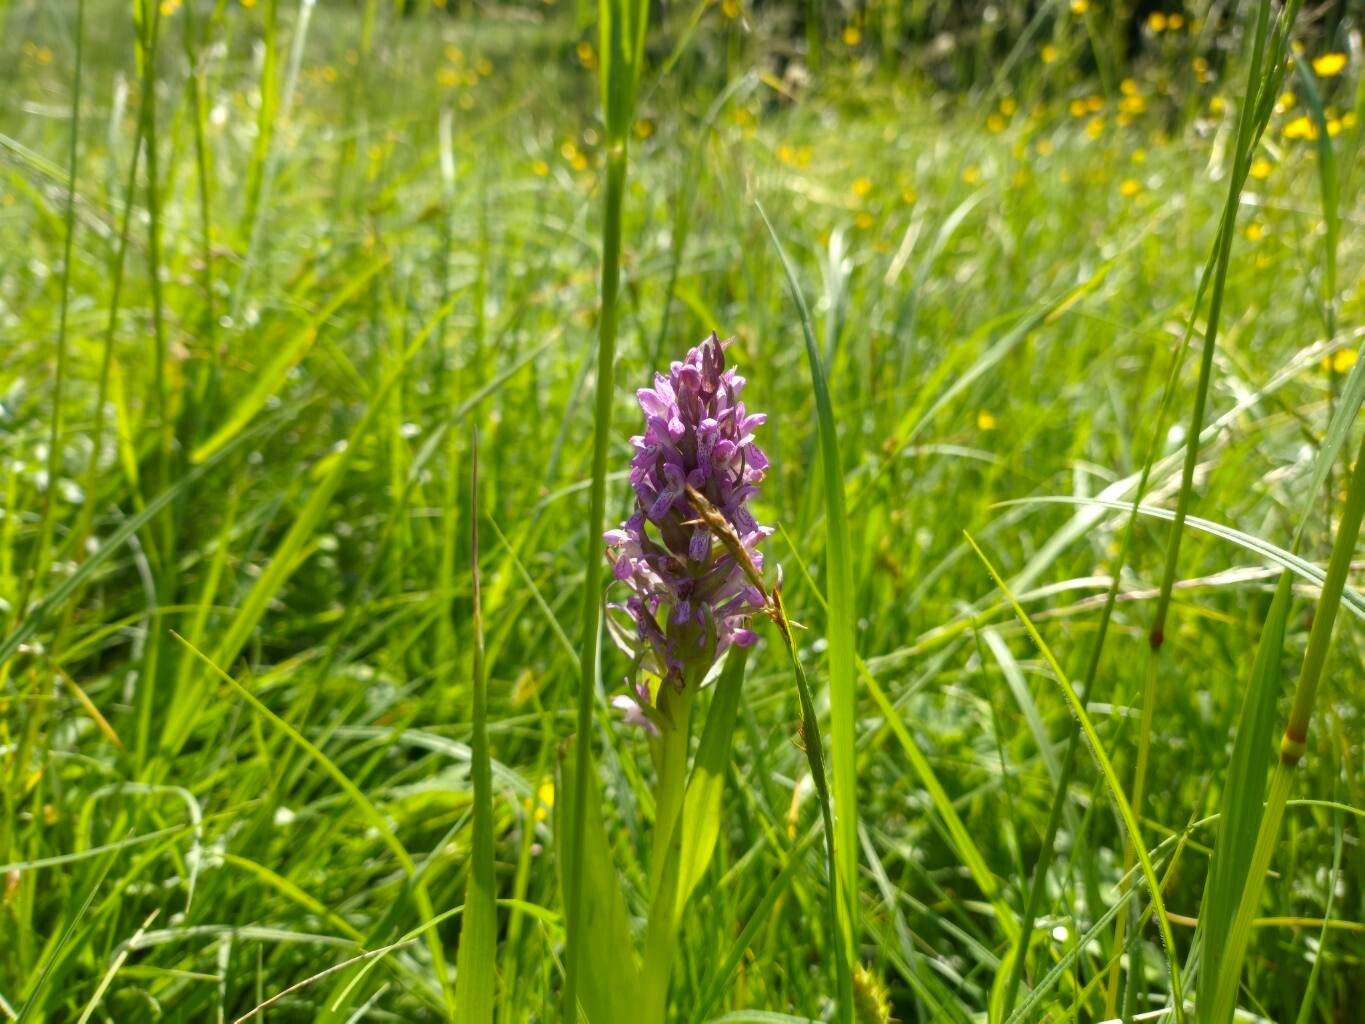
Well hello there, fellow plant enthusiast! I’m absolutely delighted you’re curious about propagating Dactylorhiza incarnata, also known as the Early Marsh Orchid. This beautiful native orchid, with its delicate pink to magenta blooms, brings such a special charm to any damp, wilder corner of the garden. Watching it unfurl new life from a parent plant is one of those truly magical gardening moments that never gets old.
Now, I won’t sugarcoat it: orchids, even terrestrial ones like our friend here, can be a little particular. Dactylorhiza incarnata isn’t the absolute easiest plant to start from scratch, especially for a complete beginner. It thrives on specific conditions, and that’s where a bit of insider knowledge really helps. But don’t let that deter you! With a little patience and the right approach, you absolutely can succeed.
The Best Time to Start
For Dactylorhiza incarnata, late spring or early summer, right after the plant has finished flowering but before it enters its summer dormancy, is your golden window. You’re looking for the plant to be actively growing, with healthy foliage. This stage provides the most energy and resources for successful propagation. Avoid attempting this when the plant is going dormant or when it’s actively flowering – it’s just not the right time for it to be putting energy into new beginnings.
Supplies You’ll Need
Here’s what you’ll want to have on hand:
- Sterile potting mix: A well-draining mix is crucial. I like to combine equal parts peat moss, perlite, and a bit of sharp sand. The goal is to mimic its natural boggy, yet aerated, environment.
- Sharp, sterile pruning shears or a clean knife: For making clean cuts. Don’t use dull tools; they can damage tissues and invite disease.
- Small pots or seed trays: Clean ones, of course!
- Watering can with a fine rose: For gentle watering.
- Optional: Rooting hormone: While not strictly necessary for division, it can give cuttings a helpful boost.
- Labels and a marker: To keep track of what you’ve done and when.
Propagation Methods
The most reliable way to propagate Dactylorhiza incarnata is through division. This involves carefully separating the dormant tubers that form from the parent plant.
- Wait for the right time: As mentioned, this is after flowering and as the foliage begins to yellow, signaling its move towards dormancy.
- Unearth with care: Gently dig around the base of the parent plant. You’re not trying to rip it out, but rather to expose the root ball and tubers. You’ll notice what look like small, fleshy fingers or bulbs – these are your tubers.
- Identify and separate: Look for tubers that have at least one healthy eye or bud. Using your sterile knife or shears, carefully cut or gently pull the tubers apart. Each section should have its own tuber with an eye. Resist the urge to break them apart aggressively; be deliberate.
- Allow to air dry (briefly): Once separated, let the divisions sit in a cool, dry, and shaded spot for a few hours to a day. This helps any cut surfaces callus over, reducing the risk of rot upon replanting.
- Pot them up: Plant each division in its own small pot filled with your prepared sterile potting mix. The tuber should be planted about 1-2 cm deep, with the eye facing upwards.
The “Secret Sauce” (Pro Tips)
- Think “slightly damp, never sodden”: While these orchids love moisture, waterlogged conditions are their nemesis once they’re out of their natural bog. When you pot divisions, water them gently, and then let the surface dry out slightly between waterings. This mimics the fluctuating water levels in their natural habitat.
- Consider a dormant chill (if dividing in autumn): If you are dividing at the very end of the season when dormancy is more pronounced, a period of cool, dry storage in peat moss or sand can actually be beneficial before you actively pot them up. This helps them experience a period of rest.
- Mimic the mycorrhizal relationship (advanced, but worth noting): Dactylorhiza species rely heavily on symbiotic fungi in the soil. While you can’t easily replicate this at home, ensuring you use a soil mix that isn’t overly sterilized and contains some organic matter can indirectly support the health of your new divisions.
Aftercare & Troubleshooting
Once your divisions are potted, place them in a cool, bright location out of direct sunlight. Keep the soil consistently moist but not waterlogged. You can mist the surface occasionally if the air is very dry.
The most common problem you’ll encounter is rot. If you see your division turning mushy, black, or developing a foul smell, it’s likely from too much moisture. Unfortunately, once rot sets in this severely, it’s very difficult to save. Prevention is key – ensure excellent drainage and a good watering regimen. If you see just a tiny bit of surface mold, try gently scraping it away and allowing the potting mix to dry out a bit more.
Be patient! It can take some time for your new divisions to establish themselves. You might not see much outward growth for a while. Just focus on providing consistent, but not excessive, moisture and good light.
A Encouraging Closing
Propagating Dactylorhiza incarnata is a journey of observation and a little bit of faith. It’s a rewarding endeavor that connects you more deeply with this beautiful plant. Don’t be discouraged if your first attempt isn’t a roaring success. Every gardener learns through trial and error, and each experience teaches us something new. So, dive in, enjoy the process, and celebrate every tiny sprout that emerges! Happy gardening!
Resource:
https://identify.plantnet.org/k-world-flora/species/Dactylorhiza%20incarnata%20(L.)%20Soó/data