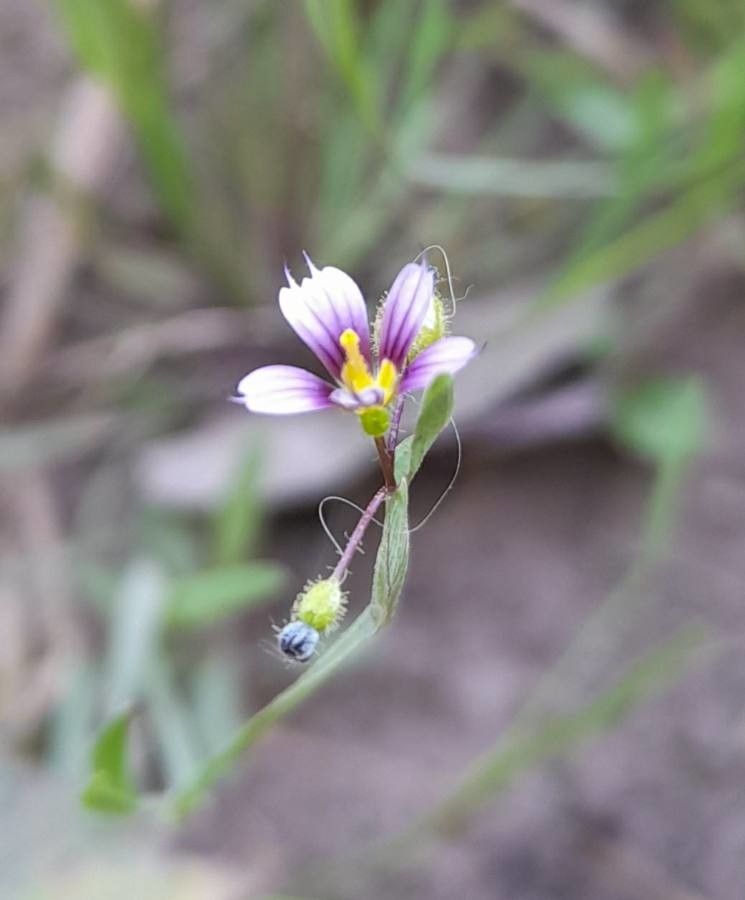
Oh, hello there! Come on in, pull up a chair. I’ve got a fresh pot of coffee brewing. Today, I want to chat about a little gem that’s been gracing my garden for years: Sisyrinchium minus. You know, those charming little native irises, often called Blue-Eyed Grass? They have this delightful way of naturalizing, creating lovely carpets of starry, sky-blue flowers in the spring.
Why You’ll Love Propagating Sisyrinchium Minus
If you have a fondness for those delicate, cheerful blooms, then propagating Sisyrinchium minus is a truly rewarding endeavor. It’s how I’ve shared these beauties with so many friends, and honestly, it’s quite satisfying to see a tiny propagule grow into a blooming plant you nurtured yourself. For beginners, I’d say this plant is moderately easy, which is always a good starting point. You’ll get the hang of it quickly, I promise.
The Best Time to Start
For Sisyrinchium minus, the absolute best time to get started is in the early spring, just as the plant is waking up from its winter slumber. You’ll see new growth emerge, and this is the prime time to either divide existing clumps or take cuttings. Transplanting divisions or established seedlings is also best done around this time, or in the fall after the heat of summer has passed.
Supplies You’ll Need
Gathering your tools beforehand makes the whole process so much smoother. Here’s what I typically have on hand:
- Sharp, clean pruning shears or a small trowel: For clean cuts and easing divisions.
- Well-draining potting mix: I like a blend of peat moss, perlite, and a bit of compost. For divisions, your garden soil might be perfectly adequate if it drains well.
- Small pots or trays: For starting new plants. Look for ones with drainage holes – they’re non-negotiable!
- Watering can with a fine rose sprinkler: Gentle watering is key, especially for young plants.
- Labels and a permanent marker: Trust me, you’ll thank yourself later!
- (Optional) Rooting hormone powder: While Sisyrinchium is pretty good at rooting on its own, a little nudge can speed things up.
Propagation Methods: Let’s Get Our Hands Dirty!
Sisyrinchium minus is most commonly propagated through division, but you can also have success with seeds if you’re patient.
Method 1: Division (My Go-To!)
This is my favorite method because it’s so effective and gives you mature plants that much faster.
- Identify a healthy, established clump. You’ll see a cluster of foliage.
- Gently dig around the clump with your trowel, loosening the soil.
- Carefully lift the entire clump out of the ground.
- Gently tease apart the root ball with your fingers or a small fork. You want to separate it into smaller sections, each with a good amount of roots and some leafy growth. I aim for sections about the size of a golf ball, but smaller is fine too.
- Replant the divisions immediately. Dig a hole in your garden or pot them up using your well-draining mix. Make sure the roots are covered and the crown of the plant is at soil level.
- Water thoroughly after planting.
Method 2: From Seed (For the Patient Gardener)
If you have plants already, let some go to seed in late spring.
- Allow the seed heads to mature and dry on the plant.
- Collect the dried seed heads and rub them gently to release the tiny black seeds.
- Sow the seeds in trays or pots filled with your seed-starting mix in the fall. They need a period of cold, moist stratification to germinate well. You can mimic this by leaving them outdoors in a sheltered spot.
- Keep the soil consistently moist but not waterlogged.
- Germination usually occurs in early spring. Once the seedlings have a few true leaves, you can carefully transplant them into individual pots.
The “Secret Sauce” (Pro Tips)
Here are a couple of things I’ve learned over the years that really make a difference:
- Don’t be afraid to be firm with divisions. Sometimes, you just need to give the root ball a good tug. If it’s being stubborn, a clean knife can help, but try to keep as much root attached as possible to each division.
- Keep newly divided or transplanted plants in a slightly shadier spot for the first week or two. This helps them adjust without getting stressed by harsh sun. Think of it as a recovery period.
- Bottom heat can be a game-changer for seed starting. If you’re starting seeds indoors and they seem slow to germinate, placing the seed tray on a heat mat designed for seedlings can really speed things up.
Aftercare & Troubleshooting
Once your divisions are planted or your seedlings have taken off, the care is pretty straightforward. Keep them evenly moist, especially during their first growing season. Avoid letting them dry out completely.
The most common issue you’ll run into is rot, which is usually caused by overwatering or poor drainage. If you see mushy stems or a plant that wilts despite being watered, it’s a sign you might need to adjust your watering schedule or check that the soil is draining well. If you catch rot early, you might be able to save a section by cutting away the affected parts and repotting in dry, fresh soil. But honestly, prevention is much easier!
Go Forth and Grow!
See? Not too daunting, is it? Propagating Sisyrinchium minus is a lovely way to expand your collection and share the joy of these resilient little plants. Be patient with yourself and with your new babies. Nature unfolds on its own timeline, and the satisfaction of watching a new plant thrive is truly unmatched. Happy gardening!
Resource:
https://identify.plantnet.org/k-world-flora/species/Sisyrinchium%20minus%20Engelm.%20&%20A.Gray/data