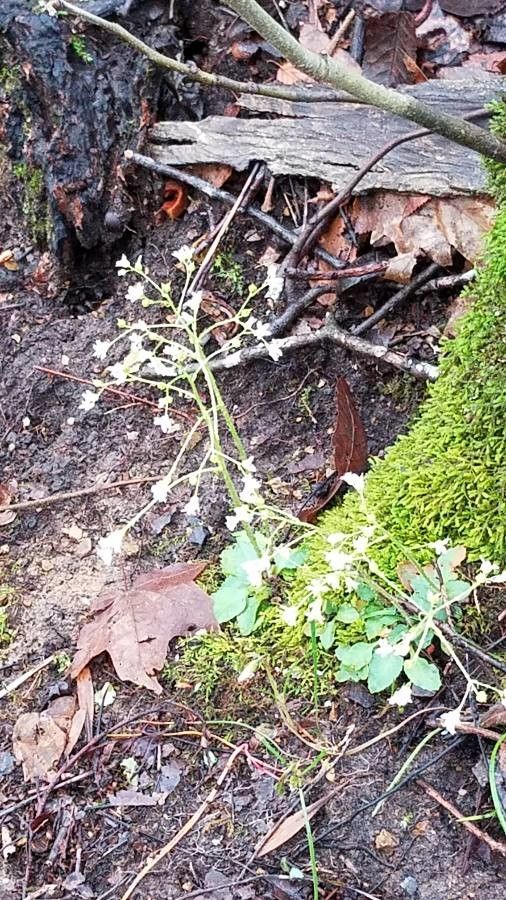
Hello, fellow plant lovers! If you’ve ever admired the delicate, airy charm of Micranthes micranthidifolia, also known as Brook Saxifrage, you’re in for a treat. There’s something incredibly satisfying about coaxing new life from an existing plant. It’s a little bit of magic, really. And the best part? Growing more of these beauties is surprisingly accessible, even for those of you who are just dipping your toes into the world of plant propagation.
The Best Time to Start
For Micranthes micranthidifolia, timing is key. I find the early spring, as soon as the plant starts showing vigorous new growth after winter, is your golden window. You can also have success with late summer, after the main flowering flush has finished, but spring usually gives you the best results with the least fuss. Look for healthy, non-flowering shoots to get started.
Supplies You’ll Need
You don’t need a fancy lab for this! Gather these essentials:
- A clean, sharp pruning shear or sharp knife
- Rooting hormone (optional, but it can give a little boost)
- A well-draining potting mix. I like a blend of peat moss, perlite, and a little bit of sterile compost. A standard succulent mix can also work wonders.
- Small pots or seedling trays with drainage holes
- A clear plastic bag or a propagation dome to create a humid environment
- A spray bottle filled with clean water
Propagation Methods
Micranthes micranthidifolia is wonderfully amenable to a few different methods. My favorite is by division, but stem cuttings work beautifully too!
Division: My Go-To Method
This is the easiest route for Brook Saxifrage.
- Gently dig up the parent plant. Do this when it’s actively growing, ideally in spring.
- Carefully tease apart the root ball. You’re looking to separate clumps that have their own root system and at least one or two leafy shoots. Don’t be afraid to be firm but gentle; sometimes you have to coax them apart.
- Trim away any damaged roots. Use your clean shears to snip off anything that looks mushy or broken.
- Pot up the divisions. Plant each division into its own small pot filled with your well-draining mix. Make sure the crown (where the leaves emerge from the roots) isn’t buried too deeply.
- Water thoroughly. Give them a good soak to settle the soil.
Stem Cuttings: For a Little Extra Effort
If you want to try cuttings, follow these steps:
- Take cuttings in spring or early summer. Look for healthy, non-flowering shoots that are about 3-4 inches long.
- Make a clean cut. Just below a leaf node (where a leaf attaches to the stem) is ideal.
- Remove the lower leaves. Leave just a couple of leaves at the top to reduce water loss.
- Dip the cut end in rooting hormone (optional). This helps encourage root development.
- Insert cuttings into pots. Gently push the cut end into pots filled with your moist potting mix. Space them out so they aren’t touching.
- Create a humid environment. Cover the pots with a clear plastic bag, making sure the leaves don’t touch the plastic. A propagation dome also works perfectly.
The “Secret Sauce” (Pro Tips)
Here are a couple of things I’ve learned over the years that make a difference:
- Don’t let the leaves touch the water in a humidity dome. If you’re using my plastic bag trick for cuttings, ensure there’s some air circulation. You can prop up the bag with a few small sticks. This prevents fungal issues.
- Bottom heat is your friend for cuttings. If you’re serious about cuttings, a heat mat placed under the pots can significantly speed up root formation. It mimics the warmth of spring soil.
Aftercare & Troubleshooting
Once your divisions are potted up or your cuttings have hopefully started to root (you’ll see new growth or feel resistance when gently tugging), it’s time for careful aftercare.
- Keep them consistently moist, but not waterlogged. Water when the top inch of soil feels dry.
- Provide bright, indirect light. Avoid direct, harsh sun, which can scorch delicate new growth.
- Slowly acclimate them. Once they look well-established, gradually remove the plastic bag or open the propagation dome over a week or so to help them adjust to normal humidity levels.
The most common issue you’ll face is rot, often due to overwatering or poor drainage. If you see mushy stems or leaves turning yellow and collapsing, it’s usually a sign that things are too wet. Pull the affected plant out, trim away any rotted parts, and let it dry out a bit before repotting in fresh, dry mix. Patience is your best tool here.
Your Green Thumb Awaits!
Propagating Micranthes micranthidifolia is a wonderfully rewarding process. Don’t be discouraged if your first attempt isn’t perfect. Every gardener learns through trial and error. Enjoy the journey of nurturing these delicate beauties, and soon you’ll have a whole garden full of them! Happy growing!
Resource: