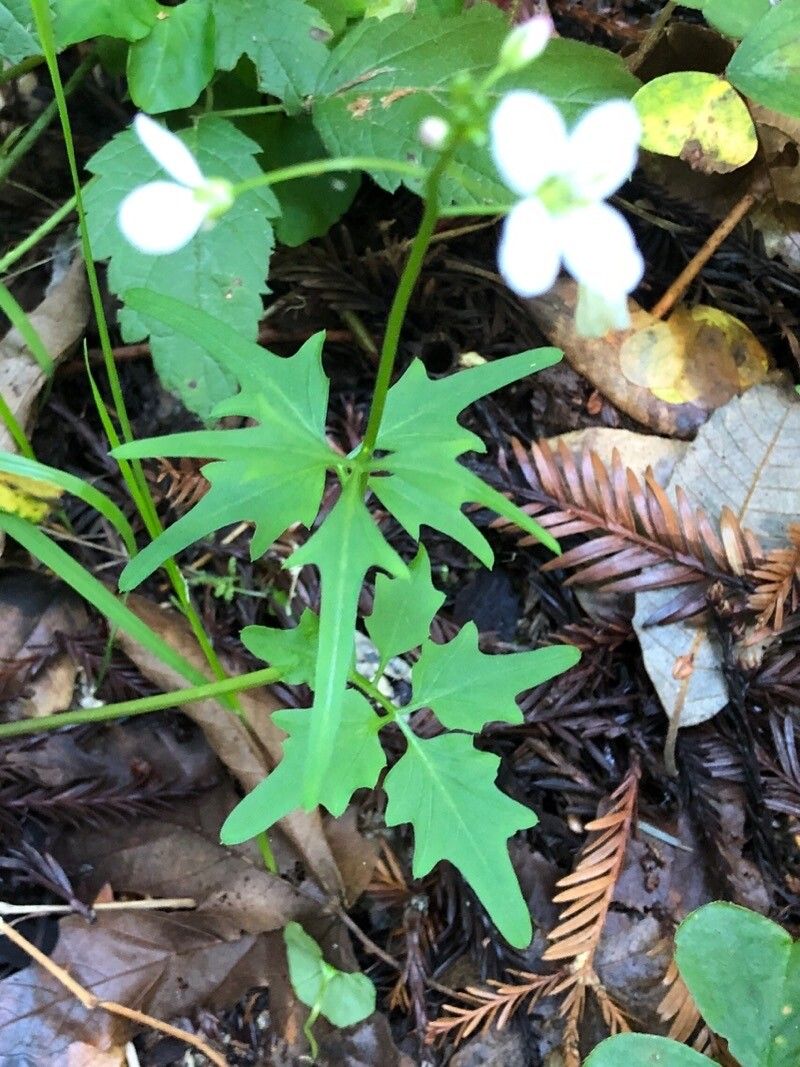
Hey there, fellow plant lovers! It’s so good to have you here. Today, we’re going to chat about a charming little native wildflower that I absolutely adore: Cardamine californica, or California Toothwort. You might know it for its delicate, almost bell-shaped white or pale lavender flowers that pop up in spring, often blooming alongside pretty woodland ferns. It’s a fantastic addition to any shady, dappled garden spot, and honestly, propagating it yourself is one of the most satisfying gardening adventures you can embark on.
For beginners, I’d say Cardamine californica is a good starting point. With a few little tricks, you’ll find it quite cooperative. It’s definitely not a plant that will leave you tearing your hair out!
The Best Time to Start
The sweet spot for propagating Cardamine californica is generally late spring to early summer, right after the plant has finished its main flowering push. You’re looking for actively growing stems that aren’t yet starting to get woody or super stressed from the summer heat. This is when the plant has plenty of stored energy to put into creating new roots.
Supplies You’ll Need
To get started, gather these essentials:
- Sharp, clean pruning shears or snips: Essential for making clean cuts.
- Small pots or seed trays: Anything that can hold your potting mix and cuttings.
- Propagation mix or a well-draining potting soil: I like a blend of equal parts peat moss or coco coir, perlite, and a bit of compost.
- Rooting hormone (optional but helpful): A powder or gel can give your cuttings a nice boost.
- Watering can with a fine rose head: For gentle watering.
- Clear plastic bags or a propagation dome: To create a humid environment.
- A sunny (but not scorching) spot or a grow light: For gentle light.
Propagation Methods
I’ve had the most success with two main methods for Cardamine californica: stem cuttings and division.
Stem Cuttings
This is my go-to for reliably creating more of this beauty.
- Take your cuttings: Look for healthy, non-flowering stems. Using your clean snips, cut a stem about 3-4 inches long. Make a cut just below a leaf node (where a leaf attaches to the stem).
- Prepare the cuttings: Gently remove the bottom couple of leaves from your cutting. You want to expose the nodes, as this is where roots typically emerge. If your cutting has a lot of leaves, you can trim larger leaves in half to reduce water loss through transpiration.
- Apply rooting hormone (if using): Dip the cut end of the stem into your rooting hormone, tapping off any excess.
- Plant the cuttings: Fill your small pots or trays with your propagation mix. Moisten the mix thoroughly. Now, make a hole with your finger or a pencil and insert the cut end of your stem. Gently firm the soil around it. You can fit several cuttings into one pot, giving them a little space.
- Create humidity: Water gently. Then, cover the pot loosely with a clear plastic bag, creating a mini-greenhouse. Make sure the leaves don’t touch the plastic bag if possible; you can use stakes to prop it up. Alternatively, use a propagation dome.
Division
This method is best done in the early spring or fall when the plant is dormant or just waking up.
- Gently excavate: Carefully dig around the base of your established Cardamine californica plant. You want to expose the root ball without causing too much damage.
- Separate the divisions: Using your hands or a clean trowel, gently pull or cut apart divisions. Each division should have several healthy shoots and a good amount of root attached.
- Replant immediately: Dig a hole in your prepared garden bed or a new pot, large enough to accommodate the division’s root system. Plant the division at the same depth it was growing previously. Water thoroughly.
The “Secret Sauce” (Pro Tips)
Here are a few things I’ve learned over the years that really make a difference:
- Bottom heat is your friend: For stem cuttings, placing your pots on a seedling heat mat can significantly speed up root formation. It mimics the warmth of spring soil and encourages those roots to get going.
- Don’t overwater, but keep it consistently moist: This is a tricky balance! The soil for cuttings should be moist but not soggy. Overwatering is the quickest way to invite rot. Check the moisture levels regularly by gently poking your finger into the soil. If the top inch feels dry, it’s time for a gentle watering.
- Patience with the potting mix: When you’re using a very fine potting mix for cuttings, I sometimes water from the bottom by placing the pots in a tray of water for about 20-30 minutes. This allows the soil to absorb moisture without disturbing the delicate cuttings or washing away rooting hormone. Then, I lift them out to drain.
Aftercare & Troubleshooting
Once you see new leaf growth appearing on your cuttings, that’s usually a good sign that roots have formed. This means you can start to gradually acclimate them to more normal humidity levels. You can do this by opening the plastic bag a little more each day over a week or so.
If you notice leaves yellowing and wilting, it could be a sign of underwatering, too much direct sun, or that the cutting hasn’t taken. If you see mushy, black stems or leaves, that’s almost always a sign of rot due to overwatering and lack of ventilation. In this case, unfortunately, that cutting is likely lost, but don’t get discouraged! Remove it and adjust your watering and humidity.
For divisions, consistent watering is key as they establish. You might see a little wilting as they adjust, but this should resolve within a week or two.
A Little Bit of Patience Goes a Long Way
Watching a new plant emerge from a tiny cutting or a division is truly a little piece of garden magic. Remember, propagation is a process, and not every attempt will be a roaring success, but that’s part of the learning curve. Keep experimenting, keep observing, and most importantly, enjoy the journey of growing your own little patch of Cardamine californica. Happy gardening!
Resource:
https://identify.plantnet.org/k-world-flora/species/Cardamine%20californica%20(Nutt.)%20Greene/data