Hello my fellow plant enthusiasts! Today, we’re diving into the wonderful world of propagating Reaumuria vermiculata. If you’ve admired its delicate, coral-like appearance and wondered how to create more of this beauty, you’re in the right place. There’s something incredibly special about nurturing a new plant from a tiny piece of an existing one. It’s a connection to nature that’s truly grounding.
The Appeal of Reaumuria vermiculata
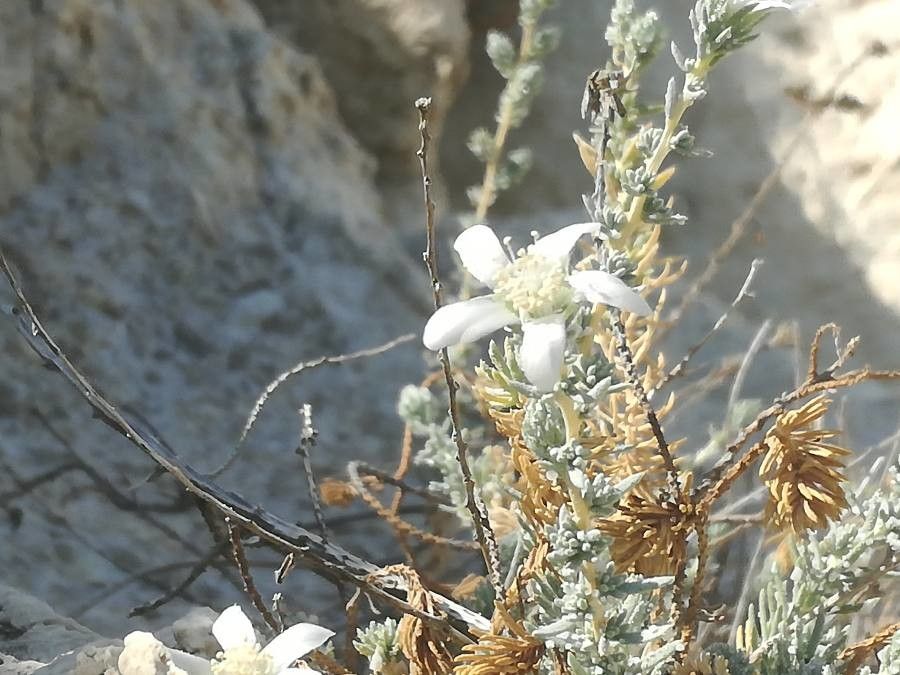
Reaumuria vermiculata, often called coral plant (though it’s not a true coral, of course!), is a charming succulent that brings a unique textural element to any collection. Its tiny, bead-like leaves create a soft, rounded shape that’s utterly delightful. Seeing these small structures develop into a full plant is a joy, and happily, propagating it is quite manageable. For beginners, it’s a great plant to get your propagation feet wet with!
The Best Time to Start
When is the magic window for propagating Reaumuria vermiculata? For the best success, I always aim for late spring or early summer. This is when the plant is actively growing and has plenty of energy to put into developing new roots. Waiting until the plant is mature and has produced new, healthy growth is key.
Supplies You’ll Need
Gathering your tools beforehand makes the process so much smoother. Here’s what I usually have on hand:
- Sharp Pruning Shears or a Clean Knife: For making clean cuts.
- Rooting Hormone (Optional but Recommended): A powder or gel to encourage root development.
- Well-Draining Potting Mix: I like a blend of succulent or cactus mix, with a bit of perlite or pumice added for extra aeration. For Reaumuria, I often cut my succulent mix with even more perlite.
- Small Pots or Propagation Trays: Clean pots are essential to prevent disease.
- Small Shovel or Spoon: For filling pots with soil.
- Watering Can or Spray Bottle: For gentle watering.
- Labels: To keep track of what’s what, especially if you’re propagating multiple things!
Propagation Methods
Let’s get our hands dirty! Reaumuria vermiculata is fairly forgiving, and I find stem cuttings to be the most reliable method.
1. Stem Cuttings
- Select a Healthy Stem: Look for a piece of stem that’s at least 2-3 inches long and shows good, firm growth. Avoid any that are soft or discolored.
- Make the Cut: Using your sharp pruning shears or knife, make a clean cut just above a point where leaves emerge. This is called a node.
- Let it Callus: This is a super important step for succulents! Gently remove a few of the lower leaves from the cutting. Then, let the cutting air dry in a well-ventilated spot for 2-3 days. You’ll see the cut end start to form a dry, protective callus. This prevents rot.
- Apply Rooting Hormone (Optional): Once callused, dip the cut end into your rooting hormone powder or gel. Tap off any excess.
- Plant the Cutting: Fill your small pot or tray with your prepared well-draining soil mix. Make a small hole in the center with your finger or a pencil. Insert the callused end of the cutting into the hole, about an inch deep. Gently firm the soil around it.
- Water Lightly: Give the soil a very light watering. You want it to be slightly moist, not waterlogged. A spray bottle is great for this delicate stage.
- Provide Bright, Indirect Light: Place your pot in a location that receives plenty of bright, indirect sunlight. Avoid direct sun, which can scorch the tender cutting.
2. Water Propagation (Use with Caution!)
While stem cuttings in soil are my go-to, some people have success with water propagation. The key here is minimal contact with water:
- Prepare the Cutting: Follow steps 1-3 from the stem cutting method.
- Place in Water: Find a clean container and fill it with fresh water. Suspend the cutting so that only the very bottom, callused end touches the water. You don’t want any leaves submerged. You can use toothpicks to help suspend it if needed.
- Change Water Regularly: Change the water every few days to keep it fresh and prevent bacterial growth.
- Wait for Roots: You should start to see tiny roots forming in a few weeks. Once the roots are about an inch long, it’s time to plant them in soil. Be very gentle when transplanting, as water roots are delicate.
The “Secret Sauce” (Pro Tips)
Here are a couple of things I’ve learned over the years that can really boost your success:
- Bottom Heat is Your Friend: If you have a heating mat designed for seedlings, placing your pots on it can significantly speed up root formation. The gentle warmth mimics summer soil temperatures and encourages those roots to sprout.
- Don’t Overwater, Seriously! This is the biggest killer of succulent cuttings. They store water in their leaves, so they don’t need much moisture while rooting. I usually wait until the soil is nearly dry before giving another light watering. Feeling the soil with your finger is the best way to judge.
- Humidity, but Not Too Much: While a bit of humidity can help callused cuttings get started, too much can lead to rot. If you’re in a very humid climate, consider skipping the humidity dome and just ensure good air circulation.
Aftercare & Troubleshooting
Once your cuttings have developed a good root system – you’ll see new growth emerging from the top, and the cutting will feel firm when gently tugged – it’s time to treat them like a mini version of your adult plant.
Continue to water sparingly, allowing the soil to dry out between waterings. Gradually introduce them to more direct sunlight as they mature.
The most common issue you might encounter is rot. If you notice your cutting turning mushy, dark, or smelling off, it’s likely rot. This is usually due to overwatering or insufficient callusing. Unfortunately, if rot sets in, it’s very difficult to save the cutting. You might be able to salvage a healthy tip if caught early enough, but it’s often best to start fresh. Yellowing leaves can sometimes indicate too much light or inconsistent watering.
Happy Propagating!
Growing new plants is such a rewarding journey. Be patient with your Reaumuria vermiculata cuttings. Some will take off faster than others, and that’s perfectly natural. Don’t get discouraged if you have a few that don’t make it – we all do! Each attempt is a learning experience. Enjoy the process of nurturing these tiny beginnings into future beauties for your home. Happy gardening!
Resource:
https://identify.plantnet.org/k-world-flora/species/Reaumuria%20vermiculata%20L./data