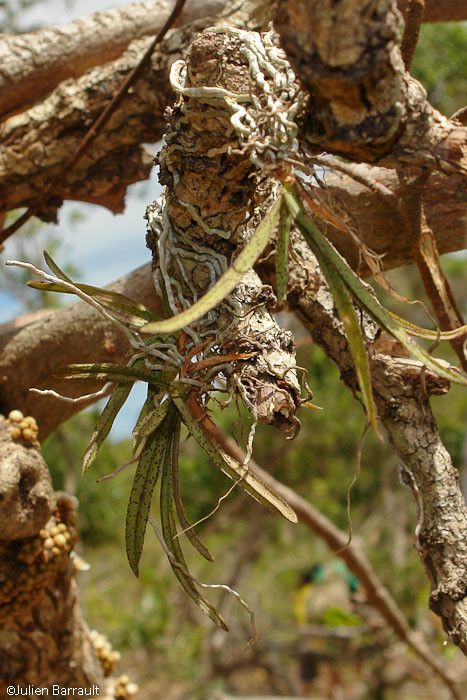
Hello there, fellow plant enthusiasts! Today, we’re diving into the delightful world of Sarcochilus hillii. If you’re drawn to miniature orchids with their charming, dainty blooms, you’re in for a treat. This little gem is a joy to have in the collection, gracing us with its presence for months. And the best part? Propagating them is a wonderfully rewarding endeavor. Now, I wouldn’t say Sarcochilus hillii is the absolute easiest plant for a complete beginner to propagate, but with a little patience and a few key pointers, you’ll be well on your way to success.
The Best Time to Start
Timing is everything when it comes to giving your new plant babies the best chance. For Sarcochilus hillii, the sweet spot is during their active growing season. This usually falls in the spring and early summer. You’ll want to work with a healthy, robust plant that’s showing new growth, perhaps a new leaf or a developing root. This means the plant has plenty of energy reserves to dedicate to those precious new propagations.
Supplies You’ll Need
Gathering your tools beforehand makes the whole process smoother. Here’s what I like to have on hand:
- Sharp, sterile pruning shears or a clean knife: Crucial for making clean cuts and preventing disease.
- Potting medium: A well-draining orchid mix is essential. I often use a blend of bark, perlite, and a touch of sphagnum moss. Some growers also have success with long-fibered sphagnum moss alone.
- Small pots or trays: Whatever suits the size of your cuttings. Tiny pots or even seedling trays work well.
- Rooting hormone (optional but recommended): A powder or gel can give your cuttings a helpful boost.
- Watering can with a fine rose: For gentle watering.
- Labels and a permanent marker: You’ll thank yourself later for remembering what you did and when!
Propagation Methods
Let’s get our hands dirty and talk about how to make more of these beauties!
Division: The Most Reliable Way
This is often the easiest and most successful method for Sarcochilus hillii. When your plant has grown into a clump with multiple equally vigorous growths, it’s time to divide.
- Gently remove the plant from its pot. If it’s tightly rooted, you might need to carefully work around the edges with a knife.
- Carefully tease apart the root ball. You’re aiming to separate the plant into sections, each with at least two healthy growths and a good root system. Don’t be afraid to gently wash away some of the old potting medium to see the roots better.
- Inspect the roots. Remove any dead or mushy ones with your sterile shears.
- Pot up each division individually. Use your prepared orchid mix and place the divisions in their new pots, ensuring the base of the plant is at the surface of the medium.
- Water lightly. Don’t drench them immediately, just settle the mix around the roots.
Stem Cuttings (Keikis)
Sometimes, Sarcochilus hillii will produce a “keiki” – a baby plant that grows on a stem. These are essentially miniature versions of the mother plant and a fantastic way to propagate.
- Identify a keiki. Look for a small plant with its own leaves and ideally, developing roots.
- Locate the connecting stem. Ensure the keiki is well-established.
- Carefully cut the stem. Using your sterile shears, make a clean cut just above and below the keiki, ensuring you get a bit of the stem attached to the keiki.
- Pot up the keiki. Plant it in a small pot with your orchid mix, just as you would a division. Make sure the base of the keiki is at the surface.
The “Secret Sauce” (Pro Tips)
Here are a few tricks I’ve learned over the years that can really make a difference:
- Don’t rush the separation: When dividing or removing keikis, give them a chance to develop some robust roots before you take them. This significantly increases their chance of survival. You’ll often see the baby roots are a good inch or two long before I even think about separating.
- The magic of bottom heat: If you can, place your potted divisions or keikis on a heated propagation mat. This gentle warmth encourages root development like nothing else. Just be sure it’s not too hot – think warm bathwater, not scorching.
- Humidity is your friend: New propagations have a hard time taking up water until their roots are well-established. Keeping the humidity high around them helps prevent dehydration. A small terrarium, a clear plastic bag tented over the pot (ensure good airflow!), or a humidity tray can work wonders.
Aftercare & Troubleshooting
Once your new Sarcochilus hillii propagations are potted up, they need a little extra TLC.
- Watering: Water thoroughly, but allow the potting medium to dry out slightly between waterings. Overwatering is a common culprit for failure, leading to root rot. You’ll see plump, firm leaves when they’re happy.
- Light: Provide bright, indirect light. Too much direct sun can scorch their delicate leaves.
- Patience! This is perhaps the most critical part of aftercare. It can take weeks, even months, for new roots to become firmly established. Don’t panic if you don’t see rapid growth immediately.
Common Signs of Trouble:
- Yellowing or mushy leaves: This is often a sign of overwatering and root rot. Check the roots – if they are brown and soft, you’ve got a problem. You may need to repot and remove any rotted roots.
- Shriveled leaves: This usually indicates underwatering or a lack of root establishment. Ensure the humidity is adequate and check if the roots are forming.
A Little Bit Longer, A Lot More Joy
Propagating Sarcochilus hillii is truly a joy. It’s a tangible way to connect with your plants and expand your collection, all while honing your orchid-growing skills. There will absolutely be times when things don’t quite work out, and that’s part of the learning curve. But the satisfaction of seeing a new, healthy plant thrive from your efforts? Priceless. Be patient, be observant, and most importantly, enjoy the beautiful journey of watching new life emerge. Happy growing!
Resource: