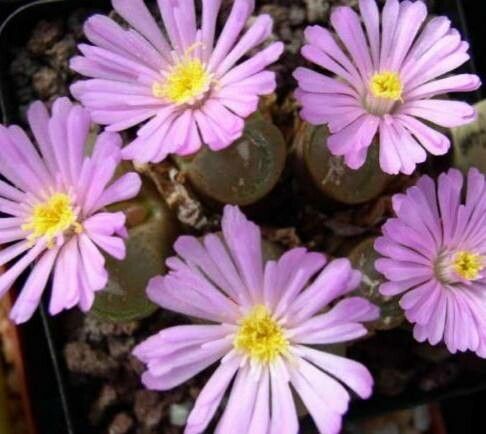
Oh, hello there! Come on in, grab a cuppa. Today, we’re diving into the wonderful world of Conophytum longum, a truly captivating succulent that’ll make your windowsill sing. These little guys are like miniature living sculptures, and if you’ve ever looked at a clump and thought, “I’d love more of those!”, you’re in the right place. Propagating them is incredibly rewarding, seeing those tiny new plants emerge feels like a little miracle. Now, I’ll be honest, Conophytum can be a touch more delicate than your average succulent, so it’s perhaps not the absolute first plant I’d recommend to a brand-new beginner, but with a little patience and a few key pointers, you absolutely can succeed!
The Best Time to Start
For Conophytum longum, the ideal time to get your propagation party started is right at the beginning of their active growing season. For most of us, this means late spring or early summer. You’re looking for those moments when the plants are plump, actively growing, and showing signs of new life. Avoid doing this during their dormancy, which is usually in the heat of summer or the depths of winter.
Supplies You’ll Need
Gathering your tools is half the fun, isn’t it? Here’s what you’ll want to have on hand:
- Well-draining potting mix: I’m talking gritty! A mix of pumice, perlite, and a small amount of coco coir or fine gravel works wonders. Avoid regular potting soil – it’s too water-retentive for these thirsty little souls.
- Sharp, clean pruning shears or a sharp knife: We want clean cuts to minimize damage and the risk of infection.
- Rooting hormone (optional but helpful): A gentle rooting hormone can give your cuttings a boost.
- Small pots or seed trays: Clean ones are a must!
- Soft brush or paintbrush: For gently dusting off any excess soil or debris.
- Watering can with a fine rose: For delicate watering.
- A light, bright spot: Think indirect sunlight, not scorching sun.
Propagation Methods
Conophytum longum is easiest to propagate through division. They naturally form clusters over time, and separating these is like giving them a little haircut and creating new plants in the process.
- Gently remove the parent plant from its pot. I usually wait until the soil is nearly dry, making it easier to shake most of it off.
- Carefully tease apart the clump. You’re looking for natural divisions – where a new body has formed a connection to the parent. Use your fingers or a dull tool to slowly and gently separate the new growth. If a connection is stubborn, a clean knife can help, but try to minimize tearing. You want each division to have a good root base, if possible.
- Inspect the divisions. Remove any dead or dried-out plant material. If a division has no roots, don’t fret too much; they are remarkably good at growing new ones.
- Let the divisions callous. This is crucial! Place the separated divisions on a paper towel in a dry, shaded spot for 2-3 days. This allows any cut surfaces to dry and form a protective “scab,” reducing the risk of rot when you plant them.
- “Plant” your divisions. Fill your clean pots or trays with your gritty soil mix. Nestle the calloused divisions into the soil, making sure the base where roots emerge is in contact with the soil. You don’t need to bury them deeply; just firm the soil around them.
- Water sparingly. After planting, I wait a day or two before giving them a very light watering. The goal is to moisten the soil, not to soak it.
The “Secret Sauce” (Pro Tips)
Here are a couple of things I’ve learned over the years that make a real difference:
- Don’t rush the watering after division. This might feel counterintuitive, but those fresh cuts need time to heal. Waiting a few days before that first light watering is a game-changer for preventing rot.
- Bottom heat can be your best friend. If your space is a bit on the cool side, placing your pots on a gentle seedling heat mat can encourage root development significantly. Just a low, consistent warmth makes them happy.
- Observe, don’t obsess. Check on your divisions daily, but resist the urge to dig them up to see if they’ve rooted. Patience is key here. You’ll see signs of growth when they’re ready.
Aftercare & Troubleshooting
Once your divisions have settled in and you start seeing signs of new growth (often a slight puffing up of the body or the emergence of new leaves), you can gradually increase watering. Water thoroughly when the soil is completely dry, then let it dry out again.
The most common problem you’ll encounter is rot. This usually happens if the soil stays too wet, or if you didn’t let the cuttings callous properly. Signs of rot include a mushy texture, discoloration (often dark brown or black), and an unpleasant odor. If you spot rot, act quickly! Remove the affected part with a clean knife and let the healthy portion callous again before attempting to replant. If the whole thing is mushy, sadly, it’s time to say goodbye.
A Encouraging Closing
Propagating Conophytum longum is a beautiful way to expand your collection and share these unique plants with others. It requires a bit more attention to detail than some, but the joy of seeing those little beauties thrive makes it all worthwhile. Be patient, trust the process, and enjoy the journey of growing your own Conophytum family! Happy gardening!
Resource:
https://identify.plantnet.org/k-world-flora/species/Conophytum%20longum%20N.E.Br./data