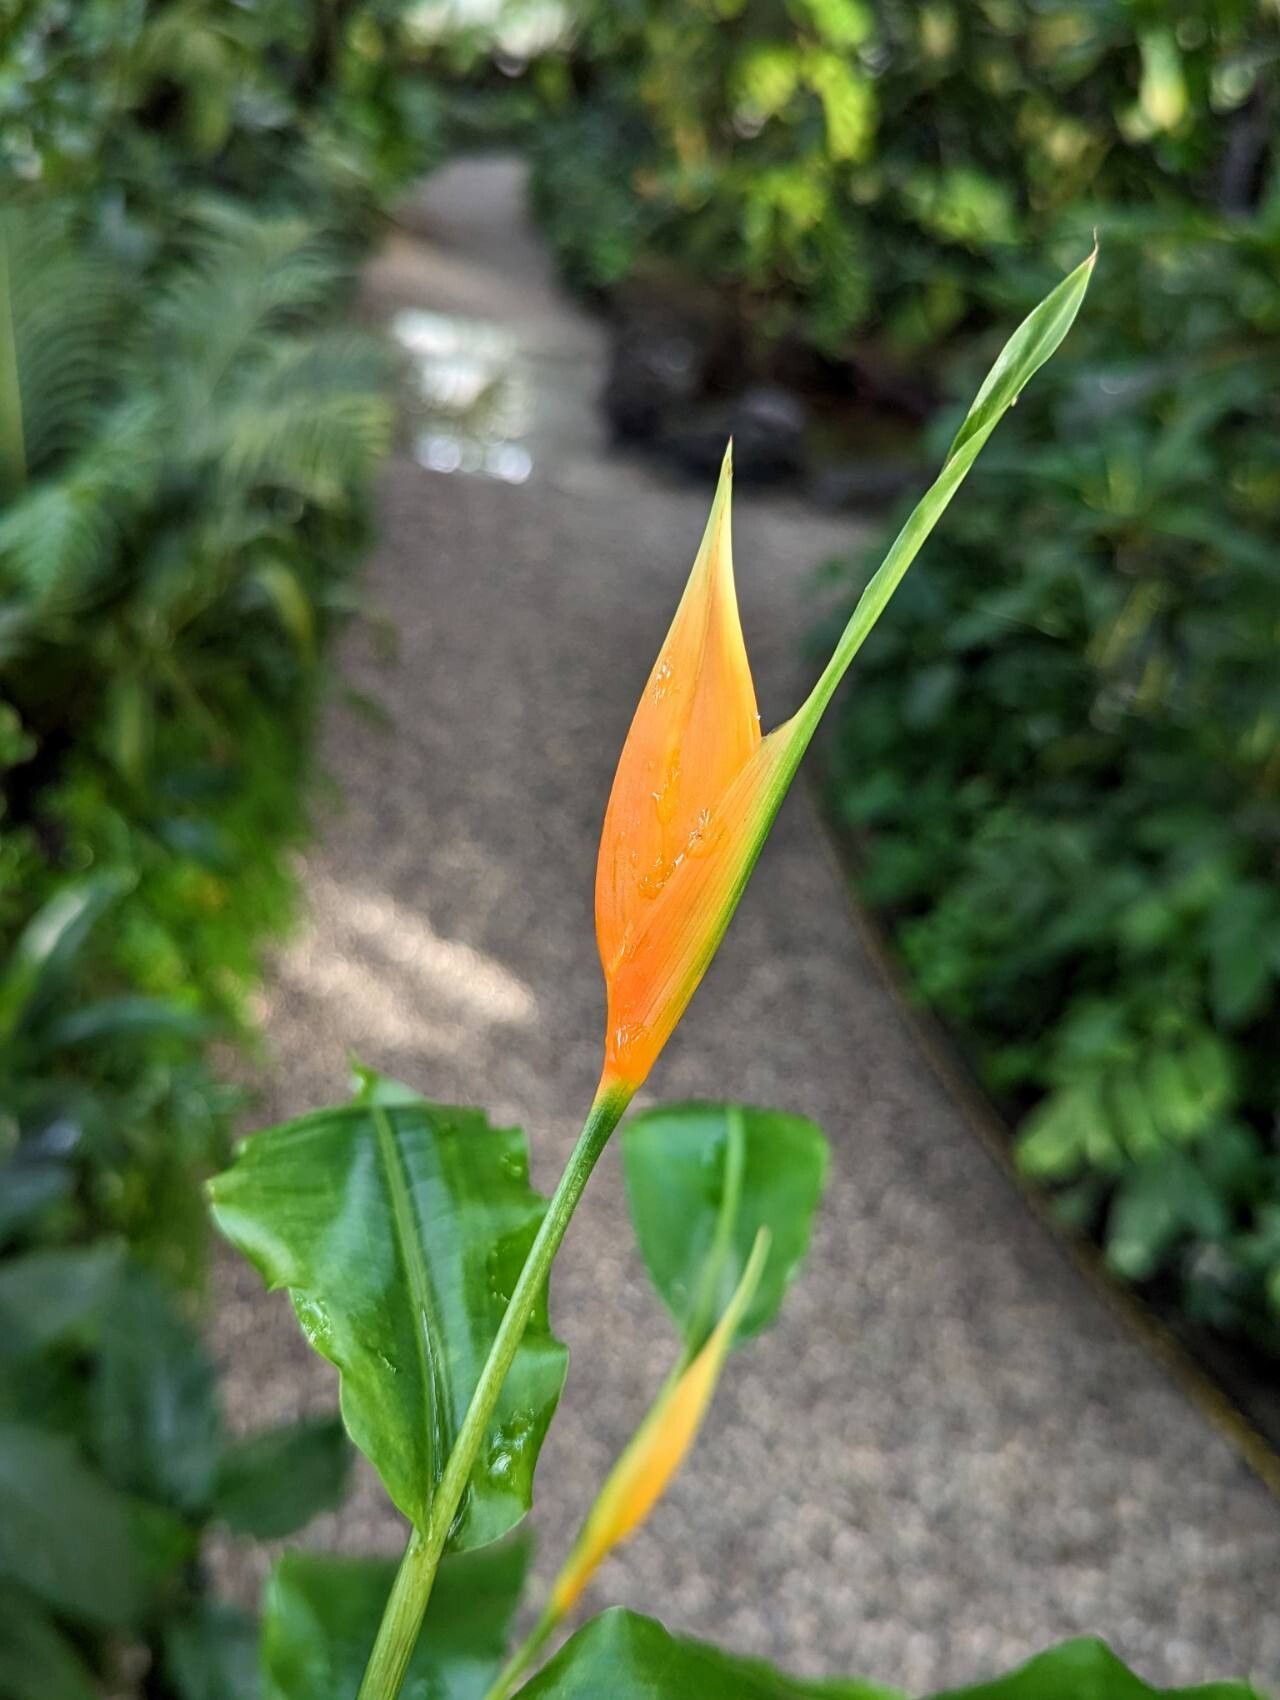
Oh, Heliconia aurantiaca! That fiery splash of orange never fails to bring a smile to my face. It’s like a little piece of the tropics right in your backyard, isn’t it? Those gorgeous, arching flower bracts are just stunning. And guess what? Bringing more of these beauties into your life is surprisingly achievable! Propagating your own Heliconias is a deeply satisfying way to expand your collection, and honestly, it’s not as daunting as you might think. While some tropical plants can be a bit fussy, Heliconia aurantiaca is quite forgiving, making it a lovely project for even those newer to the gardening world.
When to Get Your Hands Dirty: The Best Time to Start
The absolute sweet spot for propagating Heliconia aurantiaca is late spring to early summer. This is when the plant is in its most vigorous growth phase, usually after the initial flush of flowering. You’ll see new shoots emerging from the base, and that’s exactly what we’re after. Starting when the plant is actively growing means your cuttings or divisions have the best chance to establish themselves quickly.
Your Propagation Toolkit
Before we dive in, let’s gather our supplies. Having everything ready will make the process much smoother:
- Sharp Pruning Shears or a Clean Knife: Sterilized, of course!
- Potting Mix: A well-draining blend is key. I like a mix of equal parts peat moss or coco coir, perlite, and compost. Some growers also swear by a bark-based orchid mix.
- Small Pots or Propagation Trays: Clean, with good drainage holes.
- Rooting Hormone (Optional but Recommended): A powder or gel form will give your cuttings a nice boost.
- Plastic Bags or a Propagation Dome: To create a humid environment.
- Water: For rinsing and, if you choose, water propagation.
- Labels and a Marker: So you remember what’s what!
- Gloves: Tropical plants can sometimes have sap that irritates skin.
Bringing New Life: Propagation Methods
Heliconia aurantiaca is most commonly propagated through division or stem cuttings. Both methods work beautifully.
Method 1: Division – The Gardeners’ Favorite
This is probably the easiest and most foolproof method for Heliconia aurantiaca. It’s like giving your plant a little haircut and getting freebies in return!
- Gently Excavate: Carefully dig around the base of your mature Heliconia plant, or at least expose the roots enough to see the rhizomes (those thick, underground stems).
- Identify the Divisions: Look for sections of the rhizome that have their own healthy shoots or at least a good bud. You want to find a natural separation point.
- Make the Cut: Using your sterilized pruning shears or knife, make a clean cut to separate a portion of the rhizome with at least one healthy shoot and some attached root system. It’s better to have too many roots than too few.
- Pot Them Up: Fill your small pots with your well-draining potting mix. Plant each division so the top of the rhizome is just at or slightly below the soil surface, with the shoot pointing upwards.
- Water and Cover: Water gently to settle the soil. Then, cover the pots loosely with a plastic bag or place them under a propagation dome. This will help maintain humidity.
Method 2: Stem Cuttings – For the Patient Gardener
This method takes a little longer but can be very rewarding.
- Select Your Cuttings: From a healthy, vigorous plant, choose a stem that is actively growing but not flowering. Look for a stem that is at least 6-8 inches long and has at least two healthy nodes (where leaves emerge).
- Make the Cut: Using your sharp shears, make a clean cut just below a node. Remove any lower leaves, making sure at least one node is left bare.
- Apply Rooting Hormone (Optional): Dip the cut end into your rooting hormone powder or gel, tapping off any excess.
- Plant the Cuttings: Fill your pots with your rooting mix. Make a small hole with your finger or a pencil and insert the cut end of the stem, ensuring the bare node is buried in the soil.
- Water and Cover: Water gently. Again, cover the pots with a plastic bag or dome to keep humidity high.
The “Secret Sauce”: Insider Tips from My Garden
Over the years, I’ve learned a few tricks that seem to make all the difference.
- The Power of Bottom Heat: I cannot stress this enough! If you can, place your pots on a heat mat. Heliconias are tropical plants, and they love warmth in their roots. This encourages fast and strong root development, especially for stem cuttings. It’s a game-changer!
- Don’t Drench; Keep it Damp: While you want humidity, you don’t want waterlogged soil. It’s far better to have soil that’s consistently damp rather than soaking wet. Excess moisture is the quickest way to invite rot, which is the nemesis of new propagations. Check the soil moisture by gently pressing your finger in; if it feels dry, spritz a little water or mist the inside of the plastic cover.
- Let Them Breathe (Eventually): While humidity is crucial initially, once you see new growth on your cuttings or divisions, it’s time to start gradually introducing them to less humid conditions. Start by opening the plastic bag a little each day for an hour or two, slowly increasing the time. This helps them acclimate and prevents shock.
Nurturing Your New Sprouts: Aftercare & Troubleshooting
Once your Heliconia shows signs of life – new shoots appearing from the soil or tiny roots peeking out of drainage holes – you’re on the right track!
Continue to keep them in their humid environment but remember to gradually reduce the cover as mentioned above. I like to keep them in bright, indirect light. Avoid direct sun, especially in the hottest part of the day, as it can scorch delicate new leaves.
What if things go wrong? The most common culprit is rot. If your cutting turns mushy and black, or if your division looks limp and discolored despite being watered, it’s likely rot setting in due to too much moisture. If you catch it early, you might be able to salvage a healthy part of the rhizome or cutting and start again, ensuring better drainage and less water. Sometimes, cuttings just fail to root. Don’t get discouraged! It happens to the best of us. It might be the time of year, the health of the parent plant, or just one of those gardening mysteries.
Go Forth and Grow!
Propagating Heliconia aurantiaca is a wonderful journey into the heart of plant growth. Be patient, observe your new babies, and enjoy the process of watching them develop. Every successful new plant is a testament to your care and a beautiful addition to your garden. Happy growing!
Resource:
https://identify.plantnet.org/k-world-flora/species/Heliconia%20aurantiaca%20Verschaff./data