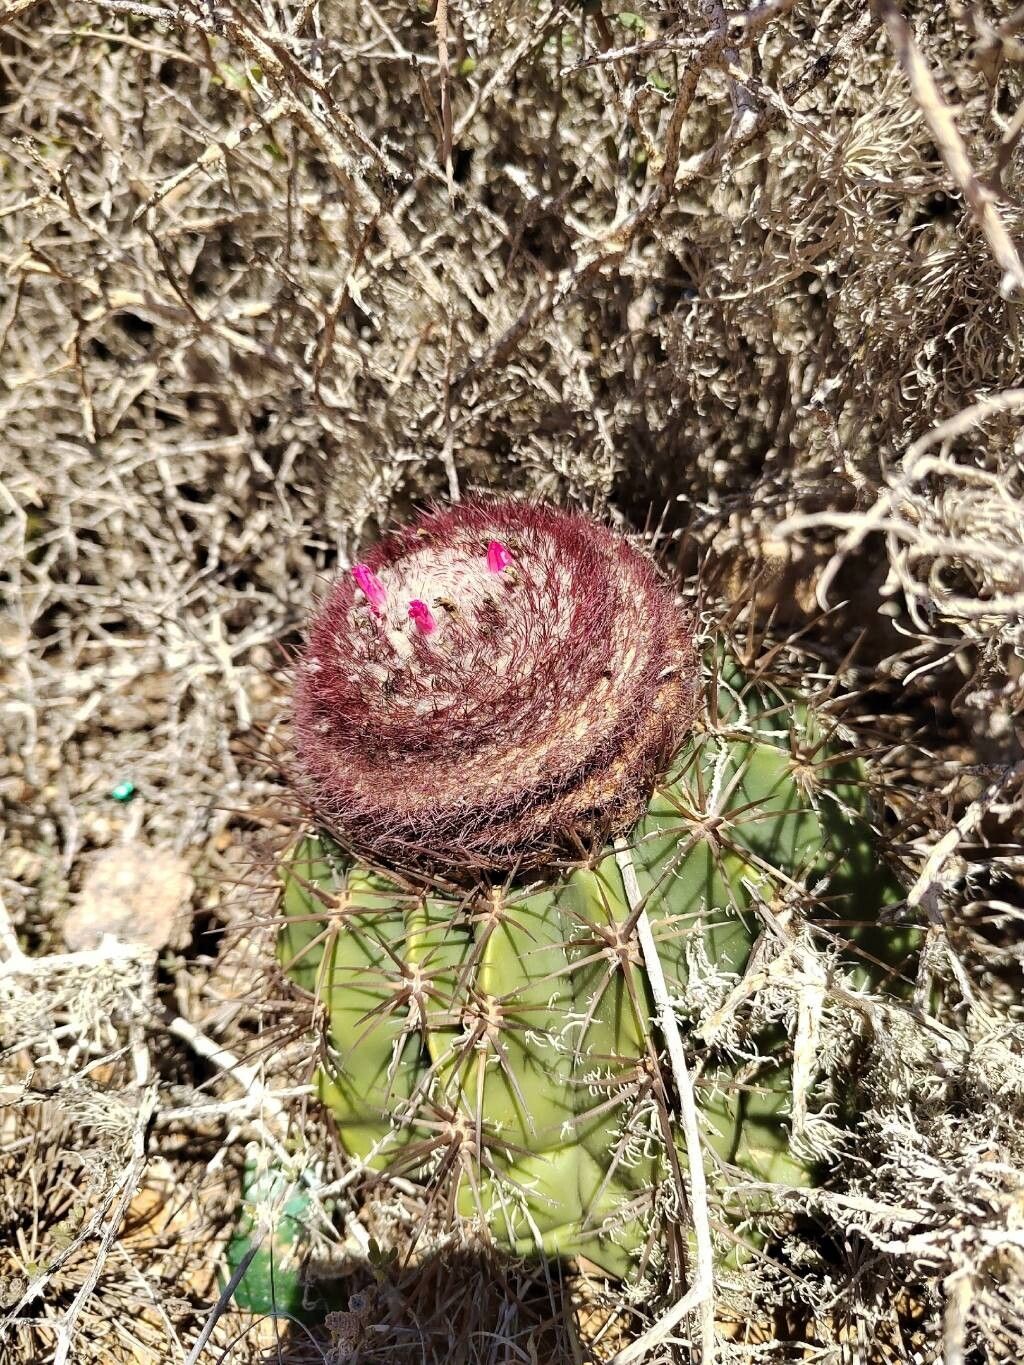
Oh, hello there! Grab your mug, let’s chat about one of my absolute favorite cacti to talk about: Melocactus curvispinus. What a stunner, right? Those beautiful, ribbed stems topped with that fuzzy, coral-colored cephalium – it’s like a little fiery crown. And the reward of coaxing a new one from a tiny piece? Pure gardening joy! Now, I won’t lie, Melocactus curvispinus can be a tad more particular than your average prickly pear, but it’s far from impossible. With a little patience and the right approach, you’ll be well on your way to more of these beauties.
The Best Time to Start
For Melocactus curvispinus, spring is truly your golden ticket. Think of it as waking up from a long winter nap. The days are getting longer, the temperatures are creeping up, and the plant is just brimming with energy. This vigorous growth phase means your cuttings or divisions are more likely to calluse over quickly and, more importantly, develop roots. Starting in late spring or early summer gives them plenty of time to establish themselves before the cooler, wetter days of autumn arrive.
Supplies You’ll Need
Before we dive in, let’s gather our tools. It’s always good to be prepared!
- Sharp, sterile knife or pruning shears: For clean cuts, preventing disease.
- Rooting hormone (optional but recommended): A little boost can make a big difference. Look for one formulated for succulents or cacti.
- Well-draining potting mix: This is crucial! A cactus-specific mix is ideal, or you can create your own with equal parts potting soil, coarse sand, and perlite or pumice.
- Small pots or seed trays: With drainage holes, of course! Terracotta pots are great as they allow the soil to dry out faster.
- Watering can or spray bottle: For gentle watering.
- Labels: To keep track of your projects!
- Bottom heat (optional): A seedling heat mat can speed up root development, especially if your environment is cooler.
- Gloves: Even cacti can surprise you with their spines!
Propagation Methods
Let’s get our hands (gently!) dirty. We’ll focus on the most reliable methods for Melocactus curvispinus.
Stem Cuttings
This is arguably the most common and straightforward way to multiply your Melocactus collection.
- Prepare Your Tools: Make sure your knife or shears are clean and sharp. This is non-negotiable!
- Make the Cut: Using your sterile tool, carefully cut a healthy stem section from the parent plant. Aim for a piece that’s at least a few inches long. Always cut just above an areole (where the spines emerge).
- Let it Calluse: This is the most important step! Place the cutting in a dry, well-ventilated spot away from direct sunlight. You need to let the cut end dry out and form a hard, protective callus. This can take anywhere from a week to a couple of weeks, depending on humidity. Don’t rush this!
- Potting Up: Once a good callus has formed, gently press the callused end into your well-draining potting mix. You don’t need to bury it too deep, just enough for it to stand upright.
- Initial Watering: Wait a few days after potting before giving it its first gentle watering. You want to avoid creating a soggy environment right away.
Division
If your Melocactus has started to produce offsets (baby plants) at its base, division is a great option.
- Remove from Pot: Carefully eject the parent plant from its pot. You might need to gently tap the sides or use a flat tool to loosen the soil.
- Examine the Base: Look for any small plantlets at the soil line or emerging from the base of the main stem.
- Separate Gently: Using your clean knife or hands, carefully separate the offset from the parent plant. Try to keep as much of its original root system intact as possible. If there are no roots, treat it like a stem cutting.
- Callusing: Even with offsets, it’s a good idea to let the point of separation calluse over for a day or two, especially if you had to make an incision.
- Potting: Pot the offset into its own small pot filled with your well-draining mix, just as you would a stem cutting. Water sparingly after a few days.
The “Secret Sauce” (Pro Tips)
Here are a few little tricks I’ve learned over the years that tend to boost success rates:
- Airflow is Your Friend: When callusing, ensure there’s good air circulation. A gentle fan on a low setting can work wonders, especially in humid environments. This helps the wound dry and prevents fungal issues from setting in.
- Patience with Watering is Key: This is a big one! Even after potting, err on the side of underwatering rather than overwatering. I often wait a full week or even ten days after potting before the first light watering. The soil should be barely moist.
- Bottom Heat is a Game Changer: If you have a heat mat, use it! Placing your potted cuttings on a gentle heat mat (around 70-75°F or 21-24°C) can significantly speed up root formation. It mimics the warmth these desert dwellers love. Just be sure not to dry out the soil too quickly with the added warmth.
Aftercare & Troubleshooting
Once your Melocactus cutting or division has taken root, it’s time to nurture it.
Signs of successful rooting include: a slight swelling at the base, new growth appearing, or gentle tugging revealing resistance.
Care for Your New Plant:
- Light: Gradually introduce your new plant to brighter light, but always avoid harsh, direct midday sun initially, as it can scorch tender new growth. Bright, indirect light is perfect.
- Watering: Water when the soil has completely dried out. This might be every 2-4 weeks or even less in cooler months. Always water thoroughly and allow excess water to drain away.
- Potting Up: Once the plant fills its current pot (usually after a year or two), you can repot it into a slightly larger container with fresh, well-draining mix.
Troubleshooting:
- Rot: This is the most common enemy. If your cutting turns mushy, black, or develops soft spots, it’s likely rot. The cause is almost always too much moisture and not enough airflow. Unfortunately, severely rotted cuttings are usually unsalvageable. If it’s minor, you might be able to cut away the rotten part and let the healthy section callus again, but this is a long shot.
- No Root Development: If after many weeks, you see no signs of roots and the cutting is still firm, it might just be a slow starter. Check your conditions – is it warm enough? Is there some light? Sometimes, patience is the only solution. If it starts to shrivel, it’s likely not going to make it.
A Little Encouragement
Trust me, watching those tiny roots emerge and your Melocactus start to thrive is incredibly rewarding. It takes a bit of practice, and sometimes Mother Nature has other plans, but don’t get discouraged! Each attempt is a learning experience. Enjoy the journey, celebrate the successes, and before you know it, you’ll be surrounded by these magnificent crowned cacti. Happy propagating!
Resource:
https://identify.plantnet.org/k-world-flora/species/Melocactus%20curvispinus%20Pfeiff./data