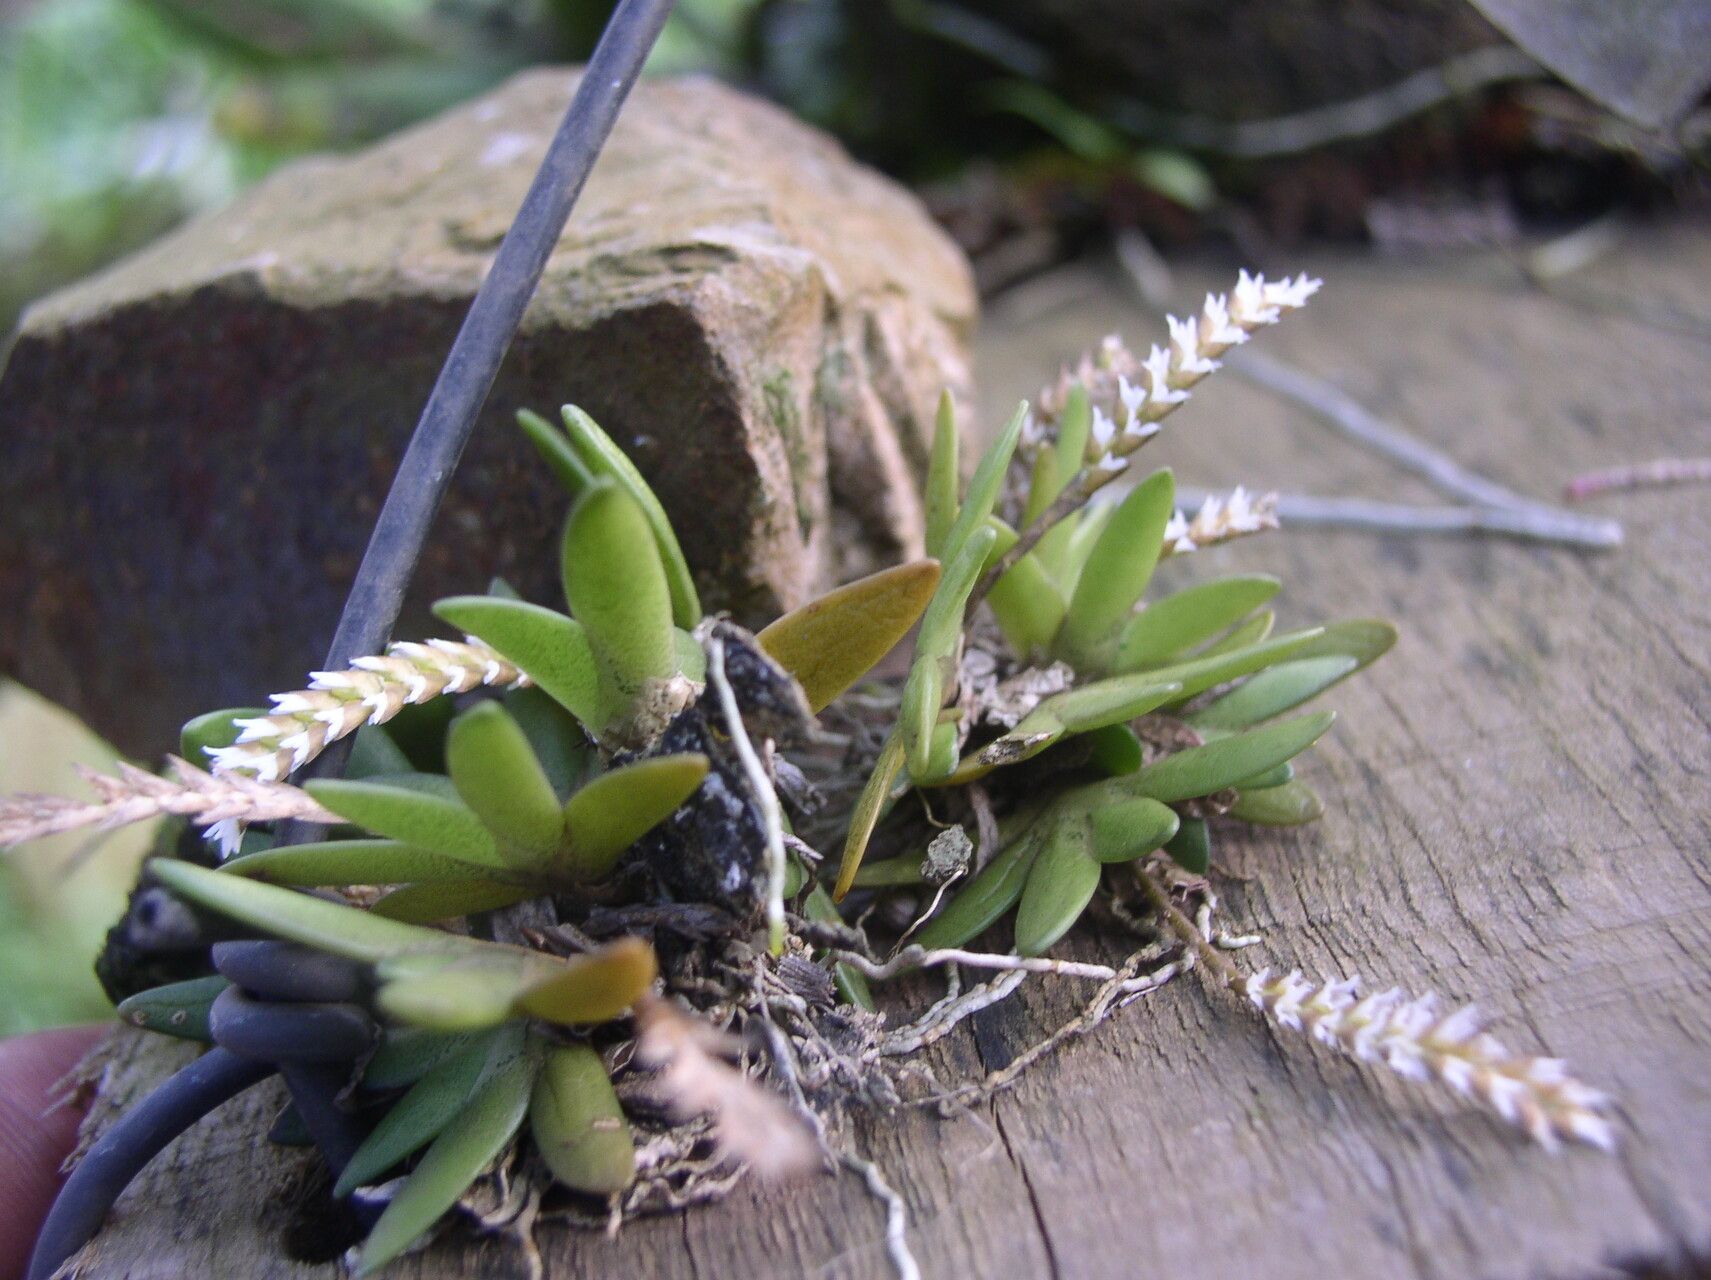
Hey there, fellow plant lovers! Today, we’re diving into the wonderful world of Bolusiella maudiae. If you’ve ever seen this little beauty, with its delicate, almost ethereal charm, you know why it captures our hearts. It’s a real jewel, and truthfully, propagating it is a journey I’ve come to cherish. It’s not the most beginner-friendly plant out there, but with a little patience and the right approach, you absolutely can succeed.
The Best Time to Start
Honestly, the sweet spot for propagating Bolusiella maudiae is when the plant is actively growing. Think late spring through summer. This is when it has the energy reserves to dedicate to new growth, whether that’s a new stem or roots. Avoid trying to propagate during its rest period; you’ll just set yourself up for disappointment.
Supplies You’ll Need
Here’s what I always have on hand when I’m ready to get busy with propagation:
- Sterile, sharp pruning shears or a clean knife: Crucial for clean cuts to prevent disease.
- Well-draining potting mix: I usually use a blend of fine orchid bark, perlite, and a bit of sphagnum moss. You want it airy!
- Small pots or seedling trays: Something that fits your new cuttings comfortably.
- Rooting hormone (optional but helpful): A powder or gel can give your cuttings a little boost.
- Clear plastic bag or a propagation dome: To create a humid microclimate for your cuttings.
- Spray bottle: For misting.
Propagation Methods
Bolusiella maudiae is most commonly propagated through stem cuttings or division. I find stem cuttings to be quite rewarding.
Stem Cuttings
- Select a healthy stem: Look for a mature stem that has at least a couple of leaf nodes. You can usually see where new growth might emerge from these nodes.
- Make the cut: Using your sterile shears or knife, make a clean cut just below a leaf node. You’re aiming for a cutting that’s a few inches long.
- Prepare the cutting: Gently remove any lower leaves that would be below the soil line. If you’re using rooting hormone, dip the cut end into the powder or gel, tapping off any excess.
- Plant the cutting: Fill your small pot with your prepared well-draining mix. Make a small hole with your finger or a pencil and insert the cut end of your Bolusiella cutting. Gently firm the soil around it.
- Provide humidity: This is key. Lightly mist the cutting and the soil. Then, cover the pot with a clear plastic bag or place it under a propagation dome. Make sure the leaves aren’t touching the plastic bag, if possible – this helps prevent rot.
Division
If your Bolusiella maudiae has grown into a larger clump, dividing it is a straightforward way to get more plants.
- Gently remove from pot: Carefully take the entire plant out of its container.
- Inspect the root ball: Gently tease away some of the old potting mix to see where the divisions naturally occur. You’re looking for sections with their own set of leaves and roots.
- Make the division: Using your clean hands or sterile tools, carefully separate the clump into smaller sections. Try to ensure each division has a good portion of roots.
- Pot up: Pot each division into its own container with fresh, well-draining mix.
The “Secret Sauce” (Pro Tips)
Here are a couple of things I’ve learned that make a real difference:
- Bottom heat is your friend: Bolusiella really loves warmth, especially when rooting. Placing your pots on a seedling heat mat can significantly speed up root development. It mimics that comforting warmth of the soil in its natural habitat.
- Don’t over-water, ever: While humidity is vital, soggy soil is the fastest way to invite rot. Let the surface of the potting mix just start to dry out before misting again. It’s a delicate balance, but you’ll get the hang of it.
- Patience with the leaves: If you’re doing water propagation (though I find soil more reliable for Bolusiella), ensure only the stem is submerged, not the leaves. Leaves submerged in water are a prime target for rotting.
Aftercare & Troubleshooting
Once your cuttings have been in their new homes for a few weeks, you might start to see tiny new roots poking out the bottom of the pot, or even a new shoot emerging. Hooray! At this point, you can gradually acclimate them to slightly lower humidity. Still mist occasionally, but start opening the bag or dome for a few hours each day.
The biggest issue you’ll likely face is rot. If you see leaves turning yellow and mushy, or the stem becoming dark and soft, it’s a sign of too much moisture. Act quickly: you might be able to salvage a healthy section of the stem if rot hasn’t set in too deep. If your cutting just seems to be sitting there, not doing anything, don’t panic. It might be slowly developing roots underground. Keep the conditions consistent and have faith!
A Encouraging Closing
Propagating Bolusiella maudiae is a wonderful way to multiply your joy and share these lovely plants with others. It teaches you so much about observation and patience. Don’t get discouraged if your first attempt isn’t perfect. Each cutting is a learning opportunity. Enjoy the process, celebrate every little bit of new growth, and before you know it, you’ll have a little collection of your own! Happy growing!
Resource:
https://identify.plantnet.org/k-world-flora/species/Bolusiella%20maudiae%20(Bolus)%20Schltr./data