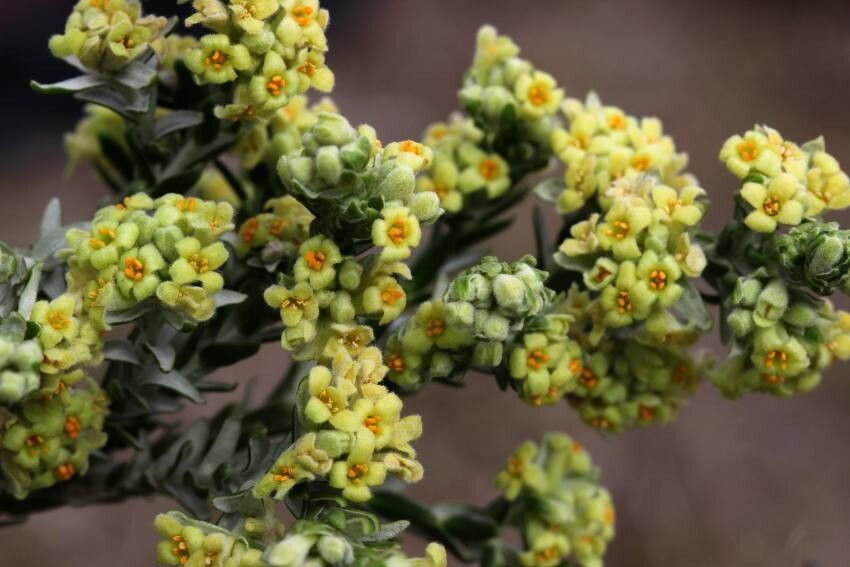
Oh, Thymelaea lythroides! What a delightful choice for your garden. Its silvery foliage and delicate, often wonderfully fragrant, little flowers bring such a unique charm. I’ve been growing it for years, and the satisfaction of creating more of these beauties from just a small cutting is truly special. If you’re a beginner, don’t be shy! While it might not be as forgiving as, say, a basil plant, with a little care and attention, you’ll find it’s quite manageable.
The Best Time to Start
For the highest chance of success, I always recommend taking cuttings in late spring to early summer. This is when the plant is actively growing, and the new stems have a good balance of being soft enough to root but with a bit of woody firmness developing. You want to catch them at that sweet spot before they get too mature.
Supplies You’ll Need
Gather these essentials before you begin:
- Sharp pruning shears or a clean knife: For making clean cuts.
- Small pots or propagation trays: With drainage holes, of course!
- Propagation mix: I like a 50/50 blend of perlite and peat moss or a good quality seed-starting mix. It needs to be well-draining – drainage is key!
- Rooting hormone (optional but helpful): A powder or gel.
- Plastic bags or a propagator lid: To create a humid environment.
- Watering can or spray bottle: For gentle watering.
- Small labels and a pen: So you don’t forget what you planted where!
Propagation Methods
My go-to method for Thymelaea lythroides is stem cuttings. It’s straightforward and generally yields the best results.
- Select Your Cuttings: Look for healthy, non-flowering stems. You want shoots that are about 4-6 inches long.
- Make the Cut: Using your clean shears, make a cut just below a leaf node (where the leaves attach to the stem). A clean cut prevents disease.
- Prepare the Cutting: Gently remove the lower leaves from the bottom 2 inches of the stem. If the cutting has any flowers, snip those off too, as they divert energy from root development.
- Apply Rooting Hormone (Optional): If you’re using rooting hormone, dip the cut end into it, tapping off any excess.
- Pot Them Up: Fill your small pots or trays with your damp propagation mix. Make a small hole in the center with your finger or a pencil.
- Insert the Cutting: Gently insert the cut end of the stem into the hole, ensuring the leaf nodes you removed are below the soil surface. Firm the soil gently around the base of the cutting.
- Water Gently: Water the soil lightly, just enough to settle it around the cutting.
- Create Humidity: Cover the pot with a plastic bag secured with a rubber band or place it inside a propagator with a lid. Make sure the leaves aren’t touching the plastic if possible to prevent rot.
- Find a Bright Spot: Place your cuttings in a bright location out of direct sunlight. A warm windowsill is often perfect.
The “Secret Sauce” (Pro Tips)
Here are a few little tricks I’ve picked up along the way:
- Bottom Heat: If you have a heat mat designed for propagators, using bottom heat can really speed up root formation. It mimics the warmth of the soil in summer. Just a gentle warmth, nothing too hot.
- Don’t Rush Watering: Once the cuttings are potted and covered, resist the urge to water them daily. Check the moisture of the soil by gently poking your finger in. You only want to water when the top inch feels dry. Overwatering is a quick way to invite rot.
- Air Circulation: Although humidity is important, a completely sealed environment with no airflow can also cause problems. If you’re using a plastic bag, open it for a few minutes each day to allow for some air exchange.
Aftercare & Troubleshooting
Once you start seeing new growth – tiny leaves emerging from the tip – that’s a good sign that roots are forming! You’ll want to gradually acclimate your new plant to normal conditions by slowly opening the plastic bag or propagator over a week or so.
The most common issue you might encounter is rot. If you see the stem turning mushy and black at the soil line, it’s unfortunately a sign that the cutting is beyond saving. This usually happens due to overwatering or poor drainage. If you lose a few, don’t get discouraged! Just try again, perhaps with a slightly drier mix or by ensuring better air circulation. If you see mold on the soil surface, it’s also a cue to increase ventilation and perhaps gently scrape off the affected top layer.
A Encouraging Closing
Propagating plants is a journey, and there’s always something to learn. Be patient with your Thymelaea lythroides cuttings. It might take a few weeks, or even a couple of months, for them to show significant root development. Enjoy the process of nurturing these new little lives, and soon you’ll have more of that lovely silvery foliage to share or plant out yourself! Happy propagating!
Resource: