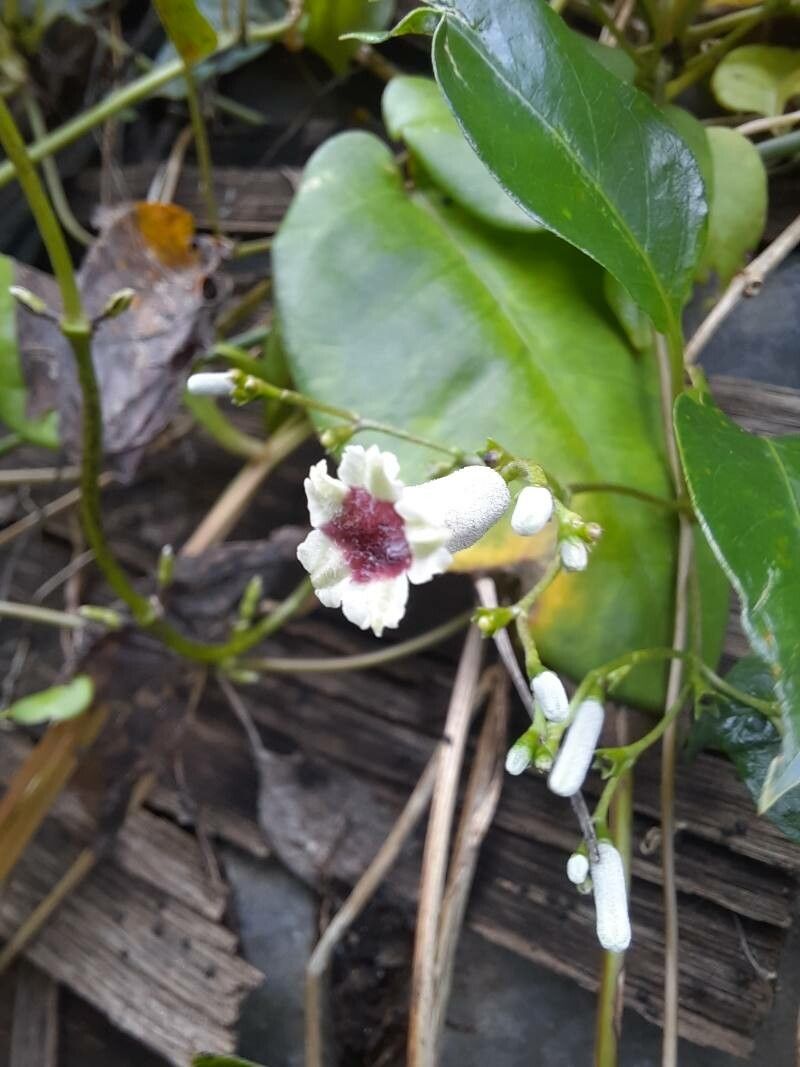
Oh, Paederia foetida! You know, the one we affectionately call “Skunkvine” or sometimes “Stinkvine” because of its unique scent when you bruise its leaves? Don’t let that name fool you, though. This vine has such a charming, almost ornamental quality with its heart-shaped leaves and delicate white or pinkish flowers. And the joy of coaxing a new plant into existence from a simple cutting? It’s truly one of gardening’s greatest rewards. Honestly, for those new to the propagation game, Paederia foetida is pretty forgiving. I find it to be a wonderfully accessible plant to start with.
The Best Time to Start
For the best chance of success, I always recommend propagating Paederia foetida in late spring to early summer. The plant is in full swing, actively growing, and has plenty of energy to put into developing new roots. Waiting until actively growing season means your cuttings will be more vigorous and less likely to succumb to stress.
Supplies You’ll Need
Gathering your tools beforehand makes the whole process so much smoother. Here’s what I always have on hand:
- Sharp pruning shears or a clean knife: For taking clean, precise cuttings.
- Potting mix: A good quality, well-draining mix is crucial. I often use a blend of equal parts peat moss or coco coir and perlite or coarse sand. This aeration is key!
- Small pots or seed trays: Clean ones, please!
- Rooting hormone (optional but recommended): A powder or gel form works well to give your cuttings a little boost.
- Plastic bags or a propagation dome: To create a humid environment.
- Watering can with a fine rose: For gentle watering.
Propagation Methods
Paederia foetida is wonderfully versatile, and I’ve had great luck with a couple of different approaches.
Stem Cuttings
This is my go-to method and probably the easiest for most people.
- Select your cuttings: Look for healthy, non-woody stems. Aim for pieces about 4-6 inches long, with at least two sets of leaves.
- Make the cut: Using your sharp shears, make a clean cut directly below a leaf node (where a leaf attaches to the stem). This is where new roots are most likely to emerge.
- Prepare the cutting: Gently remove the leaves from the bottom half of the cutting. This prevents them from rotting in the soil and encourages rooting. You can leave one or two sets of leaves at the very top.
- Apply rooting hormone (if using): Dip the cut end into the rooting hormone, tapping off any excess.
- Plant your cuttings: Fill your small pots or trays with your prepared, moist potting mix. Make a small hole with your finger or a pencil and insert the cutting, ensuring the nodes are buried in the soil. Gently firm the soil around the stem.
- Create humidity: Water gently and then cover the pots with a clear plastic bag or place them under a propagation dome. This traps moisture around the leaves, preventing them from drying out while they try to root.
Water Propagation
If you’re a visual person like me and like to see the roots form, this is a fun alternative.
- Take your cuttings: Follow steps 1-3 from the stem cutting method.
- Place in water: Put the cuttings in a clean jar or vase filled with fresh water. Ensure the leaf nodes are submerged, but try to keep the leaves themselves out of the water.
- Find a good spot: Place the jar in a bright location, but out of direct sunlight.
- Change the water: Change the water every few days to keep it fresh and prevent bacterial growth.
- Be patient: You should start to see tiny white roots appearing in a few weeks. Once the roots are about an inch long, you can carefully transplant them into pots with potting mix, following the planting steps above.
The “Secret Sauce” (Pro Tips)
Here are a few little tricks I’ve learned over the years that can really make a difference:
- Don’t let the leaves touch the water in water propagation: I know I mentioned it, but it bears repeating! Any leaf submerged below the water line will likely rot and can infect the whole cutting. Think of it as keeping things clean and preventing a breeding ground for nasties.
- Bottom heat is your friend: While not strictly necessary, placing your pots on a heat mat designed for plants can significantly speed up the rooting process. The gentle warmth encourages root development from below. Just make sure the soil doesn’t dry out!
- Mist, mist, mist! Even with a plastic bag, I like to give my cuttings a light misting of water every day or two. This keeps the humidity high and the leaves happy. If you see condensation building up heavily on the plastic, you can vent it for a few hours.
Aftercare & Troubleshooting
Once you see new leaf growth emerging, that’s a sure sign your cutting has rooted!
- Acclimate them: Gradually remove the plastic bag or dome over a week to let your new plants get used to the ambient humidity.
- Watering: Water when the top inch of soil feels dry. Avoid overwatering, as this is the quickest way to invite root rot.
- Sunlight: Move your newly rooted plants to a spot with bright, indirect light. Too much direct sun can scorch young leaves.
Occasionally, things don’t quite work out. If your cutting turns mushy and black, or starts to wilt without any signs of new growth, it’s likely rot. This is usually due to too much moisture and not enough air circulation. Don’t be discouraged! Just toss the failed cutting (compost it!), clean your pot, and try again with fresh material and perhaps adjust your watering.
A Warm Encouraging Closing
Propagating plants is a lesson in patience and observation. Sometimes it takes a few tries, but each attempt teaches you something new. Be kind to yourself, enjoy the process of nurturing these tiny new lives, and before you know it, you’ll have a whole collection of beautiful Paederia foetida vines to share or enjoy. Happy growing!
Resource:
https://identify.plantnet.org/k-world-flora/species/Paederia%20foetida%20L./data