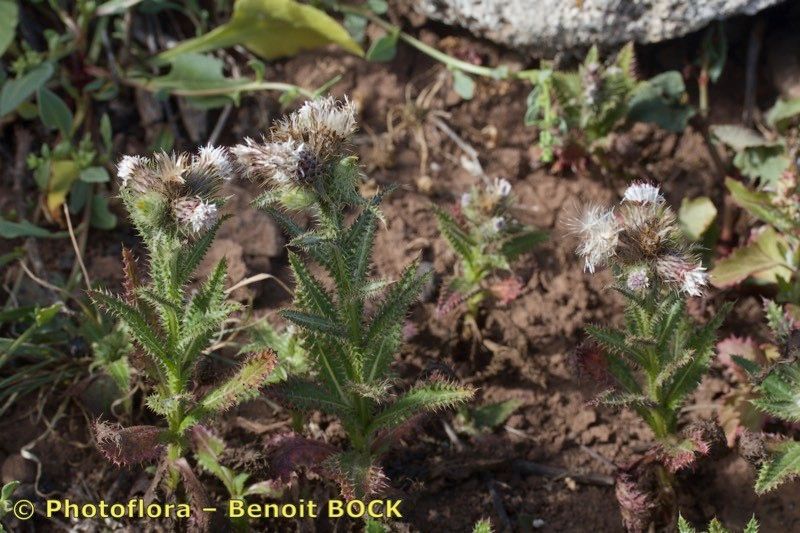
Hey there, fellow plant lovers! Today, we’re diving into the wonderful world of propagating Carduus bourgaei. If you’re unfamiliar, this thistle relative has these gorgeous, often vibrant, spiky blooms that can really add drama to a garden. Plus, there’s a special kind of thrill in nurturing a new plant from a tiny piece of the original. It’s a fantastic way to fill your garden or share the green love with friends. And for those wondering, propagating Carduus bourgaei isn’t overly tricky, making it a good project even if you’re just starting to experiment with growing from cuttings or divisions.
The Best Time to Start
For the highest success, aim to propagate your Carduus bourgaei in late spring to early summer. This is when the plant is actively growing and has plenty of energy to put into sending out roots. You’re looking for young, healthy stems that aren’t flowering yet. If you’re thinking about division, after the plant has finished its main flowering period in late summer or early fall is also a good time.
Supplies You’ll Need
Gathering your supplies beforehand makes the whole process so much smoother. Here’s what I usually have on hand:
- A sharp, clean pruning shear or a sharp knife. Sterilize them with rubbing alcohol between cuts, especially if you’re working with multiple plants.
- A well-draining potting mix. I often use a 50/50 blend of perlite and a good quality seed-starting mix. Some people swear by a gritty mix with sand and gravel.
- Rooting hormone (optional, but it really helps speed things up). I prefer the powder form.
- Small pots or trays with drainage holes.
- A plastic bag or propagation dome. This creates a humid environment.
- A spray bottle filled with water.
- If dividing, a garden trowel.
Propagation Methods
There are a couple of reliable ways to get more Carduus bourgaei plants.
Stem Cuttings
This is my go-to method for many herbaceous plants, and it works well for thistles.
- Take your cuttings: With your clean shears, snip off healthy, non-flowering stems that are about 4-6 inches long. Make the cut just below a leaf node (the point where leaves grow from the stem).
- Prepare the cuttings: Gently remove the lower leaves from the cutting, leaving just a couple of leaves at the top. This helps prevent them from rotting in the soil.
- Apply rooting hormone: Dip the cut end of the stem into your rooting hormone, tapping off any excess.
- Plant the cuttings: Make a small hole in your prepared potting mix with a pencil or your finger. Insert the cutting into the hole, ensuring the nodes where you removed leaves are below the soil surface. Gently firm the soil around the base.
- Create humidity: Water the soil lightly with your spray bottle until it’s moist but not soggy. Then, cover the pot with a plastic bag or propagation dome to trap humidity.
- Place in a bright spot: Put the pot in a location with bright, indirect light. Avoid direct sun, which can scorch the young cuttings.
Division
This method is fantastic when your Carduus bourgaei plant starts to clump up a bit.
- Dig it up: In the right season (late summer/early fall is ideal), carefully dig around the base of the parent plant with your trowel. Gently lift the entire plant from the ground.
- Separate the clumps: You’ll see that established plants often have multiple crowns or offsets. You can gently pull these apart with your hands, or if they’re really stuck, use your trowel or a clean knife to divide the root ball into smaller sections, ensuring each section has at least one healthy bud or growing point.
- Replant immediately: Plant each division back into the garden or into pots with fresh potting mix, watering them in well.
The “Secret Sauce” (Pro Tips)
Here are a few things I’ve learned over the years that make a big difference:
- Don’t let the leaves touch the water when water propagating: If you choose to try water propagation (though soil is usually more successful for this type of plant), never let the leaves of your cutting sit in the water. They’ll rot quickly. Only the stem should be submerged.
- Bottom heat is your friend: For stem cuttings, placing your pots on a gentle heat mat can significantly speed up root development. It mimics the warmth of spring and encourages those roots to form faster.
- Don’t be afraid to cut back: If your cuttings get leggy or seem to be struggling, don’t hesitate to pinch them back. This encourages bushier growth and redirects energy into root production.
Aftercare & Troubleshooting
Once you see signs of new growth – tiny shoots or leaves emerging – it’s a good sign that roots are forming! This usually takes anywhere from 2-6 weeks, depending on the conditions.
- Gradually acclimate: Once roots are established, you’ll want to gradually acclimate your new plants to normal conditions. Start by opening the plastic bag or dome for a few hours each day, slowly increasing the time over a week.
- Watering: Continue to keep the soil consistently moist but not waterlogged. As they grow, you can let the very top layer of soil dry out slightly between waterings.
- Watch for rot: The most common problem you’ll encounter is rot. If a cutting turns mushy and black, it’s usually a sign of too much moisture and not enough air circulation. Ensure your potting mix is very well-draining and don’t overwater.
- Unrooted cuttings: If your cuttings shrivel up and show no sign of roots after several weeks, they may simply not have taken. Don’t get discouraged; try again with fresh material!
A Heartfelt Closing
Propagating plants is a journey, and Carduus bourgaei is a rewarding companion on that path. Be patient with your new green babies, and don’t fret if some don’t make it. Every attempt teaches you something new. Enjoy the process, the anticipation, and the sheer joy of watching a new life unfold in your hands. Happy gardening!
Resource:
https://identify.plantnet.org/k-world-flora/species/Carduus%20bourgaei%20Kazmi/data