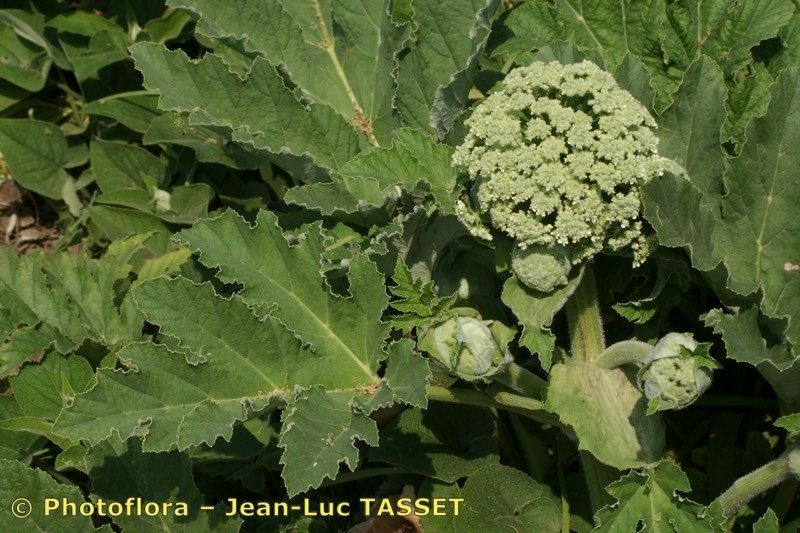
Hello there, fellow garden enthusiasts! It’s so lovely to have you join me. Today, we’re going to talk about a plant that truly captures the wild heart of the garden: Heracleum antasiaticum, often known as the Caucasian Giant Hogweed. Now, before you get intimidated by the “giant” and “hogweed” parts, let me tell you, this plant is a showstopper. Its enormous, lacy leaves and impressive flower umbels bring a dramatic, almost architectural presence to any landscape.
Propagating Heracleum antasiaticum can be a wonderfully rewarding experience. You get to multiply that stunning foliage and create so much more beauty for your own garden or to share with friends. Is it a beginner plant? Honestly, I’d say it falls somewhere in the middle. With a little care and the right timing, you can absolutely succeed, but it’s not quite as foolproof as, say, a lucky begonia cutting.
The Best Time to Start
For Heracleum antasiaticum, the sweet spot for propagation is late spring or early summer. This is when the plant is actively growing and has plenty of energy to put into new growth. Waiting until the plant has produced good, healthy foliage but hasn’t yet (or has just barely) started to form its flower stalks is ideal. This ensures the cuttings or divisions have the best chance of establishing themselves before the intense heat of midsummer or the dormancy of winter.
Supplies You’ll Need
Here’s what I usually have on hand when I’m propagating my giants:
- Sharp Pruning Shears or a Craft Knife: Clean cuts are crucial for preventing disease.
- Rooting Hormone (Optional but Recommended): A powder or gel can really boost your success rate, especially for stem cuttings.
- Well-Draining Potting Mix: I like a blend of peat moss, perlite, and a bit of sand. You want it to hold moisture but not become waterlogged.
- Small Pots or Trays: Clean pots are a must!
- Clear Plastic Bags or a Propagator: To create a humid environment for cuttings.
- Labels and a Permanent Marker: Trust me, you’ll forget what you planted where!
- A Gentle Watering Can or Mister: For a delicate touch.
- Gloves: While Heracleum antasiaticum isn’t as notorious as some other Heracleum species for causing phototoxic reactions, it’s always wise to be cautious with sap.
Propagation Methods
The most reliable ways to propagate Heracleum antasiaticum are through stem cuttings and division.
Stem Cuttings
This is a fantastic method for getting multiple new plants.
- Select Your Cuttings: In late spring or early summer, look for healthy, non-flowering stems. You want pieces that are about 4-6 inches long. Ideally, they should have at least two sets of leaves.
- Make the Cut: Using your clean shears or knife, make a clean cut just below a leaf node (the point where a leaf attaches to the stem). Remove the lower leaves, leaving just one or two at the top.
- Apply Rooting Hormone: Dip the cut end of the stem into your rooting hormone powder or gel. Tap off any excess.
- Plant the Cuttings: Fill your small pots with your well-draining potting mix. Make a hole with your finger or a pencil, and insert the cutting. Gently firm the soil around it.
- Water Gently: Water the soil lightly. You don’t want to dislodge the cutting.
- Create Humidity: Place the potted cutting inside a clear plastic bag, sealing it loosely, or put it in a propagator. This traps moisture, which is vital for cuttings to root. Place them in a bright spot, but out of direct sunlight.
Division
If your plant is already well-established, division is a great way to rejuvenate it and get new plants.
- Dig Carefully: In early spring, before the plant really gets going, or in early fall after flowering, carefully dig around the base of the plant. You want to lift the entire root ball.
- Assess the Roots: Shake off excess soil so you can clearly see the root structure. Look for natural divisions where the plant has sent up multiple shoots from the root system.
- Divide the Roots: Using a clean, sharp spade or even your hands, gently pull or cut the root ball into sections. Each section should have at least one healthy shoot and a good portion of root.
- Replant Immediately: Plant each division into your prepared soil, either back in its original spot or in new pots. Ensure the crown (where the shoots emerge from the roots) is at soil level.
- Water Thoroughly: Give each newly planted division a good watering to help settle the soil and reduce transplant shock.
The “Secret Sauce” (Pro Tips)
Here are a few things I’ve learned over the years that can make all the difference with these magnificent plants:
- Don’t Drown Your Cuttings: When you water your stem cuttings initially, don’t let the leaves sit in standing water. This is a fast track to rot. Lightly moist soil is the goal. If you’re submerging them in water for rooting (which I find less successful for Heracleum but some people do), ensure only the stem is touching the water, not the leaves.
- Bottom Heat is Your Friend for Cuttings: If you have them, placing your pots on a gentle heat mat can significantly speed up root formation for stem cuttings. It mimics the warmth of the soil that encourages roots to emerge.
- Handle with Care (and Respect): The sap of Heracleum plants, especially some species, can cause skin irritation and photosensitivity (meaning your skin becomes more sensitive to sunlight). While antasiaticum is generally milder, it’s always best practice to wear gloves when handling the plant, its cuttings, or its roots. Wash your hands thoroughly afterwards.
Aftercare & Troubleshooting
Once you see signs of new growth on your cuttings (usually tiny leaves emerging), or your divisions are settled, it’s time for continued care.
- Light and Water: Keep your new plants in bright, indirect light. Water them when the top inch of soil feels dry. Gradually introduce them to more light as they establish.
- Acclimatize Cuttings: If you used a plastic bag, slowly start to open it up over a few days before removing it entirely. This helps prevent shock.
- Signs of Failure: The most common issue is rot. If your cuttings turn mushy and black, or your divisions fail to revive and the stems go limp and brown, it’s usually a sign of too much moisture or lack of aeration in the soil. Another sign is wilting that doesn’t perk up after watering – this can indicate roots haven’t formed or have rotted away.
A Little Patience Goes a Long Way
Propagating any plant is a journey of patience and observation. Don’t be discouraged if every single cutting doesn’t make it. The ones that do will be a testament to your growing skills and a beautiful addition to your garden. Take joy in the process, learn from each attempt, and enjoy watching your very own Heracleum antasiaticum reach for the sky! Happy gardening!
Resource:
https://identify.plantnet.org/k-world-flora/species/Heracleum%20antasiaticum%20Manden./data