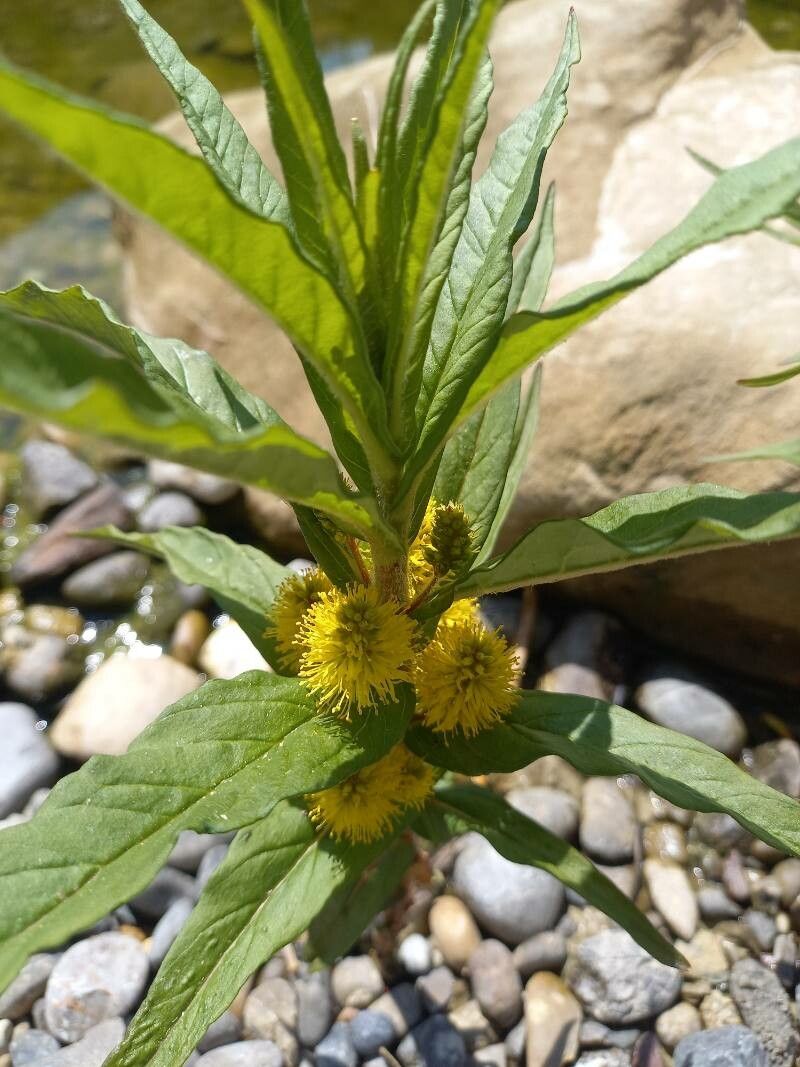
Oh, hello there! Come on in, pull up a chair. Let’s chat about a little gem that I absolutely adore for its sprightly charm: Lysimachia thyrsiflora, or as it’s often called, Tufted Loosestrife.
Why You’ll Love Propagating Tufted Loosestrife
This plant is such a delight, isn’t it? Its elegant, wand-like flower spikes bring a touch of wild beauty to any garden, especially damp spots or the edge of a pond. And the best part? Propagating it is far more rewarding than difficult. If you’re just starting out on your propagation journey, you’ll be happy to know that Tufted Loosestrife is quite forgiving. You’ll be admiring your own babies in no time.
When to Get Your Hands Dirty
The sweet spot for propagating Lysimachia thyrsiflora is really once the plant has settled in and is actively growing. I find the late spring to early summer is your golden window. Aim for when the stems are robust but not yet flowering heavily. This gives the cuttings or divisions the best chance to establish before the heat of midsummer or the chill of autumn sets in.
Your Propagation Toolkit
Let’s gather our essentials. You won’t need much, but having the right tools makes all the difference:
- Sharp Pruning Shears or a Craft Knife: For clean cuts that heal faster.
- A Good Potting Mix: I like a light, well-draining mix. A blend of equal parts peat moss or coco coir, perlite, and a bit of compost works wonders.
- Small Pots or Trays: For your new cuttings or divisions.
- Rooting Hormone (Optional but Recommended): A powdered or gel form can give your cuttings a helpful boost.
- A Spray Bottle: For misting.
- Labels: Because we all forget what we planted where!
- Water: Lovely, clear water.
Bringing Your Tufted Loosestrife to Life
There are a couple of ways you can go about this, and both are pretty straightforward.
Method 1: Stem Cuttings – The Speedy Approach
- Select Your Stems: Look for healthy, non-flowering stems from your mature plant. You want pieces that are about 4-6 inches long.
- Make the Cut: Using your sharp shears or knife, make a clean cut just below a leaf node. These nodes are where new roots will emerge.
- Prepare the Cuttings: Gently remove the lower leaves, leaving just a few at the very top. This prevents them from rotting in the soil.
- Dip in Magic (Optional): If you’re using rooting hormone, dip the cut end of the stem into the powder or gel. Tap off any excess.
- Plant ‘Em Up: Fill your small pots with your prepared potting mix. Make a small hole with your finger or a pencil and gently insert the cutting. Firm the soil around it.
- Water Gently: Water thoroughly but be careful not to dislodge your cuttings.
Method 2: Division – The Established Plant’s Gift
This is hands-down the easiest method if you have a mature, clumpy Lysimachia thyrsiflora.
- Dig with Care: In the spring, when the plant is just waking up, gently dig around the base of the clump.
- Loosen the Roots: Carefully lift the entire plant out of the ground. You’ll see it has a pretty fibrous root system.
- Separate the Divisions: Gently pull or use your hands (or a spade if it’s a very large clump) to separate the root ball into smaller sections. Aim for divisions that have at least a few stems and some healthy roots attached.
- Replant Immediately: If the roots start to dry out, your divisions won’t do as well. Replant them directly into your garden or into pots filled with good soil. Water them in well.
The “Secret Sauce”: My Gardener’s Wisdom
There are a few little tricks I’ve picked up over the years that really seem to make a difference.
- Don’t Let Leaves Drown: When doing water propagation (which is also an option for Tufted Loosestrife, though I prefer soil for this one), make sure no leaves are submerged in the water. They’ll just turn to mush and invite rot. Only the stem should be in the water.
- A Warm Hug: For stem cuttings, a bit of bottom heat can be a game-changer. Placing your pots on a heating mat designed for seedlings can significantly speed up root formation. It mimics that lovely warmth of spring.
- Be Patient with Divisions: Sometimes, even with divisions, a plant might look a little sad for a week or two. Give it some consistent moisture and a bit of shade during the hottest part of the day. It’s usually just readjusting.
Nurturing Your New Arrivals
Once your cuttings have developed a good root system (you can gently tug on them – if there’s resistance, they’re rooted!), or your divisions are showing new growth, it’s time for a bit more dedicated care.
- Watering: Keep the soil consistently moist, but not waterlogged. Feel the top inch of soil; if it’s dry, it’s time to water.
- Light: Give them bright, indirect light. Direct, scorching sun can be too much for young plants.
- When to Pot Up: Once the roots are filling the pot, you can gradually transplant them to larger containers or their permanent garden spot.
Keep an eye out for signs of rot, which usually looks like mushy, black stems or leaves. This is often due to overwatering or poor drainage. If you spot it, remove the affected parts immediately and try to improve air circulation and reduce watering.
Happy Propagating!
You’ve got this! Propagating Tufted Loosestrife is a lovely way to expand your garden, share with friends, or simply enjoy the satisfaction of growing plants from scratch. Be patient with the process, celebrate each little success, and most importantly, enjoy the journey. Happy gardening!
Resource:
https://identify.plantnet.org/k-world-flora/species/Lysimachia%20thyrsiflora%20L./data