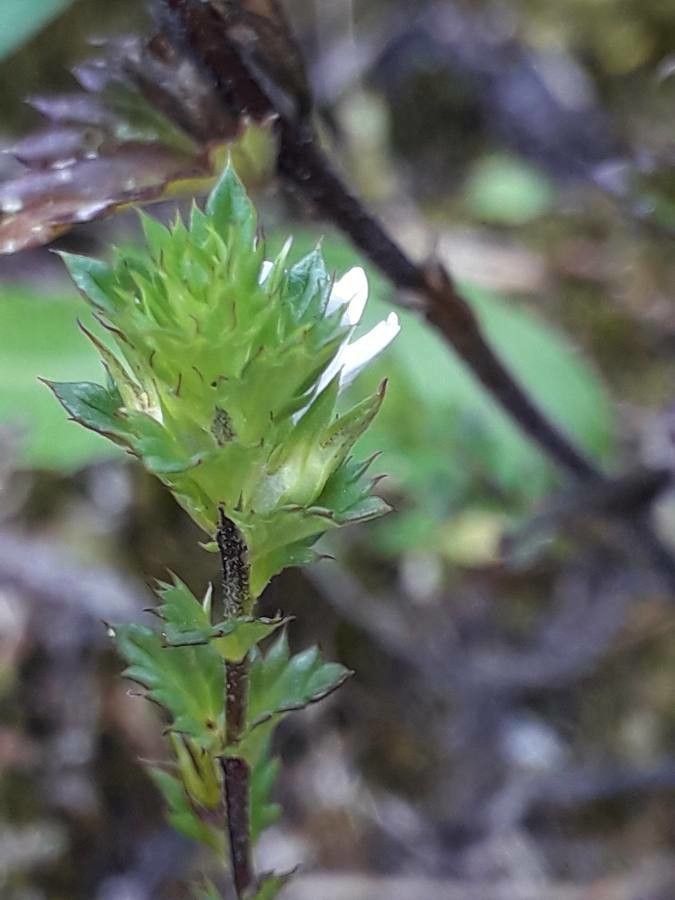
Hello fellow garden enthusiasts! Today, we’re diving into the wonderful world of Euphrasia alpina, often called Alpine Eyebright. This charming little plant, with its delicate white or pale blue flowers often kissed with yellow, brings a touch of wild beauty to any rock garden or sunny border. Its low-growing habit and dainty blooms make it a real treasure, and the satisfaction of coaxing new life from an existing plant? Well, that’s pure garden gold.
Now, I won’t sugarcoat it. Euphorbia alpina isn’t the absolute easiest plant to propagate for a complete beginner. It’s more of a rewarding challenge, but with a little care and the right approach, you’ll absolutely be able to succeed. Think of it as learning to make a perfect sourdough starter – it takes a bit of finesse, but oh-so-worth-it!
The Best Time to Start
For Euphrasia alpina, I’ve found the late spring to early summer is your golden window. This is when the plant is actively growing, so it has plenty of energy to put into developing new roots. Look for healthy, non-flowering stems. Trying to propagate from a plant that’s struggling or in the middle of a heatwave is like asking for trouble.
Supplies You’ll Need
Having the right tools makes all the difference. Here’s what I always have on hand:
- Sharp pruning shears or a clean knife: For clean cuts that heal quickly.
- Well-draining potting mix: A blend of peat moss, perlite, and a little sand works wonders. You want something airy that won’t hold excess moisture.
- Small pots or propagation trays: Clean ones are a must to prevent disease.
- Rooting hormone (optional, but recommended): A little helps boost root development.
- Spray bottle: For misting.
- Clear plastic bag or dome: To create a humid environment.
- Gravel or small stones: For drainage in pots.
Propagation Methods
We’ll focus on the most reliable method for Euphorbia alpina: stem cuttings.
- Take Your Cuttings: On a bright, cool morning (after the dew has dried), select healthy, vigorous stems. Using your sharp shears or knife, take cuttings that are about 3-4 inches long. Make sure each cutting has at least two sets of leaves.
- Prepare the Cuttings: Gently remove the lower leaves from the stem, leaving just one or two sets at the top. This helps prevent them from rotting in the soil. If you’re using rooting hormone, dip the cut end into it now, tapping off any excess.
- Plant Them Up: Fill your small pots or trays with your well-draining potting mix. Make a small hole in the center of the soil with a pencil or your finger.
- Insert the Cuttings: Carefully place the prepared cuttings into the holes, ensuring the cut end is firmly in the soil. You can fit several cuttings into one pot, but give them a little space. Gently firm the soil around them.
- Mist and Cover: Lightly mist the cuttings and the soil surface with your spray bottle. Then, cover the pots with a clear plastic bag or a propagation dome to create a mini-greenhouse. This will help maintain humidity, which is crucial for root formation.
The “Secret Sauce” (Pro Tips)
Here are a couple of tricks I’ve learned over the years that really give your cuttings a fighting chance:
- Bottom Heat is Your Friend: If you have one, placing your pots in a warm spot with bottom heat (like a seed propagation mat) can significantly speed up root development. Think of it as giving your cuttings a cozy little spa treatment.
- Don’t Let Them Drown: While they need humidity, stagnant, waterlogged soil is the enemy. Ensure your mix is genuinely free-draining. If you see condensation pooling heavily on the inside of your plastic bag, open it up for an hour or two to allow some ventilation.
Aftercare & Troubleshooting
Once your cuttings are planted, place them in a bright location but out of direct, harsh sunlight. Keep the soil consistently moist but not soggy. You should start to see signs of new growth, like tiny leaves unfurling, within 3-6 weeks.
Rot is the most common problem. If you notice your cuttings turning brown and mushy, or if mold appears on the soil surface, it’s usually a sign of too much moisture and poor air circulation. Unfortunately, these are often beyond saving. Ensure your soil is draining well in the future and allow for brief periods of ventilation.
A Encouraging Closing
Propagating plants, especially those with a bit of a reputation like Euphorbia alpina, is a journey. Be patient with yourself and your little green charges. Celebrate every tiny success, like the first hint of a new leaf or the first sign of a root poking through! Enjoy the process, and soon you’ll have a whole new patch of these delightful blooms. Happy gardening!
Resource:
https://identify.plantnet.org/k-world-flora/species/Euphrasia%20alpina%20Lam./data