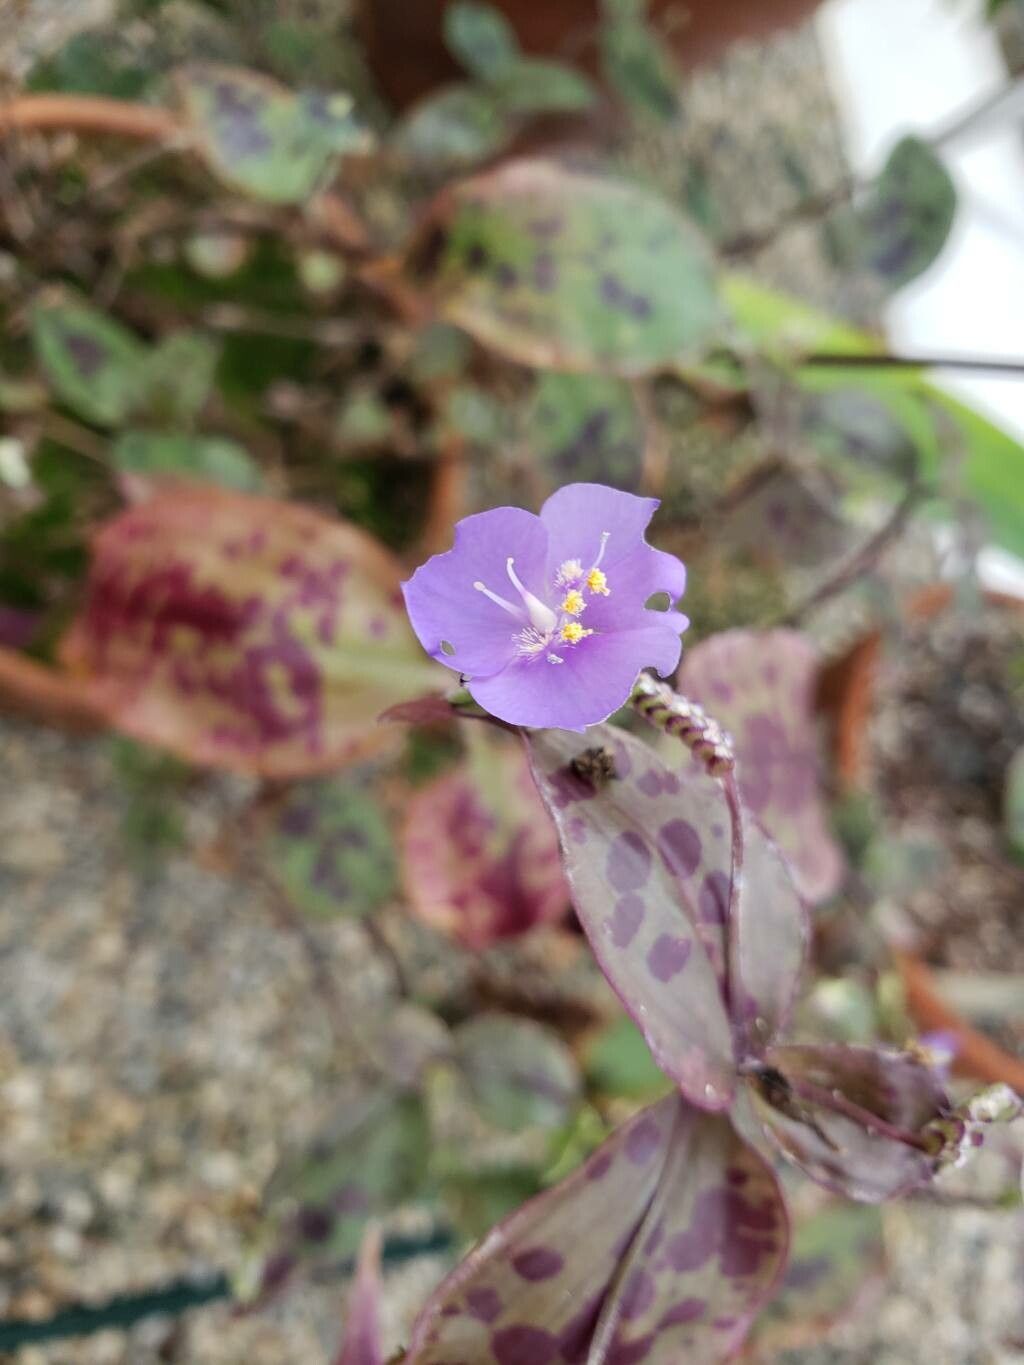
Hello, fellow plant lovers! I’m thrilled to share a little bit about a plant that truly brings a touch of magic to any home: Tinantia pringlei, also known as Mexican False Spiderwort. Its velvety leaves, often adorned with gorgeous shimmering patterns, are a delight to behold, and watching those delicate blooms unfurl is pure joy.
The best part? Propagating Tinantia pringlei is incredibly rewarding. It’s a generous plant, happy to share its beauty, and I find it to be quite forgiving. Honestly, if you’ve got a bit of patience and a love for green things, you’ll do wonderfully with this one. It’s a fantastic plant for those dipping their toes into the world of propagation!
The Best Time to Start
For the absolute best success with Tinantia pringlei, I always recommend starting in the late spring or early summer. This is when the plant is in its most vigorous growth phase. You’ll have plenty of healthy new stems to work with, and the warmth of the season will encourage roots to form quickly. Trying to propagate when the plant is stressed or dormant just makes things harder on everyone involved – you and the plant!
Supplies You’ll Need
Let’s gather our tools. Having everything ready makes the process so much smoother:
- Sharp Pruning Shears or a Clean Knife: For making clean cuts.
- Rooting Hormone (Optional but Recommended): A little boost can speed things up.
- Well-Draining Potting Mix: I like a blend of peat moss, perlite, and a touch of compost. You can also use a specialized propagation mix.
- Small Pots or Propagation Trays: Anything that will hold your cuttings snugly.
- Water: For watering your new cuttings.
- Clear Plastic Bag or Dome (Optional): To create a humid environment.
- Labels: To remember what you’ve planted and when!
Propagation Methods
Tinantia pringlei is a champion at propagating from stem cuttings. It’s straightforward and gives you a high chance of success.
Method: Stem Cuttings
- Take Your Cuttings: Look for healthy, non-flowering stems on your mature plant. Using your sharp shears or knife, carefully cut a section about 4-6 inches long. Make sure each cutting has at least two or three sets of leaves. It’s best to cut just below a leaf node (where a leaf attaches to the stem), as this is typically where roots will emerge.
- Prepare the Cuttings: Gently remove the lower leaves from the cutting, leaving just the top couple of sets. This prevents the leaves from rotting once planted. If you’re using rooting hormone, dip the cut end into the powder or gel now. Tap off any excess.
- Plant Your Cuttings: Fill your small pots or propagation tray with your prepared potting mix. Make a small hole in the center of the mix with your finger or a pencil. Gently insert the cut end of your Tinantia pringlei cutting into the hole. Press the soil gently around the cutting to secure it.
- Water Gently: Water the soil thoroughly but avoid making it waterlogged. You want the soil to be evenly moist.
- Create a Humid Environment (Optional): If your home is on the drier side, you can cover the pot with a clear plastic bag or place it under a clear propagation dome. Be sure to lift the bag or dome daily for a few minutes to allow for air circulation and prevent fungal issues.
Method: Water Propagation
This is another wonderfully simple way to get started:
- Prepare Your Cuttings: Follow step 1 and 2 from the “Stem Cuttings” method above.
- Place in Water: Find a small jar or glass and fill it with fresh water. Place your prepared cuttings in the water, ensuring that the leaf nodes (where you removed the leaves) are submerged. Crucially, make sure no leaves are touching the water.
- Find a Spot: Place the container in a location that receives bright, indirect light.
- Change Water Regularly: Change the water every few days to keep it fresh and prevent bacterial growth.
The “Secret Sauce” (Pro Tips)
Here are a few little tricks I’ve picked up over the years that can really give your cuttings a helping hand:
- Bottom Heat is Your Friend: If you have them, placing your pots on a heated propagator mat can make a world of difference. This gentle warmth encourages root development from below, speeding up the process significantly, especially if your room isn’t naturally warm.
- Don’t Over-Water! This is probably the most common mistake. While cuttings need moisture, soggy soil is a fast track to rot. I always prefer to water from the bottom if possible, letting the soil wick up what it needs. If watering from the top, be very gentle.
- Be Patient with the Visual Cues: With water propagation, look for tiny white nubs appearing at the nodes. For cuttings in soil, gently tug on a cutting after a few weeks. If you feel resistance, it means roots are forming! Don’t pull too hard, though!
Aftercare & Troubleshooting
Once you see signs of roots – whether it’s roots emerging from the bottom of the pot or those tell-tale white nubs from water propagation – it’s time for a little tender loving care.
For cuttings in soil, continue to keep the soil consistently moist but not soggy. If you propagated in water, wait until the roots are about an inch long before carefully planting them into your well-draining potting mix. Treat your new babies like you would a slightly more delicate version of the parent plant. They’ll need bright, indirect light and a gentle watering schedule.
The main culprit for failure is usually rot. If your cutting looks mushy, dark, or has a foul smell, it’s likely rotted. This is often due to overwatering or poor air circulation. Don’t be discouraged if a few don’t make it; it’s part of the learning process! Just remove any rotted pieces and start again.
A Little Encouragement
Propagating plants is a beautiful way to connect with nature and multiply the greenery you love. Don’t be afraid to experiment and enjoy the journey. Watch for those tiny roots to form, and soon you’ll have a whole new Tinantia pringlei to admire. Happy propagating!
Resource:
https://identify.plantnet.org/k-world-flora/species/Tinantia%20pringlei%20(S.Watson)%20Rohweder/data