Oh, hello there! Come on in and make yourself comfortable. I’ve got my favorite mug of Earl Grey right here, and I’m just itching to chat about one of my most cherished plants: Ardisia polycephala.
A Little Charm From Below
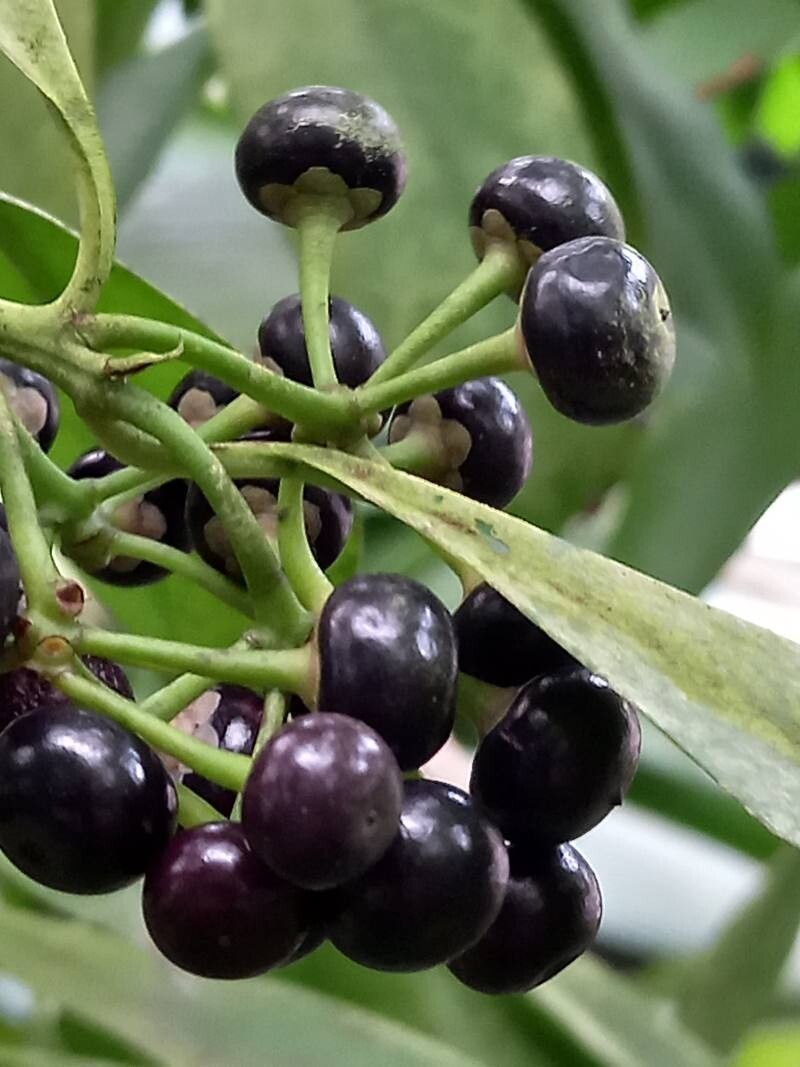
You know, Ardisia polycephala, sometimes called Coral Berry or sometimes just plain delightful, is just such a gem. It’s those clusters of delicate, star-shaped flowers that have a lovely subtle scent, followed by those stunning pops of red (or sometimes white, depending on the variety!) berries. They really do bring a splash of color and joy, especially when the days start to get a bit shorter.
And guess what? Propagating this beauty is a really rewarding endeavor. It’s a wonderful way to fill your home with more of its magic, or even to share cuttings with fellow plant lovers. Now, for beginners, I wouldn’t call it super challenging, but it does require a little bit of attention to detail. With a few key steps, though, you’ll be well on your way to success.
When the Stars Align: The Best Time to Start
My absolute favorite time to propagate Ardisia polycephala is during its active growing season. For most of us, this means late spring through early summer. The plant is energized and focused on growth then, which means it’s more receptive to taking root. You can sometimes get away with it in early fall too, but spring is generally your best bet for those robust new plants.
Gathering Your Toolkit
Before we dive in, let’s make sure we have everything we need. It’s always better to be prepared!
- Sharp Pruning Shears or a Clean Knife: For making those crucial, clean cuts. We want to avoid crushing the plant tissue.
- A Good Potting Mix: I like to use a well-draining, peat-based potting mix. You can even add a bit of perlite or coarse sand to help with aeration.
- Rooting Hormone (Optional but Recommended): This isn’t strictly necessary for Ardisia, but it can significantly speed up root development and increase your success rate. Look for a powder or gel.
- Small Pots or Trays: Clean, small pots that fit your cuttings nicely.
- Plastic Bags or a Propagator: To maintain high humidity around your cuttings.
- Watering Can or Spray Bottle: For gentle watering.
- Small Labels and a Marker: So you don’t forget what you planted where!
Let’s Get Growing: Propagation Methods
Ardisia polycephala is quite amenable to propagation through stem cuttings. It’s my go-to method, and I find it yields the best results.
Stem Cuttings: The Tried and True Way
- Select Your Cuttings: Look for healthy, non-flowering stems that are roughly 4-6 inches long. Ideally, these will be somewhat mature, not brand new, soft, floppy growth. You want stems that have a little bit of rigidity.
- Make the Cut: Using your sharp pruning shears or knife, make a clean cut just below a leaf node. A leaf node is where a leaf attaches to the stem; this is where the magic happens for root development!
- Prepare the Cutting: Gently remove the lower leaves from your cutting, leaving just 2-3 leaves at the top. This reduces water loss. If your cutting is very long, you can even trim the top leaves in half horizontally to further reduce transpiration.
- Apply Rooting Hormone (If Using): Dip the cut end of the stem into your rooting hormone. Tap off any excess.
- Planting Time: Make a small hole in your moist potting mix with a pencil or your finger. Insert the cut end of the stem into the hole. Gently firm the soil around it to ensure good contact. You want the nodes where you removed leaves to be buried.
- Create a Humid Environment: Water the soil gently. Then, cover the pot with a clear plastic bag or place it in a propagator. You can use stakes to keep the bag from touching the leaves. This creates a mini-greenhouse effect.
- Placement: Place your cuttings in a bright spot out of direct sunlight. They prefer warm temperatures, so if your home is a bit on the cool side, consider using a heat mat.
Water Propagation: A Peek at the Roots
While I prefer soil propagation for Ardisia, you can try water propagation.
- Prepare the Cutting: Follow steps 1-3 from the stem cutting method.
- Place in Water: Fill a clean jar or glass with room-temperature water. Submerge the leaf nodes of your cutting in the water. Crucially, ensure that no leaves are submerged. This is super important to prevent rot.
- Location and Water Changes: Place the jar in bright, indirect light. Change the water every 2-3 days to keep it fresh and oxygenated.
- Patience: You’ll start to see tiny root nubs emerge from the nodes. Once the roots are about an inch long, you can transplant them into potting mix.
The “Secret Sauce”: My Top Tips
Now, a few little secrets I’ve picked up over the years that can really make a difference:
- Bottom Heat is Your Friend: Like I mentioned, Ardisia loves warmth. If you’re struggling with slow rooting, investing in a small seedling heat mat for under your pots can be a game-changer. It encourages those roots to form much faster.
- Don’t Be Afraid to Mist (Lightly!): While you want to avoid soggy soil, a light misting of the leaves once or twice a day on your cuttings, especially if they aren’t fully covered, can help keep them from drying out too much while they’re trying to establish themselves. Just a quick spritz from your spray bottle is all they need.
- Patience and Observation: The biggest secret? Just watch them. Don’t be tempted to pull them up every day to check for roots. Give them time. You’ll know they’re rooting when you see new growth emerging from the top.
Aftercare and When Things Go Wrong
Once your cuttings have developed a good root system – you can gently tug on them and feel resistance, or you might even see roots peeking out of the drainage holes – it’s time for their next stage.
- Transplanting: Gently transplant your rooted cuttings into their own small pots filled with your well-draining potting mix.
- Watering: Water them thoroughly after transplanting, then allow the top inch of soil to dry out between waterings. They’re still young and sensitive, so avoid overwatering.
- Light: Continue to keep them in bright, indirect light.
Troubleshooting: The most common issue you might encounter is rot. This usually happens due to too much moisture, poor drainage, or lack of air circulation. If you notice your cutting becoming mushy, turning black, or developing a foul smell, it’s likely rotted. Unfortunately, at that point, it’s usually best to discard it and start again. Preventing overwatering and ensuring good air circulation are key to avoiding this.
Go Forth and Propagate!
See? It’s not so daunting, is it? Propagating Ardisia polycephala is a wonderful way to connect with your plants and appreciate the miracle of new life. Just remember to be patient, give them the right conditions, and don’t be discouraged if the first few attempts aren’t perfect. Every gardener has their share of learning experiences – I certainly do!
Enjoy the process, and soon you’ll have a whole collection of these delightful plants. Happy gardening!
Resource:
https://identify.plantnet.org/k-world-flora/species/Ardisia%20polycephala%20Wall.%20ex%20A.DC./data