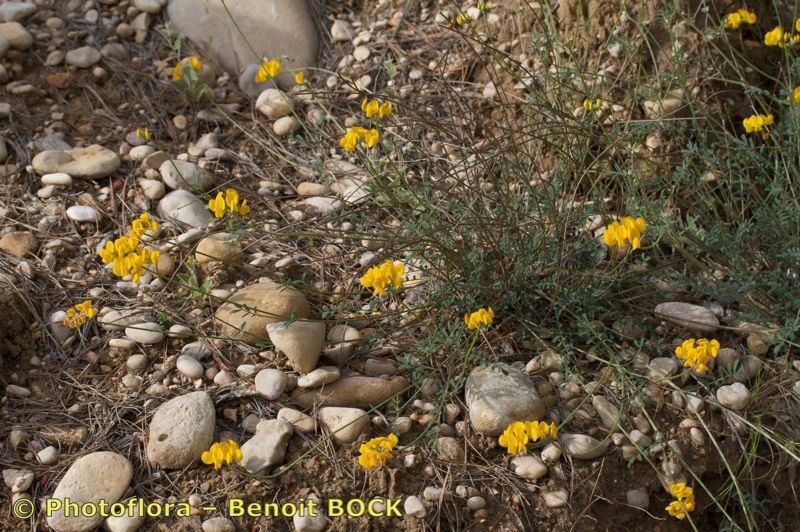
Hello, fellow garden enthusiasts! Today, we’re diving into the delightful world of Hippocrepis squamata, sometimes called Spanish Coral Bean or Scorpion Senna. If you’re looking for a plant that brings a unique charm to your garden with its delicate, pea-like flowers and airy foliage, you’re in for a treat. Plus, the satisfaction of growing more of these beauties from your own stock is truly something special. For those just starting out on their propagation journey, Hippocrepis squamata is quite forgiving, making it a wonderful plant to learn with.
The Best Time to Start
When it comes to getting new Hippocrepis plants going, spring is your best friend. Think of it as the plant waking up from its winter slumber and focusing all its energy on growth. Taking cuttings or dividing during this active period means the plant is ready to bounce back and put down roots with gusto. Aim for early to mid-spring, before it gets too hot and dry.
Supplies You’ll Need
To set yourself up for success, gather these essentials:
- Sharp pruning shears or a craft knife: For clean cuts that heal well.
- Rooting hormone (optional, but recommended): Helps speed up root development.
- Well-draining potting mix: A blend of perlite, peat moss, and compost works wonders. Seed starting mix is also a good option.
- Small pots or seedling trays: With drainage holes, of course!
- Plastic bags or a propagation dome: To create a humid environment.
- Watering can or spray bottle: For gentle watering.
- Labels: To keep track of your efforts!
Propagation Methods
Let’s get our hands dirty! Here are the primary ways to multiply your Hippocrepis squamata:
Stem Cuttings
This is my go-to method for Hippocrepis.
- Select Healthy Stems: Look for young, non-flowering shoots that are about 4-6 inches long. They should be firm but not woody.
- Make the Cut: Using your clean shears, make a clean cut just below a leaf node (where a leaf attaches to the stem).
- Prepare the Cutting: Gently remove the lower leaves, leaving just a couple at the top. If you’re using rooting hormone, dip the cut end into the powder or gel, tapping off any excess.
- Planting: Fill your small pots with your chosen potting mix and moisten it. Make a small hole in the center with a pencil or your finger.
- Insert the Cutting: Place the prepared cutting into the hole, firming the soil gently around its base.
- Create Humidity: Water the pot gently. Then, cover the pot with a plastic bag or place it under a propagation dome. Ensure the leaves don’t touch the plastic.
Division
If your Hippocrepis has become a bit of a clump, division is a fantastic option.
- Gently Excavate: Carefully dig up the entire plant. It’s best to do this in spring when the soil is moist and the plant is actively growing.
- Inspect and Separate: Gently tease apart the root ball with your fingers or hands. You’re looking for natural breaks where you can divide the plant into smaller sections, each with a healthy root system and a few shoots.
- Replant Immediately: Pot up each division into its own pot filled with well-draining soil. Water them in well.
The “Secret Sauce” (Pro Tips)
Here are a couple of little tricks that have served me well over the years:
- Bottom Heat is Your Friend: For cuttings, placing your pots on a heated propagation mat can significantly speed up rooting. It mimics the warm earth of spring and really encourages those roots to form. You can find these online quite easily.
- Don’t Drown Your Cuttings: While humidity is key, waterlogged soil is the fast track to rot. Make sure your soil is moist but not soggy, and if you’re using a tray with a water reservoir, be mindful of how much water is in there. Let the surface dry out slightly between waterings.
Aftercare & Troubleshooting
Once you’ve got your cuttings or divisions planted, patience is key! Keep them in a bright spot, but avoid direct, scorching sunlight initially. The humidity dome or plastic bag should remain on for a few weeks, or until you see new growth.
Signs of success are new leaves unfurling. If you gently tug on a cutting and feel a slight resistance, that’s a good indicator roots are developing.
Troubleshooting is part of the game! The most common issue is rot, which usually happens from overwatering or poor drainage. If your cutting looks mushy or has turned black and slimy, it’s likely a goner. Don’t be discouraged; just learn from it and try again! Yellowing leaves, while sometimes normal for a stressed cutting, can also indicate too much or too little water.
A Gracious Closing
Propagating Hippocrepis squamata is a deeply rewarding experience. It’s like growing a little piece of your garden that you can share, or simply expand your own collection. Be patient with yourself and the process. Even experienced gardeners have failures – it’s all part of the journey. Enjoy watching your little pieces of Hippocrepis grow into beautiful, thriving plants! Happy gardening!
Resource:
https://identify.plantnet.org/k-world-flora/species/Hippocrepis%20squamata%20(Cav.)%20Coss./data