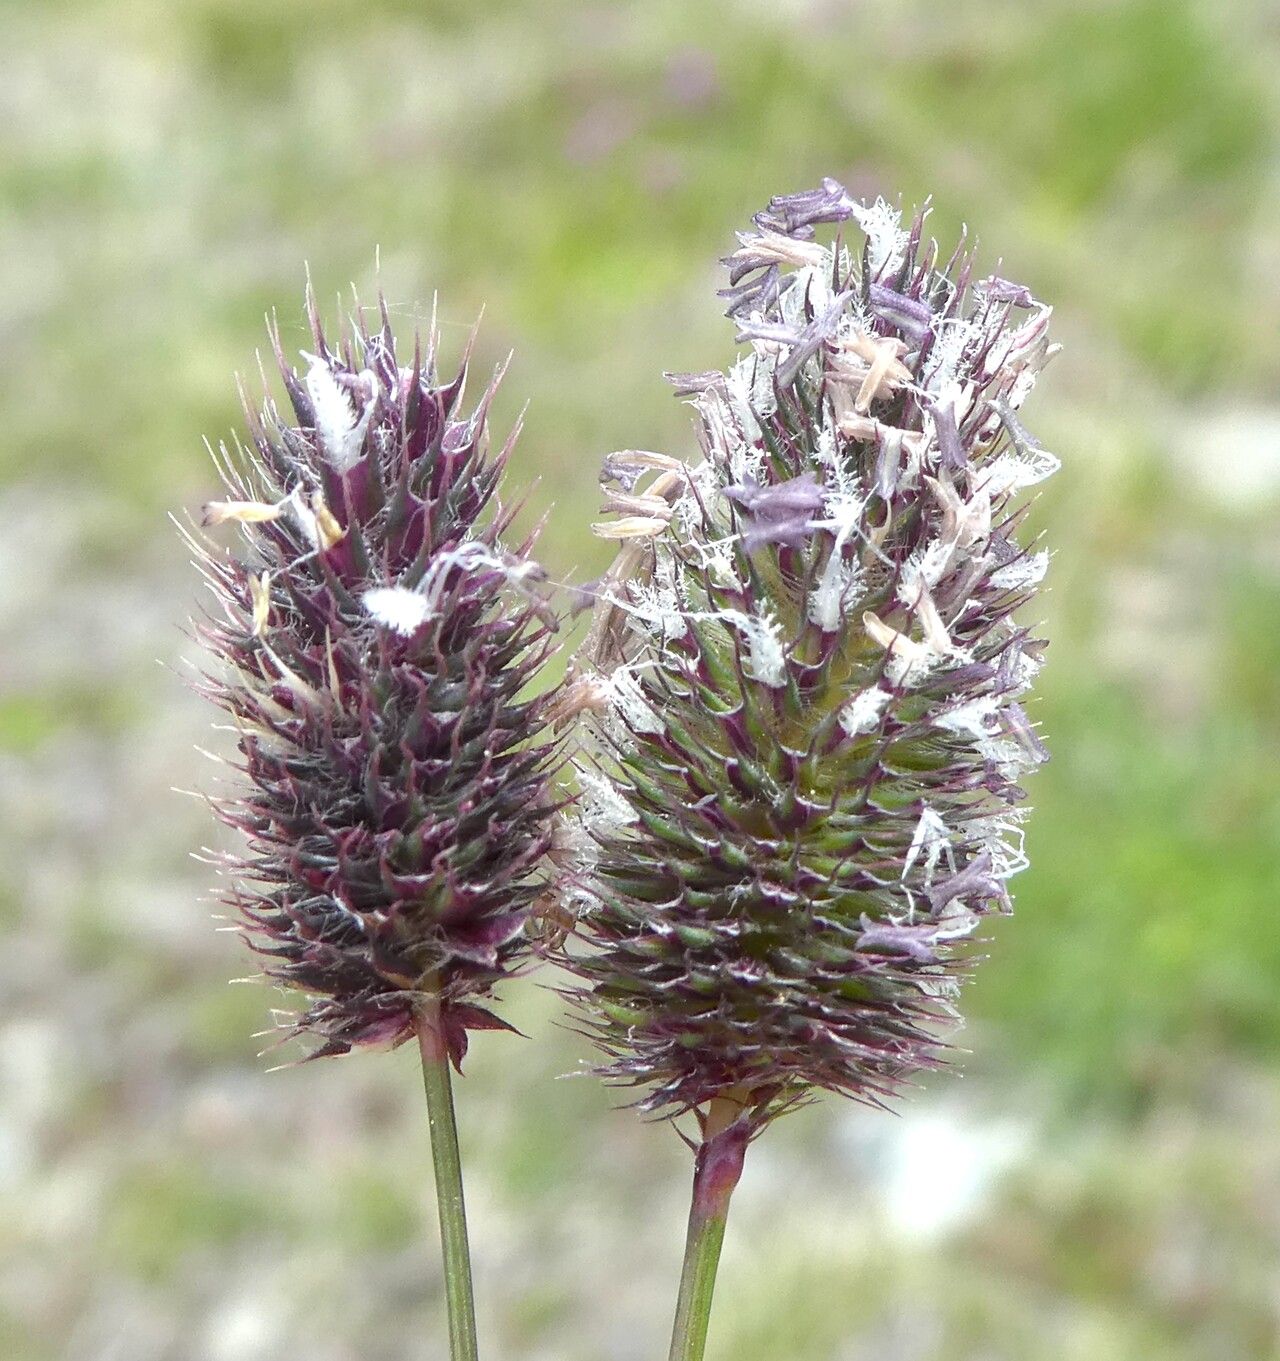
Oh, hello there! Come on in and pull up a chair. Let’s chat about one of my favorite little treasures: Phleum alpinum, also known as Alpine Timothy grass. Isn’t it just lovely? That soft, fluffy seed head, like a miniature cattail gracefully nodding in the breeze. It adds such a touch of wild charm to any garden spot, and getting more of this beauty yourself is incredibly satisfying.
Why Propagate Alpine Timothy?
Honestly, growing more Phleum alpinum is a joy because it’s generally quite straightforward. It’s a wonderfully forgiving plant, making it a fantastic choice for those new to the world of propagation. Plus, imagine a whole border filled with these charming little grasses, or sharing rooted divisions with fellow plant enthusiasts! It’s a way to spread that joy and beauty.
The Best Time to Start
For the highest success rates with Phleum alpinum, I find late spring to early summer is your sweet spot. After the main flowering period is over, but before the plant really starts to feel the heat of full summer, is when it’s most vigor to put down new roots. You’re looking for vigorous, healthy growth, not something stressed by drought or extreme temperatures.
Supplies You’ll Need
Gathering your tools before you start makes the whole process go so much smoother. Here’s what I always have on hand:
- Sharp, clean pruning shears or a sharp knife: Cleanliness is key to preventing disease.
- A good quality potting mix: I like a well-draining mix, often a blend of peat moss, perlite, and a bit of compost. Alpine Timothy doesn’t like soggy feet!
- Small pots or trays: Whatever works best for the method you choose.
- Rooting hormone (optional but helpful): Especially if you’re trying stem cuttings.
- Watering can with a fine rose: For gentle watering.
- Labels and a marker: To keep track of what you’ve planted (trust me, it’s easy to forget!).
Propagation Methods
Phleum alpinum is most easily propagated through division. It’s like giving the plant a little haircut and encouraging it to make more little clumps!
Method: Division
- Digging Up: Gently excavate the parent plant from its pot or garden bed. Try to loosen the soil around it without disturbing the root ball too much. If it’s in the ground, use a trowel or spade to carefully lift it.
- Separating the Clumps: Once you have the plant out, you’ll see that it naturally forms multiple smaller clumps or shoots connected at the base. You can often gently pull these apart with your hands. If the roots are a bit tangled, use your clean knife or shears to carefully cut through the root mass, ensuring each division has a good amount of roots and at least a few healthy shoots.
- Potting Up: Fill your small pots with your prepared potting mix. Make a little well in the center of each, place a division into the well, and gently firm the soil around the roots. Aim to have the base of the shoots just at the soil surface.
- Watering In: Water thoroughly after potting. You want the soil to be moist, but not waterlogged.
The “Secret Sauce” (Pro Tips)
Here are a few little tricks I’ve picked up over the years that really seem to give Phleum alpinum a boost:
- Don’t Drown the Newbie: While moisture is crucial, I always err on the side of slightly too dry than too wet for divisions. Overwatering is one of the quickest ways to invite rot, especially when the plant is still establishing itself and doesn’t have a robust root system yet.
- Give it a Cozy Spot: Newly divided plants can be a bit fragile. Find a location that offers bright, indirect light and protection from harsh winds. A greenhouse or a bright windowsill is often ideal. Avoid direct, scorching sun for the first few weeks.
Aftercare & Troubleshooting
Once your divisions are planted, the main goal is to encourage root development. Keep the soil consistently moist but not saturated. You’ll know your new plants are happy when you start to see new shoots emerging from the base, or if they resist a gentle tug when you try to pull them out of the pot.
The most common issue you might encounter is rot. If you see the leaves turning yellow and mushy, or a dark, wet base on the shoots, it’s a sign that things are too wet. In this case, gently try to increase air circulation and allow the soil to dry out slightly before watering again. Sometimes, it’s a tough lesson, but part of the gardening journey!
Keep Growing!
So there you have it! Propagating Phleum alpinum is a lovely, rewarding process. Be patient with your little babies, give them a bit of care and attention, and you’ll soon have a garden full of these charming grasses. Happy planting!
Resource:
https://identify.plantnet.org/k-world-flora/species/Phleum%20alpinum%20L./data