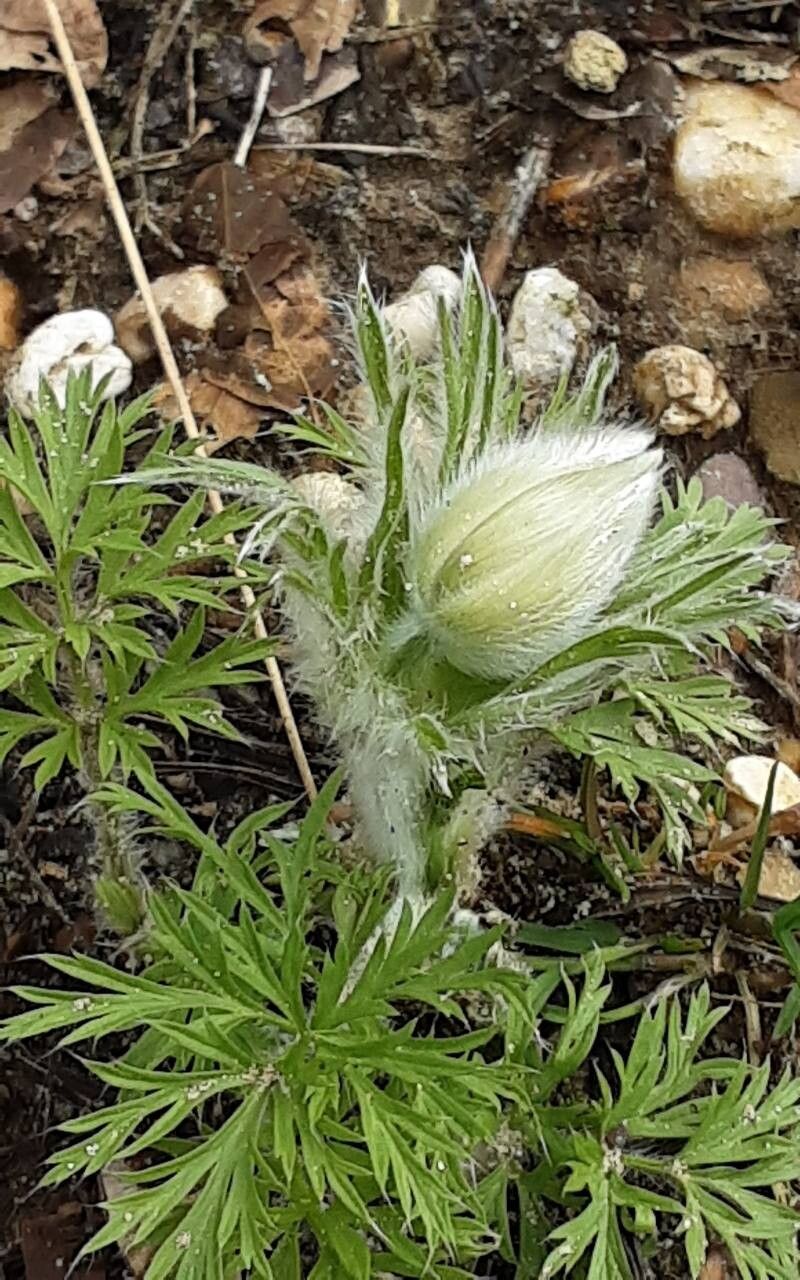
Hello, fellow plant lovers! It’s your garden friend here, eager to chat about a real beauty: Pulsatilla vernalis, or spring pasqueflower. This charming little gem, with its fuzzy leaves and delicate, bell-shaped blossoms, is such a joy to have gracing the early spring garden. It whispers of warmer days ahead and brings a touch of wild elegance. If you’ve ever admired its unique beauty and thought, “I’d love to have more of these!”, you’re in luck. Propagating Pulsatilla vernalis can be done, though I’d say it’s more of a rewarding challenge than a beginner’s walk in the park. Stick with me, and we’ll coax these beauties into existence together!
The Best Time to Start
For Pulsatilla vernalis, the absolute best time to propagate is from fresh seeds as soon as they are ripe, usually in late spring or early summer. If you miss that window, or if you’re working with established plants, dividing them in early spring just as new growth begins is your next best bet. Waiting until they’ve finished flowering and begun to set seed is also a good time for seed collection.
Supplies You’ll Need
Here’s what you’ll want to gather before we get our hands dirty:
- Seed Starting Mix: A light, airy mix is crucial. I like to use a blend of peat moss or coir, perlite, and a touch of fine compost.
- Small Pots or Seed Trays: Clean, with drainage holes, of course!
- Gloves: Keeps your hands clean and protects you from any sap.
- Dibber or Pencil: For making little holes for seeds or divisions.
- Watering Can with a Fine Rose: Gentle watering is key.
- Razor Blade or Sharp Knife: For clean divisions.
- Mulch: For covering your seed trays.
- Optional: Rooting Hormone: While not strictly necessary for divisions, some gardeners like to use it.
Propagation Methods
Pulsatilla vernalis is primarily propagated through seeds and division. Cuttings are less successful for this particular plant.
1. From Seed:
This is often the most successful route, but patience is your mantra here.
- Collect Seeds: Once your pasqueflowers have finished blooming and you see those distinctive fuzzy seed heads, it’s time to act. Gently collect the feathery seed heads before they disperse too widely.
- Sow Immediately: Pulsatilla vernalis seeds have a short viability period. This means they need to be sown as soon as possible after ripening for the best germination rates.
- Prepare Your Pots: Fill your small pots or seed trays with your seed starting mix.
- Sow the Seeds: Sow the seeds thinly on the surface of the soil. Don’t worry about covering them too deeply – a very light dusting of soil or fine grit is all they need.
- Water Gently: Use your fine rose watering can to gently water the surface. You want the soil to be moist but not waterlogged.
- Provide Stratification (Cold Treatment): This is a crucial step! The seeds require a period of cold, moist stratification to germinate. Place the pots in a plastic bag (to keep the moisture in) and put them in the refrigerator for 6-8 weeks.
- Bring Them Out: After their chilly retreat, bring the pots out and place them in a bright, cool location, ideally around 50-60°F (10-15°C). An unheated greenhouse or a cool windowsill is perfect.
- Be Patient: Germination can be slow and erratic. Some seeds might sprout in a few weeks, others might take months, and some may not germinate until the following year. Don’t give up on them!
- Care for Seedlings: Once seedlings appear, ensure they have adequate light and water them carefully to avoid damping off.
2. By Division:
This method is best for established plants.
- Timing is Key: Ideally, divide your Pulsatilla vernalis in early spring as soon as you see the first signs of new growth. You can also do this in the autumn after flowering.
- Gently Excavate: Carefully dig around the base of the plant, trying to lift the entire root ball with as much soil as possible. Avoid disturbing the roots more than necessary.
- Inspect the Roots: Once the plant is out of the ground, gently shake off some excess soil to get a clear view of the root system.
- Identify Natural Divisions: Look for natural breaks in the root structure. Healthy Pulsatilla vernalis often form clumps that can be gently pulled apart.
- Make the Cuts: Using your sharp knife or razor blade, carefully separate the plant into sections. Ensure each division has healthy roots and at least a few buds or shoots. Cut cleanly to minimize stress and disease.
- Replant Immediately: Plant the divisions as soon as possible into their new locations or into pots filled with your well-draining soil mix.
- Water Well: Water the newly planted divisions thoroughly.
The “Secret Sauce” (Pro Tips)
Here are a couple of things I’ve learned over the years that can really boost your success:
- Don’t Overcrowd Seeds Under the Surface: For the seed propagation, think of it like a delicate kiss of soil over the seeds. Too much can prevent them from getting the light and air they need to sprout. A barely-there covering is often best.
- Embrace the Chill: Those seeds really need that cold period. Don’t skip the refrigerator treatment! It artificially mimics winter and tells the seeds it’s time to wake up and grow when they come into warmer conditions. Think of it as a well-deserved spa treatment for your seeds.
- Be Mindful of Dormancy: If you’re dividing, remember that Pulsatilla vernalis doesn’t always show off its growth. Err on the side of caution with handling the roots. Sometimes you’ll pull up what looks like a dormant clump, but with a bit of care, it can still be divided successfully.
Aftercare & Troubleshooting
Once your seeds have sprouted or your divisions are planted, it’s time for a little TLC.
- Watering: Keep the soil consistently moist but not soggy. Overwatering is the quickest way to invite trouble. As the new plants establish, you can gradually reduce watering frequency.
- Light: Seedlings need bright, indirect light. Too much direct sun can scorch delicate new leaves. Established divisions will appreciate a sunny spot.
- Overwintering Seedlings: If you sowed seeds in the fall or they haven’t fully established by winter, protect very young plants with a layer of mulch or by moving pots to a sheltered spot.
Troubleshooting:
- Rot/Damping Off: This is the most common issue with seedlings. It’s usually caused by overwatering and poor air circulation. If you see seedlings collapsing at the base, it’s likely rot. Remove affected plants immediately and ensure good airflow. Using a sterile seed mix also helps.
- No Germination: Be patient with seeds! As I mentioned, germination can be slow. Ensure the cold stratification was sufficient and that the environment is cool and bright. Some seeds might just be non-viable.
- Divisions Failing to Establish: This can happen if the division was too small, didn’t have enough roots, or if the weather was too hot and dry when replanted. Ensure good root contact with the soil and maintain consistent moisture.
A Cheerful Goodbye
Propagating Pulsatilla vernalis might take a bit of finesse, but the reward is so worth it. You’ll be multiplying the joy of these enchanting flowers, and honestly, there’s something wonderfully satisfying about nurturing a plant from its very beginnings. Be patient with the process, trust your instincts, and most importantly, enjoy the journey. Happy gardening!
Resource:
https://identify.plantnet.org/k-world-flora/species/Pulsatilla%20vernalis%20(L.)%20Mill./data