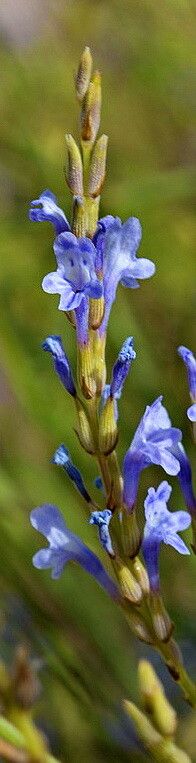
Oh, lavender! Who can resist that intoxicating scent and beautiful blooms? When it comes to Lavandula coronopifolia, also known as Crown Lavender because of its lovely toothed leaves, you’ve got a real winner. It’s a bit less common than some of its cousins, adding a touch of uniqueness to your garden. And let me tell you, coaxing a new plant into existence from a stem cutting is one of the most satisfying gardening experiences. It’s not the easiest lavender to propagate, if I’m being honest, but definitely achievable with a little care and patience. Definitely not one to shy away from, though!
The Best Time to Start
For Lavandula coronopifolia, I find that late spring to early summer is your sweet spot. You’re looking for new, soft growth – what we call “semi-ripe cuttings.” The plant is actively growing then, making it more eager to root. Avoid taking cuttings from woody, old stems, as they’re much less likely to sprout roots.
Supplies You’ll Need
Here’s a little kit I usually have ready:
- Sharp, clean pruning shears or a sharp knife: Essential for clean cuts that heal and root better.
- Rooting hormone (powder or gel): This is key for lavender. It really gives cuttings that extra boost.
- A gritty, free-draining potting mix: I often use a mix of perlite, coarse sand, and a little bit of peat or coco coir. Lavender hates soggy feet, even as a cutting!
- Small pots or seed trays with drainage holes: Anything that lets excess water escape is perfect.
- A plastic bag or cloche: To create a humid environment for your cuttings.
- A label and pen: Trust me, you’ll forget you have three types of lavender if you don’t label!
Propagation Methods: Stem Cuttings
This is my go-to method for lavenders, and it works beautifully for Lavandula coronopifolia.
- Take Your Cuttings: On a bright morning, select a few healthy stems from your established plant. Look for stems that are green and supple, about 4-6 inches long, and have started to harden up slightly. Snap or cut a section just below a leaf node (where a leaf emerges from the stem).
- Prepare the Cuttings: Gently remove the lower leaves from the bottom inch or two of the stem. You want to expose that section for rooting. If the leaves are quite large, you can even snip some of them in half horizontally to reduce moisture loss.
- Apply Rooting Hormone: Dip the cut end of each stem into your rooting hormone. Tap off any excess – you don’t need a thick coating.
- Plant Your Cuttings: Fill your pots or trays with your well-draining mix. Make a small hole with a pencil or dowel, then insert the cutting, ensuring the hormone-coated part is within the soil. Gently firm the soil around the stem.
- Water Gently: Water the soil thoroughly but softly. You don’t want to dislodge the cuttings.
- Create Humidity: Cover the pots with a clear plastic bag or a cloche. This traps moisture and keeps the leaves from drying out while they try to root.
The “Secret Sauce” (Pro Tips)
Now, for a couple of things I’ve learned along the way that really make a difference:
- Don’t let the leaves touch the water. If you’re doing a water propagation experiment (which is trickier for woody plants like lavender), ensure only the stem is submerged. Any leaves wilting into the water will quickly rot and take your cutting with them. It’s a quick ticket to failure!
- Bottom heat is your friend. Especially if your propagation space is a bit cooler, a gentle heating mat placed underneath your pots can significantly speed up root development. That little bit of warmth encourages the plant to start setting roots.
Aftercare & Troubleshooting
Once your cuttings are potted, keep them in a bright, indirect light spot. Water sparingly, only when the top inch of soil feels dry to the touch. You’ll know your cuttings are rooting when you see new leaf growth or feel a slight resistance when you gently tug on the stem. This can take anywhere from 4 to 8 weeks, sometimes longer.
The most common issue you’ll face is rot. If you see cuttings turning black and mushy, it’s likely due to too much moisture and not enough air circulation. Ensure your soil is always free-draining and that you haven’t overwatered. If you see mold, remove the affected cutting immediately and improve ventilation.
A Encouraging Closing
Propagating Lavandula coronopifolia is a journey, and like any good journey, it requires a little patience. Don’t be discouraged if not every cutting takes. Observe, learn, and enjoy the process of bringing new life into your garden. Soon enough, you’ll have a whole new collection of fragrant lavender to share! Happy gardening!
Resource:
https://identify.plantnet.org/k-world-flora/species/Lavandula%20coronopifolia%20Poir./data