Hello there, fellow plant enthusiasts! I’m so happy you’ve stopped by. Today, we’re diving into the wonderful world of Eriosyce nigrihorrida. If its unique, spiky charm hasn’t already captured your heart, I suspect it will after this.
The Allure of Eriosyce nigrihorrida
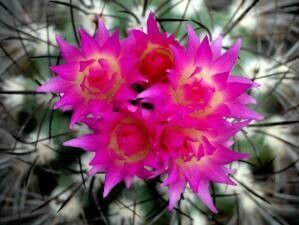
This striking cactus, with its hairy areoles and often clustered growth, is a real conversation starter. For me, seeing a new head emerge from a parent plant or coaxing a tiny pup into a robust specimen is just one of gardening’s pure joys. It’s incredibly rewarding to share your passion by gifting a propagation or simply expanding your own collection. Now, for the big question: is it easy for beginners? To be honest, it’s moderately easy. It requires a bit of attention to detail, but with the right approach, you’ll be successful.
The Best Time to Start
The absolute best time to get your hands dirty with Eriosyce nigrihorrida propagation is during its active growing season. For most of us, this means late spring through summer. You’ll want to start when the plant is actively putting on new growth and has plenty of energy. Avoid propagating when the plant is dormant in winter or if it’s stressed from extreme heat or cold.
Supplies You’ll Need
Gathering your tools beforehand makes the whole process much smoother. Here’s what I always have on hand:
- Well-draining potting mix: A cactus and succulent mix is a great base. I often amend mine with extra perlite or pumice for even better aeration.
- Sharp, sterile pruning shears or a sharp knife: Clean tools are crucial to prevent disease.
- Rooting hormone (optional but helpful): Especially for cuttings, this can give them a nice boost.
- A small pot or tray: Make sure it has drainage holes!
- Gravel or small stones: For top dressing.
- A spray bottle: For gentle watering.
- Gloves: Cacti can be pokey!
Propagation Methods
Eriosyce nigrihorrida is best propagated through two main methods: offsets (pups) and stem cuttings.
Propagating from Offsets (Pups)
This is often the easiest and most successful method. You’ll notice new little plantlets, or “pups,” growing from the base of your mature cactus.
- Identify a healthy pup. Look for one that’s a decent size, not just a tiny bud.
- Gently separate the pup. Carefully use your knife or shears to cut the pup away from the parent plant. Try to get a clean cut, and if possible, retain a small bit of the pup’s base to encourage rooting.
- Allow it to callus. This is a critical step! Place the separated pup in a dry, bright place with good air circulation for 2-7 days. You’ll see the cut end dry and form a hard “scab” or callus. This prevents rot when planted in soil.
- Pot it up. Once callused, plant the pup in your well-draining cactus mix. Don’t bury it too deeply; just enough so it stands upright. You can add a thin layer of gravel on top for stability and to help keep the base dry.
- Wait to water. Resist the urge to water immediately. Wait at least a week, and even then, water very sparingly. You’re encouraging the plant to reach for moisture, which stimulates root growth.
Propagating from Stem Cuttings (Less Common, but Possible)
If you have a larger specimen that needs trimming or want to try something new, you can take cuttings.
- Select a healthy stem or segment. Look for a firm, well-established part of the cactus.
- Make a clean cut. Using your sterile shears or knife, make a clean cut to remove the desired section.
- Allow it to callus. Just like with offsets, this is essential. Let the cutting dry and form a callus for several days to a week or more, depending on humidity.
- Apply rooting hormone (optional). If using, dip the callused end into rooting hormone powder.
- Pot it up. Plant the callused end into your prepared cactus mix.
- Water sparingly. Again, wait at least a week before giving it a light watering.
The “Secret Sauce” (Pro Tips)
Here are a couple of things I’ve learned over the years that make a real difference:
- Think “dry, dry, dry” initially. Cacti hate soggy feet, especially when they’re trying to establish roots. Overwatering at this stage is the quickest way to a mushy end. My rule of thumb is to water very, very lightly only after I see some sign of new growth or when the soil is bone dry and has been for a while.
- Consider a little gentle warmth. If you’re propagating in cooler months or your home is a bit chilly, placing your pots on a heat mat can significantly speed up root development. Not hot, just gently warm to the touch.
Aftercare & Troubleshooting
Once your propagated Eriosyce nigrihorrida has developed roots – you might see it looking a bit plumper or even starting to grow a new tip – you can gradually transition to more regular watering. Water thoroughly when the soil is dry, and then let it dry out completely again.
The most common issue you’ll face is rot. Signs include mushiness, darkening at the base, or a generally limp appearance. If you see this, it’s usually a sign of too much moisture. Try to remove the affected part with your sterile knife and allow the remaining healthy section to callus over again before repotting in fresh, dry soil. Sometimes, it’s just too far gone, and that’s part of learning!
A Word of Encouragement
Propagating plants is a journey. Some will take off like rockets, and others will be more stubborn. Be patient with your little Eriosyce nigrihorrida babies. Enjoy the process of nurturing something new, and celebrate every tiny success. Happy growing!
Resource: