Hello, fellow plant enthusiasts! I’m so excited to chat with you today about a plant that has really captured my heart over the years: Codia mackeeana. If you’re looking for a bit of architectural interest and a plant that just feels sophisticated, this is it. Its striking, upright leaves add such a dramatic flair to any indoor space. And the best part? You can easily multiply this beauty yourself! Propagating Codia mackeeana is surprisingly straightforward, making it a wonderful project for both seasoned gardeners and those just starting out on their plant journey. Don’t feel intimidated; I’ll guide you through every step.
The Best Time to Start
For the most success, I always recommend starting your Codia mackeeana propagation in the spring or early summer. This is when the plant is actively growing and has the most energy to put into developing new roots. You’ll notice new shoots and strong, healthy leaves – those are your cues that it’s ready to share!
Supplies You’ll Need
Before we get our hands dirty, let’s gather our tools:
- Sharp Pruning Shears or a Knife: Cleanliness is key for preventing disease.
- Rooting Hormone (Optional but Recommended): This little powder can significantly boost your success rate.
- Well-Draining Potting Mix: I love a blend of perlite, peat moss, and coco coir for this. A cactus/succulent mix also works in a pinch.
- Small Pots or Trays: With drainage holes, of course!
- Watering Can: For gentle watering.
- Plastic Bag or Dome: To create a humid microclimate.
- Patience! This is the most important ingredient.
Propagation Methods
Let’s get to the fun part! Here are my go-to methods for multiplying Codia mackeeana:
1. Stem Cuttings: This is my absolute favorite way to propagate this plant.
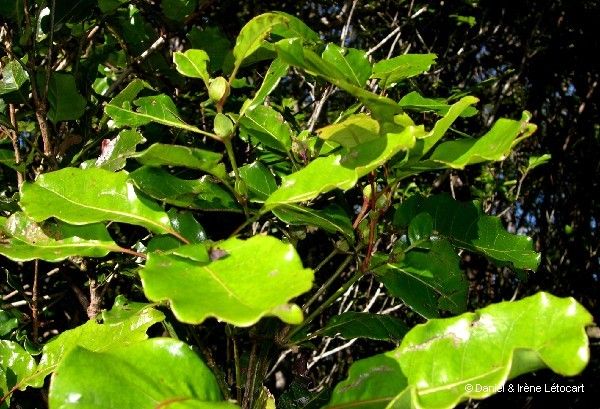
*   **Select Your Mother Plant:** Choose a healthy, mature *Codia mackeeana* with strong, upright stems.
*   **Take Your Cuttings:** Using your **clean, sharp shears**, cut stems that are about **4-6 inches long**. Try to get them from a part of the stem that has at least **two leaf nodes** (where the leaves attach to the stem). Make your cut just below a leaf node.
*   **Prepare the Cuttings:** Gently **remove the lower leaves** from the cutting, exposing the nodes. This is where the roots will emerge. If your cutting is very large, you can even cut it in half lengthwise, or remove some of the larger leaves to reduce water loss.
*   **Apply Rooting Hormone (Optional):** Dip the cut end of the stem into rooting hormone powder, tapping off any excess.
*   **Plant Your Cuttings:** Fill your small pots with the well-draining potting mix. Make a small hole in the center with your finger or a pencil and **carefully insert the cut end of the stem**. Gently firm the soil around it.
*   **Water Gently:** Water the soil thoroughly but **gently**, so you don't dislodge the cutting.
*   **Create Humidity:** Cover the pot loosely with a plastic bag or place it in a propagation tray with a dome to create a humid environment. Make sure the leaves **don't touch the inside of the bag**.
2. Division: If your Codia mackeeana has become quite bushy and is developing multiple new shoots from the base, division is a great option.
*   **Gently Remove from Pot:** Carefully take the entire plant out of its pot.
*   **Inspect the Roots:** Gently tease apart the root ball. You're looking for sections with their own established roots and some healthy foliage.
*   **Separate the Divisions:** Using your hands or a clean knife, carefully **separate the plant into smaller sections**, ensuring each section has a good amount of roots attached.
*   **Re-pot Divisions:** Plant each division into its own pot filled with the well-draining potting mix, just as you would a new plant. Water thoroughly.
The “Secret Sauce” (Pro Tips)
Here are a couple of tricks that have really upped my propagation game:
- Bottom Heat is Your Friend: I’ve found that placing propagation trays on a gentle heating mat makes a world of difference. Roots are much more inclined to form when the soil is consistently warm. You don’t need it super hot, just a gentle, consistent warmth.
- The “Callusing” Trick: For stem cuttings, I sometimes let them sit out in a dry place for a day or two after taking them before planting. This allows the cut end to “callus over,” which can help prevent rot and encourage root formation. It sounds counterintuitive, but it often works wonders!
Aftercare & Troubleshooting
Once your cuttings have been planted, the waiting game begins!
- Light: Place your pots in a bright spot with indirect light. Avoid direct sunlight, which can scorch the young leaves.
- Watering: Keep the soil consistently moist but not soggy. Check the soil moisture by sticking your finger about an inch deep. Water when the top inch feels dry. If you used a plastic bag, open it for a few hours each day to allow for air circulation and prevent fungal issues.
- Root Check: After a few weeks, you can gently tug on a stem. If there’s resistance, that’s a good sign roots are forming! You can also look for new leaf growth.
- Troubleshooting: The most common issue is rot. This usually happens if the soil stays too wet or if there’s poor air circulation. If you see a cutting turning mushy or black, sadly, it’s likely lost. Remove infected cuttings immediately to prevent it from spreading. Another issue can be drying out, which is why the humidity dome or plastic bag is so important initially.
A Encouraging Closing
Propagating plants is a journey of observation and patience. Some cuttings will root quickly, others might take their sweet time. Don’t get discouraged if you have a few failures along the way – it happens to all of us! Just keep trying, learn from what you see, and celebrate every new root you discover. Enjoy the process of nurturing these little green babies into beautiful, independent plants. Happy propagating!
Resource: