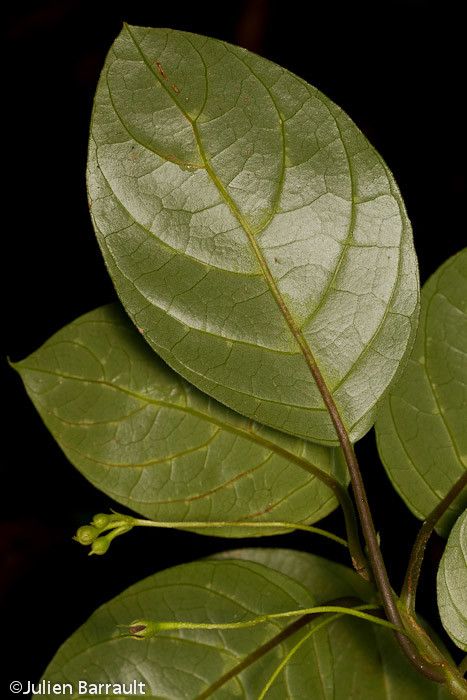
Oh, the sheer joy of Depanthus pubescens! If you’ve ever seen these beauties gracing a garden or a friend’s home, you know that velvety texture and those delicate blooms are something special. Propagating them isn’t just about getting more plants; it’s about unlocking a little bit of that magic yourself. And guess what? While they have their quirks, I’ve found them to be quite rewarding for even those dipping their toes into propagation for the first time.
The Best Time to Start
For Depanthus pubescens, spring is truly your golden window. Think of it like this: the plant is waking up from its winter nap, full of vigor and ready to grow. Taking cuttings or dividing when the energy is flowing is key to getting those new roots to establish quickly. You want to aim for when new, soft growth is appearing, not the old, woody stems.
Supplies You’ll Need
Gathering your tools beforehand makes the process so much smoother. Here’s what I usually have on hand:
- Sharp pruning shears or a clean knife: For making those crucial, clean cuts.
- Rooting hormone (optional but recommended): This gives your cuttings a little extra boost. Look for one specifically for stem cuttings.
- Well-draining potting mix: A good blend is about 50% peat moss or coco coir and 50% perlite or coarse sand. You want to avoid anything that holds too much moisture.
- Small pots or trays: Clean, of course!
- Plastic bags or a propagator lid: To create that humid environment new cuttings love.
- Watering can with a fine rose or spray bottle: For gentle watering.
Propagation Methods
I find Depanthus pubescens responds beautifully to a couple of methods.
Stem Cuttings
This is my go-to for Depanthus.
- Take your cuttings: In spring, select healthy, non-flowering stems. You’re looking for pieces that are about 4-6 inches long. Make a clean cut just below a leaf node, which is that little bump where a leaf attaches to the stem.
- Prepare the cuttings: Gently remove the lower leaves. You want just a couple of leaves at the very top. This reduces water loss.
- Apply rooting hormone: Dip the cut end into your rooting hormone, tapping off any excess.
- Plant your cuttings: Fill your pots with your well-draining mix and gently insert the cuttings. Make sure the leaf nodes you removed are buried in the soil.
- Water gently: Give them a light watering to settle the soil around the cuttings.
- Create humidity: Cover the pots with a plastic bag, securing it around the pot, or place them in a propagator. This traps moisture.
- Provide warmth: Place them in a bright spot, but out of direct sunlight. A little warmth from the bottom can really speed things up – think of a heat mat if you have one.
Water Propagation
This is a simpler, more visual method.
- Select and cut: Similar to stem cuttings, choose healthy stems and make clean cuts. Again, remove the lower leaves.
- Place in water: Put the cuttings in a clean jar or vase of water. Ensure no leaves are submerged in the water. This is super important to prevent rot.
- Change water regularly: Refresh the water every few days to keep it clean and oxygenated.
- Location: Place the jar in a bright spot, away from direct sun.
- Watch for roots: You should start seeing roots emerge from the leaf nodes in a few weeks. Once the roots are about an inch long, it’s time to pot them up.
The “Secret Sauce”
Here are a couple of things I’ve learned over the years that make a real difference:
- Bottom Heat is Your Friend: I mentioned it, but it bears repeating. Providing a bit of gentle warmth from below – just enough to feel slightly warm to the touch – dramatically encourages root development. It mimics ideal natural conditions.
- Don’t Rush the Potting Up: Even when you see roots, wait until they’re robust. For cuttings in soil, give them a gentle tug to feel resistance. For water-propagated plants, wait for those roots to be a good few inches long and a bit branched. This ensures they can handle the transition to soil.
Aftercare & Troubleshooting
Once your Depanthus have roots – hurrah!
- Transitioning: If you used water propagation, carefully pot your rooted cuttings into your well-draining mix. Start them in small pots.
- Watering: Water them in well, then let the surface of the soil dry out slightly between waterings. Avoid waterlogging; that’s the quickest way to invite rot.
- Light: Keep them in bright, indirect light. As they grow stronger, you can gradually introduce them to more light.
- Signs of Trouble: The biggest culprit is rot. If your cuttings turn mushy and dark, or if your rooted plants start to yellow and wilt despite consistent watering, it’s usually a sign of too much moisture. If you see this, try to dry things out and ensure good airflow. Sometimes, a cutting is just a dud – don’t get discouraged!
A Encouraging Closing
Growing new plants from cuttings is a little act of faith. Be patient with your Depanthus pubescens. Take joy in the process of nurturing these tiny beginnings. Each new sprout is a testament to nature’s resilience and your green thumb’s growing wisdom. Happy propagating!
Resource:
https://identify.plantnet.org/k-world-flora/species/Depanthus%20pubescens%20Guillaumin/data