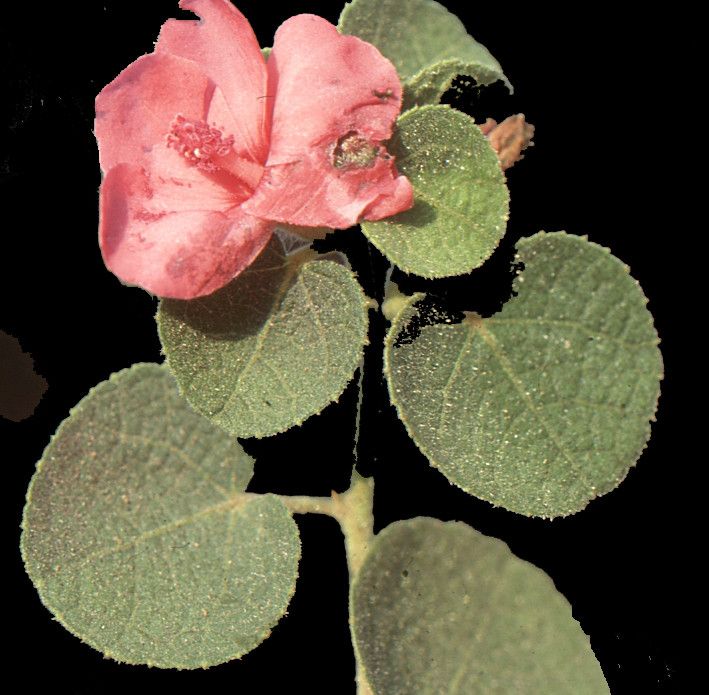
Hello, fellow plant lovers! I’m so excited to chat with you today about a plant that has brought a delightful splash of charm to my own garden and many others: Urena rigida. You might know it by its common name, the Pink Mallow or sometimes Tropical Mallow. I just adore its cheerful, bright pink, hibiscus-like flowers that keep on blooming for ages, especially in warmer weather. Plus, it’s a fantastic spot for pollinators, which is always a win in my book.
Now, if you’re new to the gardening scene, you might be wondering if Urena rigida is a good plant to start with for propagation. I’d say it’s moderately easy. It’s not quite as foolproof as some of the really fast growers, but with a little attention and the right approach, you’ll be celebrating success. And trust me, nurturing a new plant from a tiny cutting is one of the most rewarding feelings a gardener can experience!
The Best Time to Start
For the highest chance of success with Urena rigida, I’ve found that the late spring to early summer is absolutely prime time. This is when the plant is actively growing, and the stems have a good amount of energy stored up. You’re looking for semi-hardwood cuttings. These are stems that are neither brand new and soft, nor old and woody. They should be quite firm, but still have a bit of flexibility to them. Think of it like a pencil – firm, but you can still bend it a little without snapping.
Supplies You’ll Need
Gathering your supplies beforehand makes the whole process so much smoother. Here’s what I always have on hand:
- Sharp Pruning Shears or a Clean Knife: For making nice, clean cuts.
- Rooting Hormone (Optional, but Recommended): A powder or gel can really give your cuttings a boost.
- Potting Mix: A well-draining mix is crucial. I like to use a blend of peat moss or coco coir and perlite or coarse sand (about a 50/50 ratio). You can also buy specialized propagation mixes.
- Small Pots or Trays: With drainage holes, of course! Small nursery pots are perfect.
- Plastic Bags or a Clear Dome: To create a humid environment.
- Watering Can or Mister: For gentle watering.
- Labels: To keep track of what you’ve planted!
Propagation Methods
There are a couple of ways to go about propagating Urena rigida, but my favorite and usually most successful is through stem cuttings.
Stem Cuttings:
- Take Your Cuttings: On a nice, bright day during the growing season, select a healthy, vigorous stem. Using your sharp pruning shears or knife, cut a piece that’s about 4-6 inches long. Make the cut just below a leaf node (where a leaf attaches to the stem). This is where roots are most likely to form.
- Prepare the Cuttings: Gently remove the lower leaves from your cutting, leaving just the top couple of leaves. If the remaining leaves are quite large, I sometimes cut them in half horizontally. This reduces water loss while still allowing for some photosynthesis.
- Apply Rooting Hormone (Optional): Dip the cut end of the stem into your rooting hormone, tapping off any excess.
- Plant the Cuttings: Fill your small pots with your well-draining potting mix. Make a hole in the center with a pencil or your finger. Insert the cutting into the hole, ensuring the leaf nodes are buried in the soil. Gently firm the soil around the base.
- Water Gently: Water the soil thoroughly but gently. You don’t want to dislodge the cuttings.
- Create Humidity: This is key! You can either place a clear plastic bag over the pot, making sure it doesn’t touch the leaves, or use a clear propagating dome. This traps moisture and keeps the humidity high, which is essential for the cuttings to root. Place the pots in a bright spot with indirect sunlight, away from harsh direct sun. I love to pop mine on a heat mat if I have one!
The “Secret Sauce” (Pro Tips)
Over the years, I’ve picked up a few little tricks that seem to make a big difference.
- Don’t Let the Leaves Touch the Water (if Water Propagating): While I primarily use soil for Urena rigida, some folks try water propagation. If you do, make absolutely sure the leaves never sit in the water. They’ll rot faster than you can say “green thumb”!
- Bottom Heat is Your Friend: Urena rigida roots much faster when its base is warm. A heating mat placed under your pots can dramatically speed up the rooting process. You can find these at most garden centers and online.
- A Gentle Tap Test: After a few weeks, when you think your cuttings might be rooted, give one a very gentle tug. If you feel resistance, it’s a good sign roots are forming. Don’t yank it out though – you want to leave that little root system undisturbed!
Aftercare & Troubleshooting
Once you start seeing new growth, or if your gentle tug test reveals resistance, congratulations! Your cuttings are likely on their way to becoming independent plants.
- Acclimatize: If you’ve been using a plastic bag or dome, gradually reduce the humidity over a week or two. Start by lifting the bag for a bit each day, then leave it off for longer periods. This helps the new plant get used to the drier air.
- Watering: Keep the soil consistently moist but not waterlogged. Water when the top inch of soil feels dry.
- Transplanting: Once your new Urena rigida is robust enough and has a good root system (you might see roots emerging from the drainage holes), you can transplant it into a slightly larger pot or its final garden location.
Now, what if things don’t go as planned? The most common issue is rot. This usually happens when the soil is too wet and there isn’t enough air circulation. If you see your cutting turning mushy or black, it’s often a sign of rot, and unfortunately, it’s difficult to recover from at that stage. Don’t overwater, and ensure your potting mix is nice and airy. Sometimes, a cutting just doesn’t take – and that’s okay! It’s all part of the learning process. Just grab another stem and try again.
So there you have it! Propagating Urena rigida is a journey, and like all good gardening adventures, it requires patience and a bit of learning. Don’t be discouraged if your first attempt isn’t perfect. Each try gives you more insight. Enjoy the process, celebrate each tiny sprout, and soon you’ll have more of these delightful pink beauties to share (or keep all to yourself!). Happy gardening!
Resource:
https://identify.plantnet.org/k-world-flora/species/Urena%20rigida%20Wall.%20ex%20Mast./data