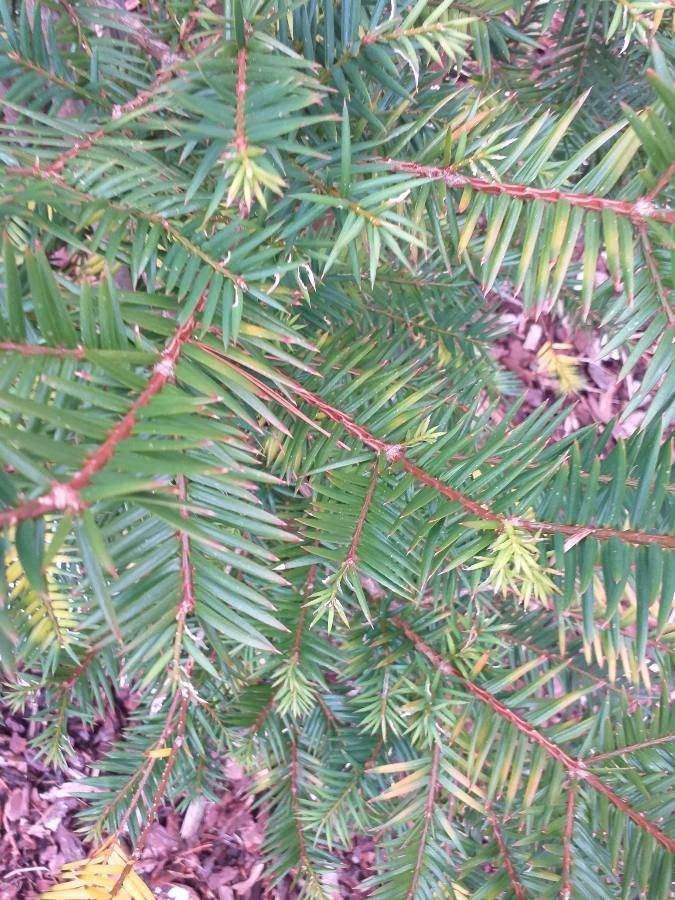
Hello, lovely gardeners! I’m so excited to chat with you today about a truly special tree: the Florida Torreya, or Torreya taxifolia. This beautiful conifer, with its rich green needles and unique habit, is often called the “stinking-cedar” because of its scent, but believe me, its fragrance is far from unpleasant once you get to know it. Growing from seed can be a slow game, and sadly, wild populations are struggling. That’s where we come in!
Propagating the Florida Torreya is a wonderfully rewarding endeavor. You’re not just getting a new plant; you’re contributing to the survival of a magnificent species. For beginners, I’ll be honest, this one can be a bit of a challenge. It’s not as straightforward as a coleus cutting, but with a little care and patience, it’s absolutely achievable. Think of it as a rewarding project that will teach you a lot!
The Best Time to Start
For the best chances of success, late spring to early summer is your sweet spot. Aim for when the plant is actively growing, but not stressed by extreme heat. You’re looking for those nice, semi-hardwood new shoots.
Supplies You’ll Need
Here’s a little toolkit to get you started:
- Sharp Pruning Shears or a Knife: Make sure they’re clean and sterile to prevent disease.
- Rooting Hormone: A good quality rooting powder or gel will give your cuttings a real boost.
- A Well-Draining Potting Mix: I like a blend of equal parts perlite, peat moss, and a bit of compost. You want it light and airy.
- Small Pots or Propagation Trays: Clean ones, of course!
- Plastic Bags or a Propagator: To maintain humidity.
- Watering Can with a Fine Rose: For gentle watering.
- Labels: To keep track of your projects!
Propagation Methods
While Torreya can be grown from seed, it’s a very slow and often difficult process. For quicker results and a more reliable method, stem cuttings are your go-to.
Stem Cuttings:
- Select Your Cuttings: Look for healthy, vigorous shoots that are about 4-6 inches long. They should be semi-hardwood – this means they’re not brand new and flexible, but not old and woody either. You should be able to snap one cleanly rather than bend it.
- Take the Cuttings: Using your clean shears or knife, make a clean cut just below a leaf node (where a leaf attaches to the stem). Remove any lower leaves, leaving just a few at the top. This prevents them from rotting in the soil.
- Apply Rooting Hormone: Dip the cut end of each cutting into your rooting hormone, tapping off any excess.
- Pot Them Up: Fill your small pots with your prepared potting mix and gently make a hole in the center with your finger or a pencil. Insert the cutting into the hole, ensuring the hormone-coated part is in contact with the soil. Firm the soil gently around the cutting.
- Create a Humid Environment: Water the soil lightly. Then, tent a clear plastic bag over the pot or place the pots inside a propagator. This keeps the humidity high, which is crucial for cuttings to develop roots. You can use a skewer or two to keep the bag from touching the leaves.
- Place in Suitable Location: Find a bright spot out of direct, harsh sunlight. A greenhouse or a bright, indirect window sill is ideal.
The “Secret Sauce” (Pro Tips)
Here are a few things I’ve learned over the years that can really make a difference:
- Bottom Heat is Your Friend: If you have a seedling mat or a warm spot in your house, placing your pots on it can significantly speed up root development. It mimics that lovely, warm soil of early summer.
- Don’t Overwater, But Don’t Let Them Dry Out: This is a delicate balance! The soil should feel consistently moist, like a wrung-out sponge, but never waterlogged. Overwatering is the quickest way to invite rot.
- Be Patient with the “Stink”: If you accidentally break a branch, you’ll notice that distinct scent. Don’t let it put you off! It’s just the tree’s way of being unique. The roots will eventually overcome this!
Aftercare & Troubleshooting
Once your cuttings have been in the propagator for a few weeks, you can gently tug on them. If you feel resistance, congratulations! Roots are forming. You’ll know they’re ready to be transplanted when they have a good, visible root system and new growth starts to appear.
Continue to keep them in their humid environment for a while longer, gradually introducing them to less humidity by opening the bag a little more each day. Water them carefully.
If your cuttings start to turn yellow and floppy, it’s usually a sign they’re struggling. Rot is the most common culprit, often caused by too much moisture. If you see any blackening or mushiness, sadly, that cutting is likely lost. Don’t get discouraged! Just try again with fresh cuttings and slightly drier soil.
Encouraging Closing
Propagating the Florida Torreya is a journey, and like all good gardening adventures, it requires patience and observation. Don’t be afraid to experiment and learn from each attempt. Seeing a tiny cutting transform into a beautiful new tree is one of the most satisfying feelings a gardener can experience. Happy propagating, everyone!
Resource:
https://identify.plantnet.org/k-world-flora/species/Torreya%20taxifolia%20Arn./data