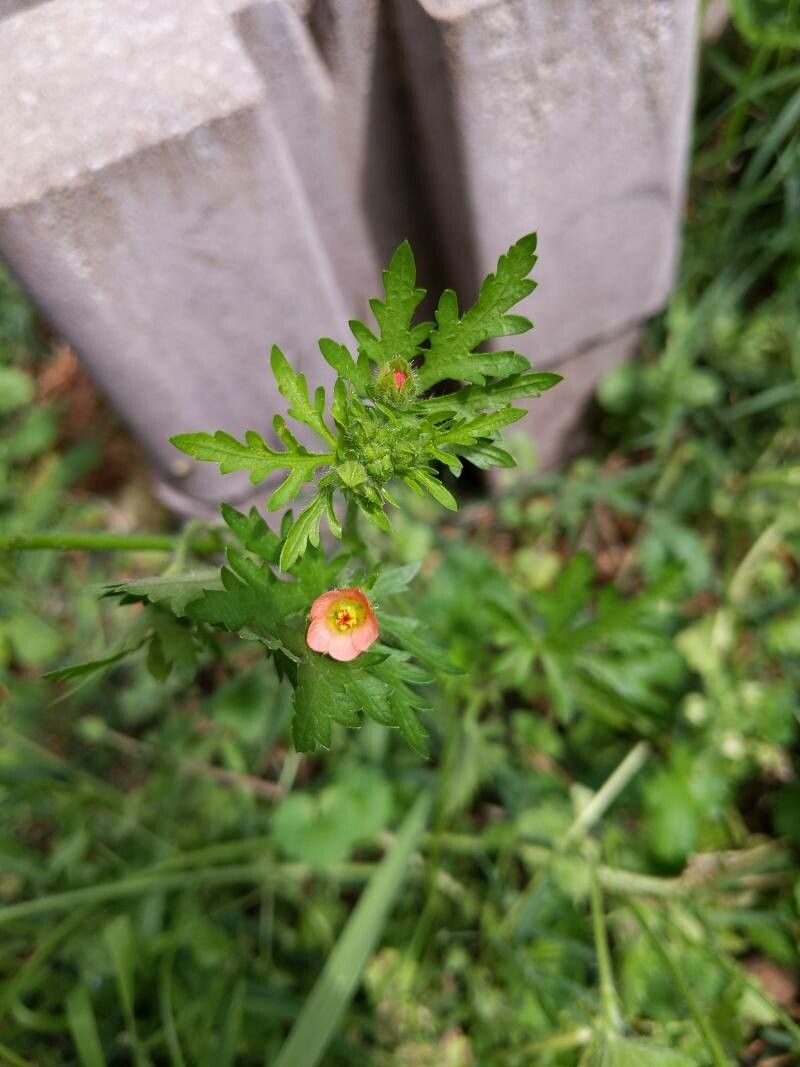
Oh, hello there! Come on in, grab a mug, and let’s chat about one of my garden favorites: Sphaeralcea pedatifida, or the wonderfully frilly Palmer’s Globemallow. If you haven’t met this beauty yet, it’s a Southwestern native with these delicate, palm-like leaves that truly stand out. And the flowers! Oh, the flowers are a joyful pop of apricot or coral, attracting all sorts of wonderful pollinators.
If you’re looking to bring more of this charm into your garden, or to share it with friends, propagating it is incredibly rewarding. Now, I won’t sugarcoat it – some plants are trickier than others, and Sphaeralcea pedatifida can be a little discerning. It’s not an absolute beginner plant, but with a bit of care and this guide, you’ll be well on your way to success.
The Best Time to Start
For the best chance of success with Sphaeralcea pedatifida, I like to work with softwood cuttings in late spring to early summer. This is when the plant is actively growing, full of vigor, and has pliable new stems. Older, woody stems just don’t root as readily. You can also have a go at propagating from seed, but cuttings usually give you a head start and are more reliable for recreating a specific parent plant.
Supplies You’ll Need
Before we get our hands dirty, let’s make sure we have everything at the ready. It makes the whole process smoother sailing:
- Sharp, clean pruning shears or a craft knife. Cleanliness is key to preventing disease.
- Rooting hormone powder (optional, but highly recommended for this species). I usually opt for one with a fungicide included.
- A well-draining potting mix. A good blend is 50% perlite and 50% peat moss or coco coir. Avoid heavy garden soil.
- Small pots or cell trays with drainage holes. Tiny 3-4 inch pots are perfect.
- A clear plastic bag or a propagation dome. This creates a humid environment.
- A spray bottle filled with clean water.
- A warm, bright location out of direct, harsh sun.
- Optional: A heat mat. This can significantly speed up root development.
Propagation Methods
Let’s dive into how we get these beauties started. My go-to for Sphaeralcea pedatifida is stem cuttings.
Softwood Stem Cuttings
- Take your cuttings: On a bright morning, select healthy, non-flowering stems. Using your clean shears or knife, take cuttings that are about 4-6 inches long. Make your cut just below a leaf node (where the leaves attach to the stem). This is where the magic happens for rooting.
- Prepare the cuttings: Gently remove the lower leaves, leaving just the top couple of sets. If you have any flower buds forming, nip them off too. They sap energy that we want the cutting to put into rooting.
- Apply rooting hormone: Dip the cut end of each stem into your rooting hormone powder, tapping off any excess. If you’re not using powder, a liquid rooting solution works too – just follow the product’s instructions.
- Plant them up: Fill your pots with your well-draining mix and lightly moisten it. Make a small hole in the center of the pot with your finger or a pencil. Insert the cut end of the stem into the hole, ensuring it reaches a decent depth. Gently firm the soil around it.
- Create humidity: Immediately after planting, give the cuttings a light misting with your spray bottle. Then, cover the pot with a clear plastic bag, propped up with a stake so it doesn’t touch the leaves, or place it under a propagation dome.
The “Secret Sauce”
Here are a couple of little tricks I’ve picked up over the years that seem to really give Sphaeralcea pedatifida cuttings the boost they need:
- The Bottom Heat Trick: Honestly, this is a game-changer, especially if your space isn’t naturally warm. Placing your pots on a gentle heat mat (around 70-75°F, or 21-24°C) makes a world of difference. It encourages the plant to initiate root development from the base, which is exactly what we want. You’ll see roots form much faster than without it.
- Air Circulation is Crucial (But Not Too Much): While we need that humidity, we don’t want stagnant, wet air. Once a day, for about 10-15 minutes, lift the plastic bag or open the propagation dome to allow for a bit of fresh air exchange. This helps prevent fungal diseases from setting in. It’s a delicate balance, but worth the attention.
Aftercare & Troubleshooting
Once your cuttings are planted, place them in that warm, bright spot. I like to check them every couple of days. You want the soil to be consistently moist, but never soggy. Mist the leaves if they look a bit wilted.
You’ll know your cuttings are rooting when you see new growth emerging from the top. This usually takes anywhere from 4 to 8 weeks, sometimes a bit longer. You can also give a very gentle tug on a cutting; if you feel resistance, those roots are starting to form!
Now, what if things aren’t going as planned? The most common issue is rot. If you see your cuttings turning mushy, blackening, or falling over, it’s usually a sign of too much moisture and not enough air circulation. Remove any rotten cuttings immediately. Don’t be discouraged if some don’t make it; that’s part of the learning process! It’s better to lose a few than to have them all succumb to rot.
Once you’ve got good root development and new growth, it’s time to gradually acclimate them to lower humidity. Start by removing the plastic bag for longer periods each day. After a week or two, you can remove it completely. You can then pot them up into slightly larger individual pots, still using that well-draining mix.
A Closing Thought
Propagating Sphaeralcea pedatifida is a wonderful way to connect with nature and expand your garden abundance. Be patient with these lovely plants. Watch them, learn from them, and enjoy the process of bringing new life into being. Happy gardening!
Resource: