Well hello there, fellow garden enthusiast! Grab a cup of your favorite brew, because today we’re diving into the wonderful world of propagating Aristolochia lindneri. I’ve been coaxing new life from my plants for two decades now, and let me tell you, there’s a special kind of magic in watching a little cutting transform into a whole new bloom.
Why You’ll Love Growing Aristolochia lindneri
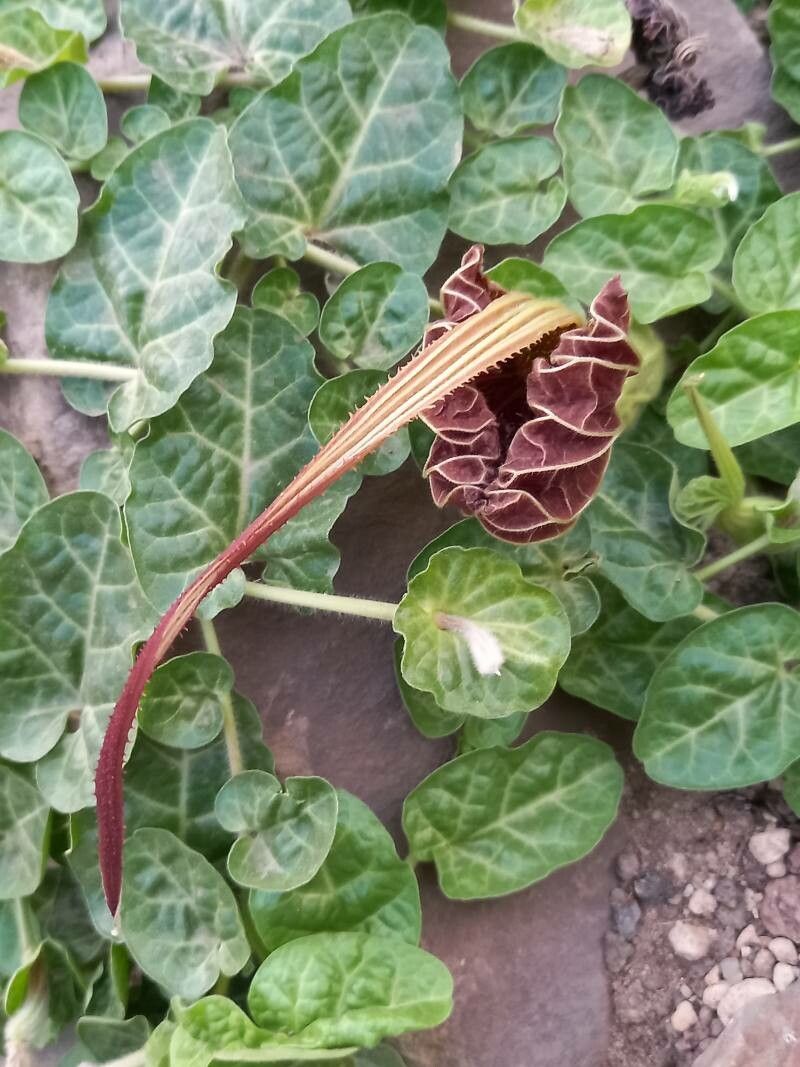
Aristolochia lindneri, often called Dutchman’s Pipe, is just… well, it’s breathtaking. Those unique, pipe-shaped flowers are unlike anything else in the garden, attracting fascinating pollinators too! Propagating it yourself is incredibly rewarding. You get to share this beauty with friends, fill more of your own garden, and really connect with the plant’s life cycle. While it’s not the absolute easiest plant to propagate for a complete beginner, with a little patience and these tips, you’ll be well on your way.
When the Magic Happens: The Best Time to Propagate
For the highest success rate with Aristolochia lindneri, I always aim for late spring to early summer. This is when the plant is actively growing, pushing out new shoots. These softwood cuttings are supple and full of energy, making them far more likely to root than older, woodier stems. Think of it like a teenager – full of vim and vigor!
Your Propagation Toolkit
Gathering up your supplies beforehand makes the whole process much smoother. Here’s what you’ll need:
- A clean, sharp pair of pruning shears or a hobby knife. Cleanliness is key to preventing disease.
- Rooting hormone. This is a powdered or gel product that significantly boosts your chances of success. I generally prefer a liquid or gel, as it adheres well.
- Well-draining potting mix. A common mix I use is one part peat moss, one part perlite, and one part vermiculite. Alternatively, a good quality seed-starting mix will also work.
- Small pots or seedling trays. Choose pots with drainage holes!
- A clear plastic bag or a propagation dome. This creates a humid environment for your cuttings.
- A spray bottle filled with clean water. For misting.
- Labels and a permanent marker. Trust me, you’ll forget what you planted where!
Bringing New Life: Propagation Methods
There are a couple of ways to get new Aristolochia lindneri plants going, but my go-to is stem cuttings, as it’s generally the most reliable.
Method 1: Stem Cuttings
- Selecting Your Cuttings: On a healthy, actively growing stem, look for a section that’s about 4-6 inches long and has at least two sets of leaves. Make your cut just below a leaf node. This is the spot where leaves emerge from the stem, and it’s where roots are most likely to form. The stem should be slightly flexible but not floppy.
- Preparing the Cuttings: Gently remove the lower leaves, leaving only the top one or two leaves intact. If the remaining leaves are quite large, you can cut them in half horizontally to reduce water loss.
- Dipping in Rooting Hormone: Dip the cut end of the stem into your rooting hormone, ensuring it’s thoroughly coated about half an inch up from the cut. Gently tap off any excess.
- Planting: Fill your small pots with your prepared potting mix. Make a hole in the center of the soil with your finger or a pencil. Carefully insert the cutting into the hole, ensuring the rooting hormone-coated end is in contact with the soil. Gently firm the soil around the stem.
- Creating the Humid Environment: Water the soil lightly until it’s moist but not soggy. Then, place your pot inside a clear plastic bag, sealing it loosely, or cover it with a propagation dome. This traps humidity, which is crucial for cuttings.
- Placement: Place your potted cuttings in a bright, indirect light location. Avoid direct sunlight, which can scorch the delicate leaves and overheat the environment inside the bag.
Method 2: Water Propagation (for the optimistic!)
While less consistent for Aristolochia lindneri than stem cuttings in soil, some gardeners have success with water.
- Prepare Cuttings: Follow steps 1 and 2 from the stem cutting method. You can usually leave these cuttings a bit longer in water.
- Place in Water: Place the prepared cuttings in a jar or vase filled with clean water. Ensure no leaves are submerged, as this will lead to rot.
- Location & Light: Place the jar in a bright, indirect light spot.
- Changing Water: Change the water every few days to keep it fresh and prevent bacterial growth.
- Transplanting: Once you see decent roots forming (pencil-thick is good!), you can carefully transplant them into your well-draining potting mix. Be very gentle with these young roots.
The “Secret Sauce” – My Insider Tips
After years of trial and error, I’ve picked up a few tricks that can really make a difference.
- Bottom Heat is Your Friend: If you have access to a propagation mat or a warm windowsill, placing your pots on it can dramatically speed up the rooting process. This gentle warmth encourages root development.
- Don’t Be Afraid to “Sacrifice” a Little: When taking cuttings, I often include a piece that’s a bit woodier at the very bottom, as this can sometimes contain beneficial microbes that aid rooting. Just make sure the majority of the stem is still pliable.
- A Gentle Mist is Better Than a Flood: Repeatedly misting your cuttings in the bag every day or two is generally better than watering deeply. You want to maintain humidity without waterlogging the soil, which is the fastest route to rot.
Aftercare and What to Watch For
Once you start seeing new leaf growth on your cuttings, it’s a fantastic sign that roots are forming!
- Acclimatization: Once you see good root development (you can gently tug on the cutting – if there’s resistance, they’re rooting), it’s time to gradually acclimatize them to normal conditions. Start by opening the plastic bag or propagation dome a little each day for a week.
- Watering: Water thoroughly when the top inch of soil feels dry. Overwatering is the most common mistake, so err on the side of caution.
- Troubleshooting: The biggest enemy here is rot. If your cutting turns black and mushy, it’s usually a sign of too much moisture and not enough air circulation. Unfortunately, a rotten cutting usually can’t be saved. Fungal diseases can also appear as brown spots on leaves; ensure good air flow and avoid wetting the foliage when watering.
Go Forth and Grow!
Propagating Aristolochia lindneri is a journey, not a race. There will be times when some cuttings don’t make it, and that’s perfectly okay. The satisfaction of seeing those first roots emerge and then watching your new plant flourish is truly unmatched. Be patient, be observant, and most importantly, enjoy the process of creating more beauty for your garden. Happy propagating!
Resource:
https://identify.plantnet.org/k-world-flora/species/Aristolochia%20lindneri%20A.Berger/data