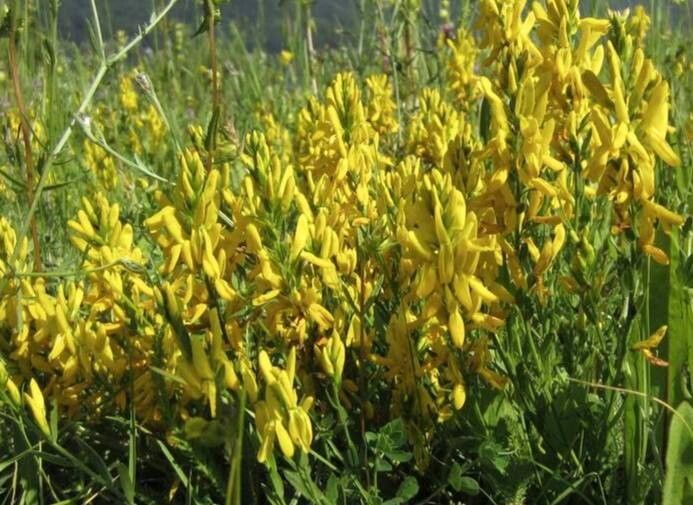
Hey there, fellow plant lovers! I’m so excited to chat with you today about a real gem in the garden: Genista januensis, or as it’s often affectionately called, the Madeira Broom. If you’ve ever seen this plant in full bloom, you know why it’s so special. Its cascading sprays of sunshine-yellow flowers are absolutely breathtaking, and it adds a touch of wild, Mediterranean charm to any space. Plus, there’s a unique kind of joy that comes from nurturing a new plant from a tiny cutting or seed. It’s like magic, but totally achievable with a little know-how. For those of you just starting out, Genista januensis can be a bit of a delicate flower, but don’t let that discourage you! With careful attention, you can absolutely succeed.
The Best Time to Start
When it comes to coaxing new life from your Genista januensis, timing is everything. I’ve found the sweet spot is late spring to early summer. This is when the plant is actively growing, and the new stems are semi-hardwood, meaning they’ve started to firm up but are still flexible enough to root. Starting then gives them the whole growing season to get established.
Supplies You’ll Need
Before we dive in, let’s make sure you have your toolkit ready. Here’s what I always have on hand for propagating Genista januensis:
- Sharp pruning shears or a clean craft knife: For making precise cuts.
- Rooting hormone: A powdered or gel form can give your cuttings a helpful boost.
- A well-draining potting mix: I like to use a blend of equal parts peat moss or coco coir and perlite or coarse sand. This is crucial for preventing waterlogged soil.
- Small pots or propagation trays: With drainage holes, of course!
- Plastic bags or a propagator lid: To create a humid environment.
- Watering can with a fine rose or spray bottle: For gentle watering.
- Labels and a permanent marker: To keep track of what’s what!
Propagation Methods
Now for the fun part! Genista januensis is most successfully propagated from stem cuttings. Let’s break down how to do it.
Stem Cuttings are My Go-To:
- Select your parent plant: Choose a healthy, vigorous Genista januensis that’s free from pests or diseases.
- Take your cuttings: In late spring or early summer, look for new growth that is slightly firm but still bendy. Using your sharp shears or knife, take cuttings about 4-6 inches long. Make the cut just below a leaf node (where a leaf attaches to the stem).
- Prepare the cuttings: Gently strip off the lower leaves. You want to leave only a few leaves at the top to help the cutting photosynthesize. If the remaining leaves are very large, you can trim them in half to reduce moisture loss.
- Apply rooting hormone: Dip the cut end of each stem into a rooting hormone. Tap off any excess. This step is highly recommended for Genista januensis as it can be a bit slow to root otherwise.
- Plant the cuttings: Fill your small pots with your prepared, well-draining potting mix. Make a small hole in the center of the mix with your finger or a pencil. Insert the cut end of the stem into the hole, ensuring the rooting hormone isn’t rubbed off. Firm the soil gently around the base of the cutting.
- Create a humid environment: Water the soil lightly until it’s consistently moist but not soggy. Place the pot inside a clear plastic bag, sealing it around the rim of the pot with a rubber band, or put it in a propagator with a lid. This will trap humidity around the cuttings, which is vital for success.
- Provide the right conditions: Place your pots in a bright spot that gets indirect sunlight. Avoid direct sun, as it can scorch the delicate cuttings. A greenhouse or bright windowsill is perfect. You can also provide gentle bottom heat from a heat mat if you have one, which really encourages root development.
The “Secret Sauce” (Pro Tips)
Here are a couple of things I’ve learned over the years that make a real difference:
- Don’t let the leaves touch the water: If you’re propagating in water, which is less common but can work for Genista januensis with great care, make absolutely sure that the leaves are not submerged. Rot sets in quickly if they are! I always snip off lower leaves to prevent this.
- Use bottom heat: As I mentioned, a gentle warming from below makes a huge difference. Genista januensis roots respond wonderfully to this, significantly speeding up the process and increasing your success rate.
- Be patient with the wind-swept look: Sometimes the cuttings might look a bit droopy or leggy. Don’t panic! This is normal as they focus their energy on developing roots. Resist the urge to overwater them.
Aftercare & Troubleshooting
Once you start to see new growth or feel resistance when gently tugging on a cutting (a sure sign of roots!), it’s time to transition.
- Acclimate slowly: Gradually remove the plastic bag or propagator lid over a week or so to allow the cuttings to adjust to normal humidity.
- Watering: Keep the soil consistently moist but not waterlogged. Water when the top inch of soil feels dry to the touch.
- Transplanting: Once the new plants have a good root system and are large enough to handle, you can transplant them into their own small pots. Use a general-purpose potting mix at this stage.
- Watch for rot: The biggest enemy of cuttings is rot, which usually happens from overwatering or poor drainage. If you see stems turning mushy and black, it’s likely rot. Unfortunately, there’s not much you can do once it takes hold. It’s better to prevent it by ensuring good air circulation and not overwatering.
A Encouraging Closing
Growing new plants is an incredibly rewarding journey. Remember, not every cutting will make it, and that’s perfectly alright. The important thing is that you’re learning, experimenting, and connecting with nature. Be patient with your little Genista januensis cuttings; they’ll let you know when they’re ready. Happy propagating, and enjoy those beautiful yellow blooms in your future!
Resource:
https://identify.plantnet.org/k-world-flora/species/Genista%20januensis%20Viv./data