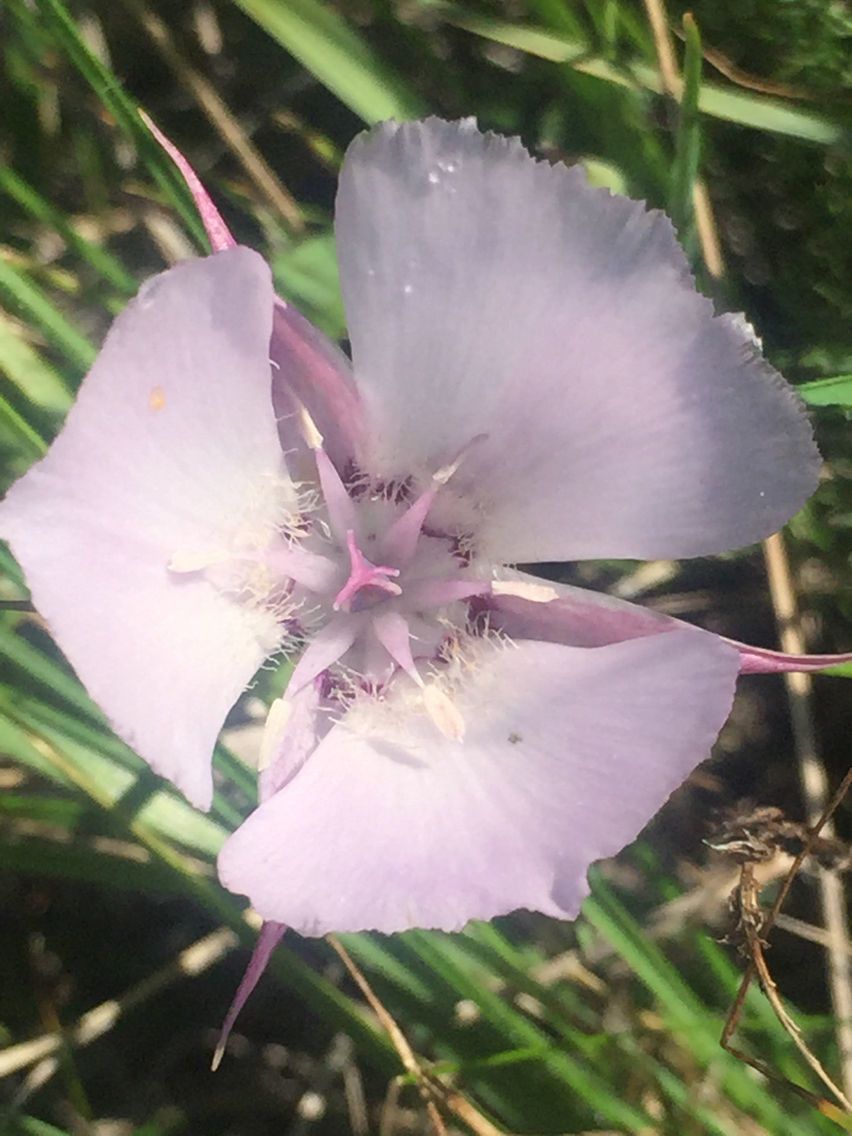
Hello, fellow garden enthusiasts! If you’re anything like me, you’ve probably fallen head over heels for the delicate beauty of Calochortus umbellatus. Also known as the Pacific Northwest Dwarf Mariposa Lily, these lovely blooms with their intricate markings and graceful presence are a real treat. And guess what? Propagating them can be incredibly rewarding, though I’ll be honest, they can be a bit of a picky plant to start with. Don’t let that deter you though; with a little guidance and patience, you can soon have a whole patch of your own!
The Best Time to Start
For Calochortus umbellatus, timing is everything. You’ll have the most success if you start your propagation efforts in the late summer or early fall, just as the plant has finished flowering and started to go dormant. This is when the bulbs are storing energy, making them prime candidates for successful division.
Supplies You’ll Need
Gathering your supplies beforehand makes the whole process much smoother. Here’s what I typically have on hand:
- A sharp, clean trowel or small spade
- Fine-pointed dibber
- A well-draining potting mix (I like to mix equal parts pumice, perlite, and a good quality potting soil)
- A small watering can with a fine rose
- Labels and a permanent marker
- (Optional but recommended for larger bulbs) A rooting hormone powder
- (Optional) A small mesh sieve to gently separate smaller bulbs
Propagation Methods: Division is Key!
For Calochortus umbellatus, the most effective and reliable method is propagation by division. These plants naturally form small offset bulbs around the main bulb.
- Gently Excavate: In late summer or early fall, when the foliage has died back, carefully dig around the main clump of bulbs using your trowel. Be gentle! Lily bulbs can be delicate.
- Clean Off the Soil: Once you’ve unearthed the clump, gently brush or rinse off as much of the soil as you can. You want to clearly see the main bulb and any smaller offsets attached to it. A small mesh sieve can be helpful here to remove clinging soil without damaging the bulbs.
- Separate the Offsets: Look for small bulbs that are attached to the main bulb by a thin stem or root. Carefully twist or use a clean knife to separate these offsets. While you can try to propagate very small bulblets, aim for those that are at least pea-sized for the best chance of success. If you’re using a rooting hormone, this is the time to dip the cut end of the offset into it.
- Planting Time: Prepare your pots or garden bed with your well-draining soil mix. Make a hole with your dibber or finger that’s about twice the depth of the bulb you’re planting. Place the offset bulb, pointed end up, into the hole and gently backfill with soil.
- Spacing is Important: Give your newly planted bulbs a little room. I usually space them about 3-4 inches apart, especially if I’m planting them in a garden bed. If you’re using pots, you can plant them a little closer, but still give them space to grow.
- Water Lightly: Give the newly planted bulbs a gentle watering. You don’t want to drench them, just lightly moisten the soil.
The “Secret Sauce” (Pro Tips)
Here are a couple of things I’ve learned over the years that really make a difference:
- Don’t Rush the Dormancy: I know it’s tempting to dig them up and peek as soon as they’re done flowering, but letting the foliage completely die back is crucial. This signals to the bulb that it’s time to store energy and prepare for the next season – and that also means developing those precious offsets.
- Embrace the Dry Spell: Once planted, Calochortus umbellatus prefers a period of dryness during their dormant phase. Resist the urge to overwater in the fall and winter. They’re native to areas with dry summers, so replicating that environment is key. Water only if the soil becomes bone dry for an extended period.
Aftercare & Troubleshooting
Once your bulbs are planted, the waiting game begins. Keep the soil lightly moist during the active growing season (spring and early summer). You’ll likely see them shoot up and bloom the following year, though it’s worth mentioning that very small offsets might take a year or two to mature and bloom.
The most common pitfall is rot, usually caused by too much moisture during the dormant season. You’ll notice the bulb becoming soft and mushy, and it will likely disintegrate. If you see signs of this, gently dig up the bulb and see if there’s a harder, viable part you can salvage and replant in drier conditions. If the whole thing has gone to mush, unfortunately, it’s time to let it go.
A Little Patience, A Lot of Beauty
Propagating Calochortus umbellatus is a journey, not a race. There’s something incredibly satisfying about nurturing these small bulbs into mature, blooming plants. Be patient with them, observe their needs, and enjoy the process of bringing more of these gorgeous lilies into your garden. Happy planting!
Resource:
https://identify.plantnet.org/k-world-flora/species/Calochortus%20umbellatus%20Alph.Wood/data