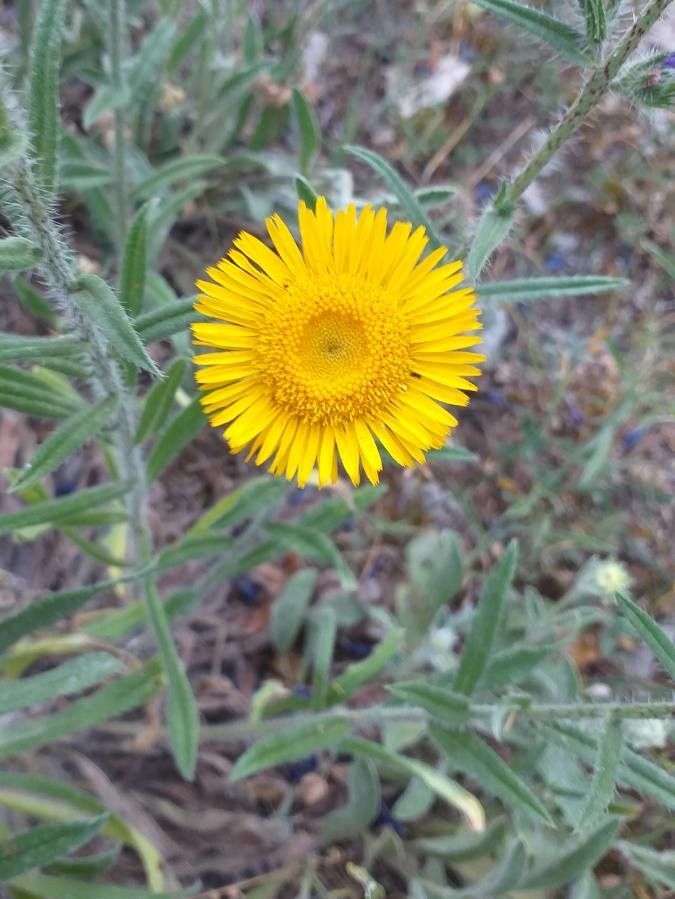
Oh, Pentanema montanum! Isn’t it just a delight? I remember the first time I saw those lovely, star-shaped blooms dotting a sunny hillside. It brings a bit of wild charm to any garden, doesn’t it? And the best part? You can easily bring that charm home by propagating it yourself. It’s a wonderfully rewarding way to expand your collection, and I promise, it’s not as daunting as it might seem. For beginners? I’d say it’s quite approachable, especially with a few guiding tips.
The Best Time to Start
When it comes to Pentanema montanum, timing is everything, and the sweet spot is late spring to early summer. This is when the plant is actively growing, full of vigor, and brimming with energy. You’ll be looking for new, healthy shoots that haven’t yet started to flower. That youthful exuberance is exactly what we need for successful propagation.
Supplies You’ll Need
To get your little Pentanema babies started, you’ll want to gather a few things. Don’t worry, it’s nothing too fancy!
- Clean, sharp pruning shears or a good craft knife: For making clean cuts.
- Rooting hormone (optional, but helpful): This little powder can give your cuttings a nice boost.
- Well-draining potting mix: I usually go for a 50/50 mix of seed starting mix and perlite or coarse sand. This is crucial to prevent soggy feet!
- Small pots or seed trays: Clean ones are a must to avoid introducing diseases.
- Watering can with a fine rose: Gentle watering is key.
- A plastic bag or propagation dome: To create a humid environment.
- Patience: The most important tool of all!
Propagation Methods
There are a couple of ways we can coax new life from your Pentanema, and both are pretty straightforward.
1. Stem Cuttings: My Go-To Method
This is often my favorite for Pentanema montanum because it’s so efficient.
- Select your cutting: Look for a healthy, non-flowering stem that’s about 4-6 inches long. Find a spot just below a leaf node (where the leaves join the stem).
- Make the cut: Use your clean shears or knife to make a sharp, decisive cut right below that leaf node.
- Prepare the cutting: Gently remove the lower leaves. You don’t want them to rot in the soil or water. Leave just a few leaves at the very top.
- Dip in rooting hormone (optional): If you’re using it, dip the cut end into the rooting hormone, tapping off any excess.
- Plant it up: Fill your small pots with your well-draining mix. Make a small hole in the center with your finger or a pencil.
- Insert the cutting: Place the cut end of the stem into the hole and gently firm the soil around it.
- Water gently: Give it a light watering to settle the soil.
- Create humidity: Place the pot inside a plastic bag or under a propagation dome. Ensure the leaves don’t touch the plastic if possible. Pop it on a bright windowsill, but out of direct, harsh sun.
2. Water Propagation: A Visual Treat
This method is so satisfying because you can actually see the roots forming!
- Select and prepare your cutting: Follow the same steps as for stem cuttings (selecting, cutting, and removing lower leaves).
- Place in water: Find a clean jar or glass. Fill it with lukewarm water.
- Submerge the cut end: Place the cutting in the water, making sure that none of the leaves are submerged. This is super important to prevent rot.
- Find a good spot: Like the cuttings, place the jar in bright, indirect light.
- Change the water regularly: This keeps things fresh and helps prevent bacterial growth. I usually change it every 2-3 days.
The “Secret Sauce” (Pro Tips)
Now, for a few little tricks I’ve learned over the years that really make a difference.
- Bottom Heat is Your Best Friend: If you’re struggling to get cuttings to root, especially if the weather is a bit cooler, using a little bottom heat can work wonders. A seedling heat mat set to a low temperature can significantly speed up root development.
- Don’t Rush the Transplant: For water propagation, I wait until the roots are at least an inch long and have started to branch a bit before I even think about potting them up. This gives them a stronger start.
- Cleanliness is Next to Godliness: I cannot stress this enough. Use sterilized pots, tools, and even fresh soil for your propagations. It’s the best defense against fungal diseases and rot, which are the biggest killers of baby plants.
Aftercare & Troubleshooting
Once you see those first tiny roots (hooray!), it’s time for a little extra TLC.
- For cuttings in soil: Gradually acclimate your new plant to less humidity by opening the plastic bag or dome for a few hours each day before removing it entirely. Continue to water when the top inch of soil feels dry.
- For water cuttings: Once your roots are substantial, carefully plant them into pots with your well-draining mix. Water them in well.
- Signs of trouble: The most common issue is rot, which usually manifests as a mushy, black stem. This often happens due to overwatering or poor drainage. If you see this, unfortunately, it’s usually a goner. Another sign of failure is a cutting that wilts and never recovers, which can indicate it’s not forming roots or the humidity wasn’t high enough.
A Little Encouragement to Finish
So there you have it! Propagating your lovely Pentanema montanum is a journey, not a race. Be patient, observe your cuttings, and celebrate those tiny victories. Seeing a new little plant emerge from what was just a piece of stem is one of gardening’s greatest joys. Happy propagating, and enjoy watching your new Pentanema family grow!
Resource: