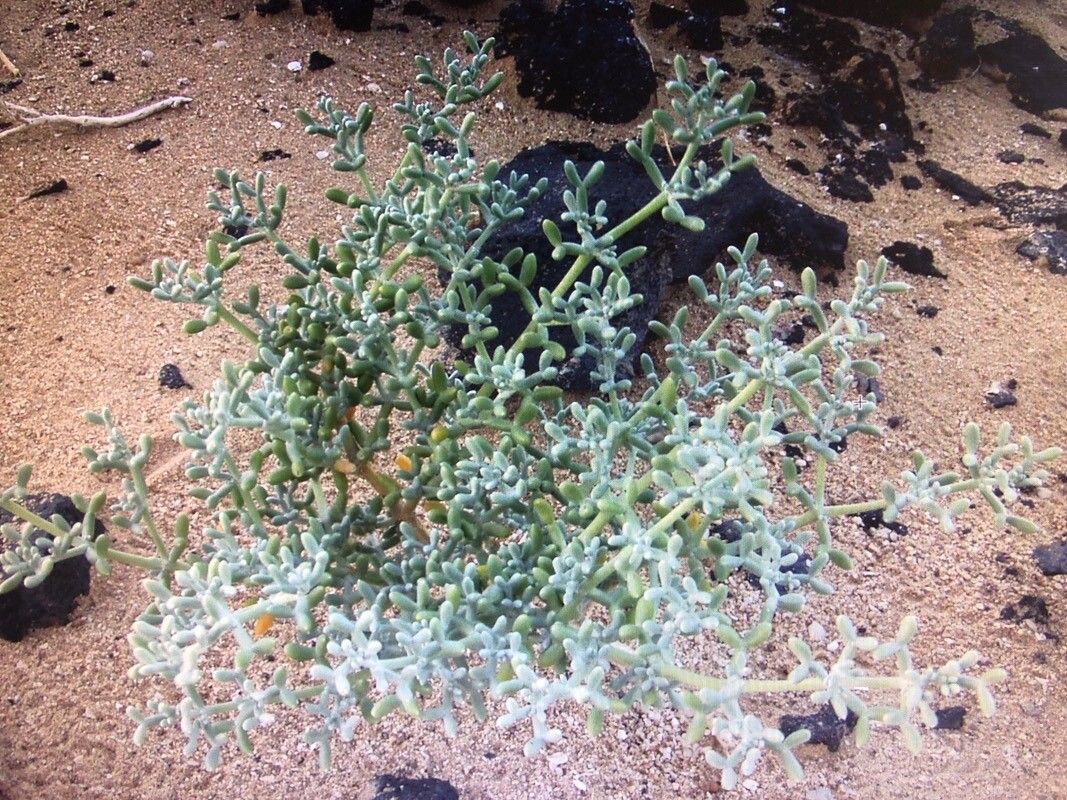
Oh, hello there! It’s lovely to have you join me for a chat about a truly special plant: Zygophyllum album. You might know it by its common name, the Bealbush or Bean Bush, and if you haven’t encountered it yet, let me tell you, it’s a gem. Its silvery, succulent leaves are just gorgeous, and it has a way of bringing a touch of the desert right into your home or garden. Propagating them is surprisingly rewarding, a little like magic unfolding, and I think even if you’re new to this whole gardening adventure, you’ll find this plant to be quite forgiving.
The Best Time to Start
For the highest success rate with your Zygophyllum album, I’ve found that late spring or early summer is your golden ticket. This is when the plant is in its most vigorous growth phase. You want to work with healthy, actively growing stems. So, grab your secateurs when the days are getting longer and the warmth is truly settling in.
Supplies You’ll Need
Gathering your tools beforehand makes the whole process so much smoother. Here’s what I always have on hand:
- Sharp Pruning Shears or a Clean Knife: For taking clean, precise cuts.
- Rooting Hormone Powder (Optional but Recommended): This gives your cuttings a helpful boost.
- A Well-Draining Potting Mix: I like a mix of equal parts perlite, coarse sand, and a good quality potting soil. You could also use a cactus or succulent mix.
- Small Pots or Seed Trays: Clean and with drainage holes, of course.
- A Spray Bottle: For misting.
- Labels: So you don’t forget what you’ve planted where!
Propagation Methods
Let’s get our hands dirty! There are a couple of ways we can coax new life from your established Zygophyllum album.
Stem Cuttings
This is my go-to method for Zygophyllum album.
- Select Your Cuttings: Look for healthy, non-flowering stems. You’re aiming for pieces about 4-6 inches long. Make your cuts just below a leaf node – that’s a little bump on the stem where a leaf grows.
- Prepare the Cuttings: Gently remove the lower leaves. You want a clean stem to insert into the soil. This also helps the plant focus its energy on rooting.
- Apply Rooting Hormone: Dip the cut end of each stem into rooting hormone powder. Tap off any excess.
- Plant Them Up: Fill your pots with your well-draining mix. Make a small hole with your finger or a pencil. Insert the cut end of the stem into the hole, ensuring the remaining leaves are above the soil line. Gently firm the soil around the cutting.
- Water Gently: Water the soil lightly. You want it moist but not waterlogged.
Water Propagation (For the Patient Explorer)
This method is a bit more visual, and you can see the roots develop!
- Take Your Cuttings: Follow steps 1 and 2 above.
- Place in Water: Fill a clean jar or glass with room-temperature water. Place the cuttings in the water, making sure no leaves are submerged. If leaves touch the water, they’ll likely rot.
- Find a Spot: Place the jar in a bright spot with indirect sunlight.
- Change Water Regularly: Change the water every few days to keep it fresh and prevent bacterial growth.
- Transition to Soil: Once you see small roots developing (about an inch long), you can transplant them into your well-draining potting mix. Be very gentle with these newly formed roots.
The “Secret Sauce” (Pro Tips)
Here are a few little tricks I’ve picked up over the years that can make all the difference:
- Don’t Drown the Leaves (Water Propagation): I know I mentioned this, but it’s so important! Submerged leaves are a fast track to rot in water propagation. Keep them high and dry.
- A Little Bottom Heat Can Be Your Friend: When I’m propagating in cooler weather, or just want to speed things up, I pop my pots or trays onto a heated propagation mat. For Zygophyllum album, consistent warmth around 70-75°F (21-24°C) is ideal for encouraging root formation.
- Be Patient with the Soil: Once planted, I resist the urge to constantly check for roots by tugging at the cuttings. They’ll tell you when they’re ready. A gentle tug that offers resistance is a good sign!
Aftercare & Troubleshooting
Once your cuttings have successfully rooted – you’ll know because they’ll start to put out new growth – it’s time for a bit more TLC.
- Gradual Acclimation: If they’ve been in a humid environment (like under a propagation dome), gradually introduce them to normal room humidity over a week or so.
- Light: They’ll still enjoy bright, indirect light. Avoid harsh, direct sun for a few weeks as they establish themselves.
- Watering: Water thoroughly when the soil dries out about an inch down. Zygophyllum album hates soggy feet, so good drainage is key to preventing root rot.
- Troubleshooting: Rot: The most common issue is rot, often caused by overwatering or poor drainage. If you see stems turning mushy and black, it’s usually a sign of too much moisture. Remove any affected parts immediately and allow the remaining bits to dry out before attempting to propagate again, or adjust your watering schedule. If a whole cutting goes limp and dark, it’s likely a lost cause. Don’t get discouraged; just try again!
A Encouraging Closing
Taking cuttings can feel like a leap of faith, but with Zygophyllum album, it’s a very achievable one. Remember to be patient, observe your new little plants, and enjoy the process of nurturing them. There’s something truly special about growing a plant from scratch, and soon you’ll have a whole family of these beautiful silvery treasures. Happy propagating!
Resource:
https://identify.plantnet.org/k-world-flora/species/Zygophyllum%20album%20L.f./data