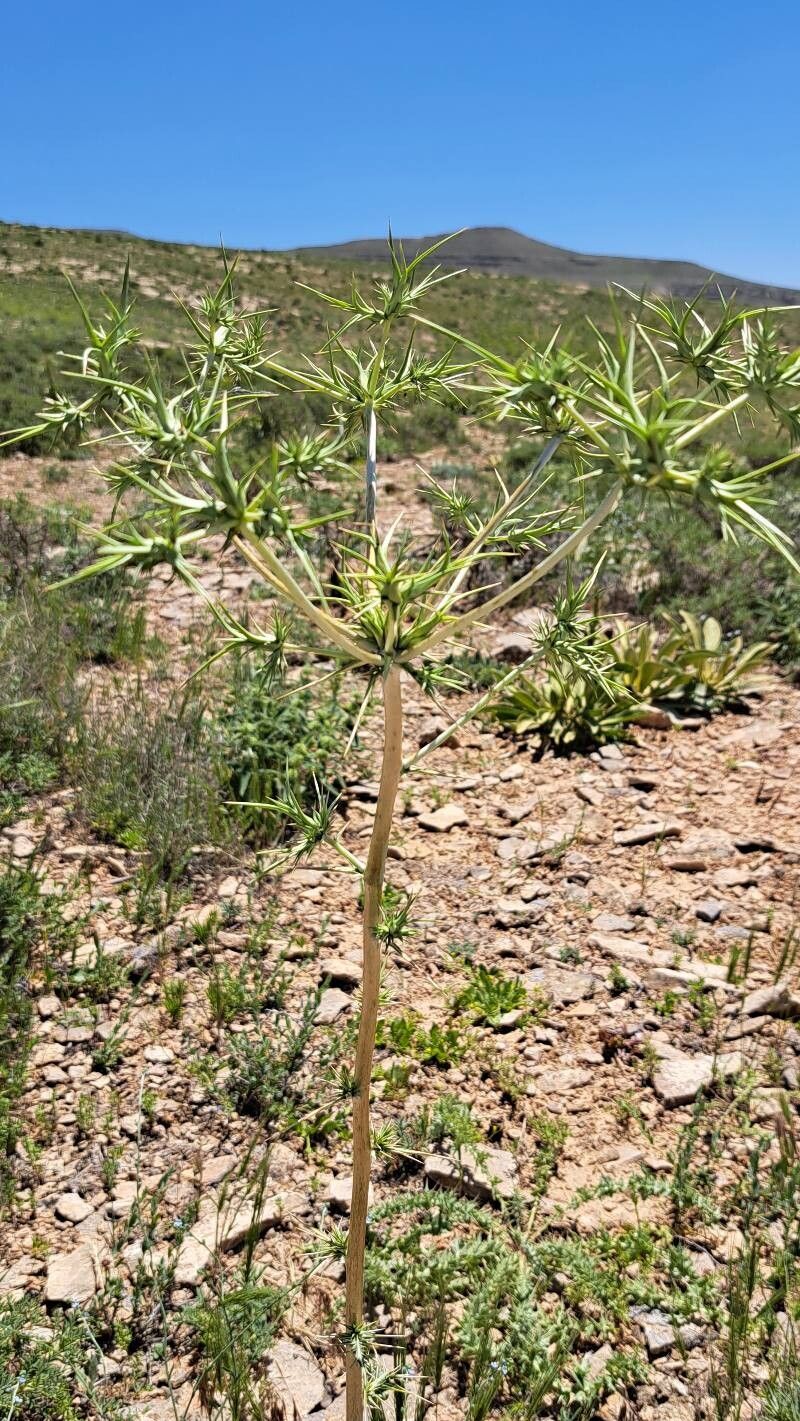
Oh, hello there, fellow plant enthusiast! Grab yourself a warm mug, and let’s chat about one of my absolute favorites: Cousinia eryngioides. If you’ve ever seen this striking beauty in a garden, you’ll know why it captures the heart. Those thistle-like, architectural blooms are simply stunning, adding a wild, yet elegant, touch to any landscape. And the best part? Propagating it is a truly rewarding endeavor, a chance to multiply that beauty and share it with others. Now, am I going to tell you it’s as easy as sticking a pothos cutting in water? Not quite. Cousinia eryngioides can be a little bit fussy, especially for absolute beginners, but with a bit of know-how and patience, you’ll be well on your way to success.
The Best Time to Start
For Cousinia eryngioides, I’ve found the late spring to early summer to be the absolute sweet spot for propagation, particularly through stem cuttings. This is when the plant is actively growing and has plenty of fresh, vigorous energy. You want to catch it just as it’s putting on its new growth, but before it gets too woody. Aim for stems that are soft and pliable, not stiff and brittle.
Supplies You’ll Need
Here’s a little checklist to get you prepped:
- Sharp, clean pruning shears or a very sharp knife: Essential for making clean cuts.
- Rooting hormone (optional, but recommended): A good quality powder or gel can give your cuttings a great head start.
- Well-draining potting mix: I love a blend of equal parts peat moss, perlite, and coarse sand. You can also find pre-made cactus or succulent mixes that work beautifully.
- Small pots or trays: Terracotta pots are fantastic because they breathe.
- Plastic bags or a propagation dome: To create a humid environment.
- Watering can with a fine spray nozzle: To avoid disturbing your newly potted cuttings.
- Labels and a marker: For keeping track of what you’ve planted and when.
Propagation Methods
While Cousinia eryngioides can be notoriously tricky with seed, stem cuttings are usually my go-to for reliable results. It’s where I’ve had the most consistent success.
-
Taking the Cuttings: With your clean shears, select a healthy stem that’s about 4-6 inches long. Make a cut just below a leaf node. A leaf node is that little bump where a leaf attaches to the stem – this is where the magic of rooting happens! Gently remove the lower leaves from the cutting, leaving just a few at the top. If the leaves are very large, you can even cut them in half to reduce water loss.
-
Applying Rooting Hormone (Optional): Dip the cut end of the stem into your rooting hormone, tapping off any excess. This step isn’t strictly necessary, but it really does boost your chances of success.
-
Potting Up: Fill your small pots with your well-draining potting mix. Make a small hole in the center of the soil with your finger or a pencil. Carefully insert the cut end of your Cousinia eryngioides cutting into the hole, ensuring the root hormone (if used) is covered by soil. Gently firm the soil around the base of the cutting to keep it upright.
-
Creating Humidity: Water the soil lightly with your fine spray nozzle until it’s evenly moist but not waterlogged. Now, the crucial step: cover the pot with a plastic bag or place it under a propagation dome. This traps the humidity around the cutting, which is vital for root development. Make sure the plastic doesn’t directly touch the leaves.
-
Finding the Right Spot: Place your potted cuttings in a bright location that receives indirect sunlight. Avoid direct sun, as it can scorch the tender new stems.
The “Secret Sauce” (Pro Tips)
Alright, let’s get into a couple of things I’ve learned over the years that make a real difference:
-
The ‘Callusing’ Trick: This is a big one, especially for slightly more challenging plants. After taking your cuttings, I like to let the cut end air out on a dry paper towel for an hour or two before dipping it in rooting hormone and potting. This helps the cut to “callus over,” reducing the risk of rot and encouraging stronger root formation. It sounds counterintuitive, but trust me on this!
-
Bottom Heat is Your Friend: While not always essential, providing a gentle bottom heat can significantly speed up the rooting process. A propagation mat placed under your pots can mimic the warmth of spring soil and really encourage those roots to sprout. Keep the temperature around 70-75°F (21-24°C).
Aftercare & Troubleshooting
Once your cuttings are happily potted, keep them consistently moist but never soggy. Check the soil moisture daily by gently poking your finger in. The plastic bag or dome should remain mostly on, but open it for a few minutes each day to allow for air circulation and prevent fungal issues.
You’ll know your Cousinia eryngioides cutting has rooted when you see new growth appearing at the top, or you gently tug on the cutting and feel resistance. This can take anywhere from 4-8 weeks, or sometimes longer. Be patient!
Now, about troubleshooting. The most common culprit for failure is overwatering, leading to rot. If you see the stem turning mushy and dark at the soil line, or the leaves wilting dramatically, it’s usually a sign of too much moisture and not enough air circulation. Don’t be afraid to remove a rotting cutting immediately to prevent it from affecting others. If your cuttings just seem to be… well, doing nothing, and you haven’t seen any new growth after a couple of months, it might just need a bit more time or perhaps a touch more warmth.
A Encouraging Closing
So there you have it! Propagating Cousinia eryngioides is a journey, and like any good gardening adventure, it requires a little patience and observation. Don’t get discouraged if your first attempt isn’t a resounding success. Each cutting is a little experiment, and you’ll learn so much as you go. The satisfaction of seeing those tiny roots emerge and then nurturing a whole new plant is truly unparalleled. Happy propagating!
Resource:
https://identify.plantnet.org/k-world-flora/species/Cousinia%20eryngioides%20Boiss./data