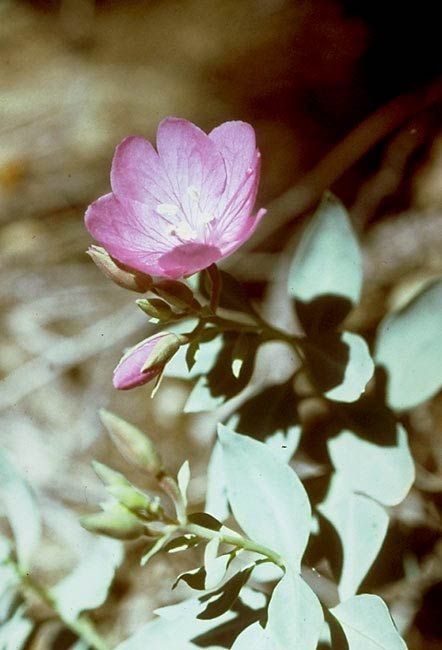
Oh, hello there! Come on in, grab a coffee. I’m so glad you’re curious about Epilobium rigidum. This delightful native plant, with its lovely pink-to-mauve flowers, is such a joy to have in the garden. It’s one of those understated beauties that just keeps on giving. Propagating it yourself? Well, that’s a whole different kind of satisfaction. Getting a whole new plant that you nurtured from a tiny piece? It feels like magic, doesn’t it? Honestly, I find Epilobium rigidum quite approachable for propagation, even for those of you who are just starting to dip your toes into the world of plant babies.
The Best Time to Start
For the highest success rate with Epilobium rigidum, I always recommend late spring to early summer. This is when the plant is actively growing and has plenty of healthy, vigorous stems to work with. You want to be taking cuttings from stems that are not yet fully woody but have started to firm up a bit. Think of them as supple, not floppy, and definitely not brittle.
Supplies You’ll Need
Gathering your supplies beforehand makes the whole process so much smoother. Here’s what I usually have on hand:
- Sharp, clean pruning shears or a sharp knife: For taking clean cuts from the parent plant.
- Rooting hormone (optional but recommended): A powder or gel to encourage root development.
- Pots or trays with drainage holes: Small to medium sizes work well.
- A well-draining potting mix: I like to use a blend of potting soil, perlite, and a little coarse sand. This is crucial for preventing rot.
- Plastic bags or a propagation dome: To create a humid environment for your cuttings.
- Water spray bottle: For keeping the humidity levels up and misting the cuttings.
Propagation Methods
My go-to method for Epilobium rigidum is stem cuttings. It’s straightforward and usually yields excellent results.
- Take Your Cuttings: Select healthy, non-flowering stems from your parent plant. Using your clean shears, cut sections that are about 4-6 inches long. Make the cut just below a leaf node (where a leaf attaches to the stem). Remove any lower leaves, leaving just the top 2-3 sets.
- Apply Rooting Hormone (If Using): Dip the cut end of the stem into your rooting hormone, tapping off any excess.
- Plant Your Cuttings: Fill your pots with your prepared potting mix. Make a small hole in the center of each pot with your finger or a pencil. Insert the cut end of the stem into the hole, ensuring it’s firm in the soil. Gently firm the soil around the stem.
- Water Thoroughly: Water your cuttings well until you see water drain from the bottom of the pot.
- Create a Humid Environment: Cover the pots with a plastic bag, propping it up with stakes so it doesn’t touch the leaves, or place them under a propagation dome.
Another simple method, especially for beginners, is water propagation.
- Select and Cut: Just like with stem cuttings, take 4-6 inch stem sections, but make sure they have plenty of leaves. Remove any leaves that would be submerged in water.
- Place in Water: Put the cuttings in a jar or vase filled with clean water.
- Find a Bright Spot: Place the jar in a bright location, but out of direct, harsh sunlight.
- Change Water Regularly: Change the water every few days to keep it fresh and prevent bacterial growth. You should start to see tiny roots forming in a few weeks.
- Pot Up Once Rooted: Once the roots are about an inch long, you can carefully transplant the cuttings into your well-draining potting mix.
If your Epilobium rigidum is a clumping type, division is also a possibility, though I find cuttings more reliable for E. rigidum specifically.
- Dig Carefully: In the dormant season (late fall or early spring), carefully dig up the entire plant.
- Separate the Roots: Gently tease apart the root ball into sections, making sure each section has healthy roots and a few shoots.
- Replant: Replant the divisions in their new locations or in pots with fresh soil. Water them in well.
The “Secret Sauce” (Pro Tips)
Here are a couple of things I’ve learned over the years that really seem to make a difference:
- Don’t let the leaves touch the water in water propagation. This is a big one! Submerged leaves will rot the cutting. Make sure only the cut stem is in the water.
- Consider bottom heat. If you have a heat mat designed for propagation, using it under your pots can significantly speed up the rooting process. It mimics the warmth of spring soil and gives those roots a real jumpstart.
Aftercare & Troubleshooting
Once you start seeing new growth on your cuttings, or if you’ve successfully rooted them in water, it’s time to adjust their care.
Gently remove the plastic bag or propagation dome for a few hours a day to acclimate them to less humid air. Gradually increase the time they are exposed. Keep the soil consistently moist but never waterlogged. As they grow stronger, you can water them less frequently, allowing the top inch of soil to dry out between waterings.
The main thing to watch out for is rot. If your cuttings look mushy or black at the base, or if your water-propagated cuttings start to yellow and wilt dramatically, it’s often a sign of too much moisture and not enough air circulation. In these cases, you might need to try again, ensuring your soil is even better draining and that you’re not overwatering. Sometimes, a cutting just doesn’t take, and that’s okay too!
A Encouraging Closing
Remember, gardening is a journey, and propagation is a wonderful part of that. Be patient with your new Epilobium rigidum babies. Not every cutting will make it, but celebrate the ones that do! Enjoy the process, learn from each attempt, and soon you’ll have even more of these lovely plants to share and enjoy. Happy propagating!
Resource:
https://identify.plantnet.org/k-world-flora/species/Epilobium%20rigidum%20Hausskn./data