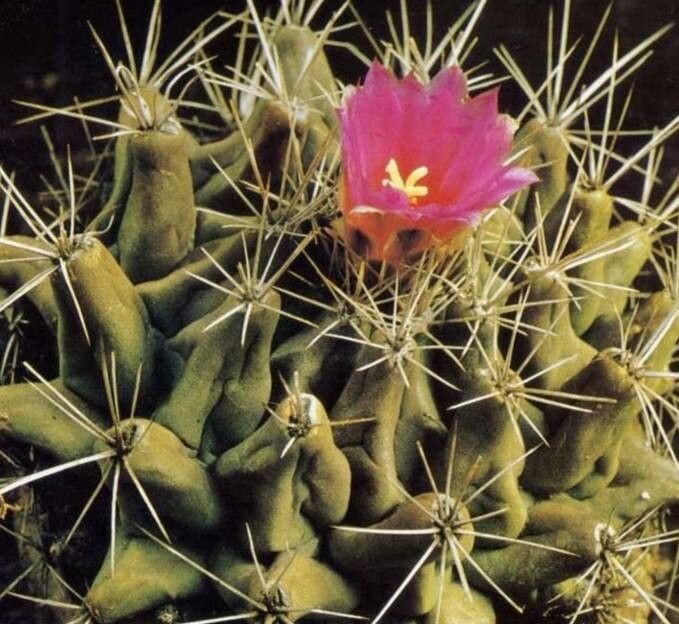
Oh, hello there! So, you’ve fallen for the charm of Thelocactus tulensis, have you? I don’t blame you one bit. These beauties, with their almost woolly crowns and stunning, often vibrantly colored flowers, are such a joy to have around. They really add a touch of desert elegance to any collection. And the best part? You can create more of these treasures yourself! Propagating succulents like Thelocactus tulensis is incredibly rewarding. It’s like a little horticultural magic trick, and I promise, it’s more achievable than you might think. While it’s not the absolute easiest succulent to start with, it’s definitely within reach for a motivated beginner who’s willing to pay a little attention.
When to Get Your Hands Dirty
The absolute best time to start propagating Thelocactus tulensis is during its active growing season. For most cacti, this means spring and early summer. The plant is full of energy then, and this vigor translates directly into successful rooting. You’ll have the highest chance of seeing those little roots pop out when the days are longer, and the temperatures are warm but not scorching.
Your Propagation Toolkit
You won’t need a whole lot of fancy gadgets, but having the right supplies makes all the difference. Here’s what I recommend having on hand:
- Well-draining potting mix: A cactus and succulent mix is ideal. You can also make your own by blending coarse sand, perlite, and a bit of peat or coco coir.
- Sharp, sterilized pruning shears or a clean knife: For making clean cuts. Sterilize with rubbing alcohol first.
- Rooting hormone (optional but helpful): A powder or gel that encourages root development.
- Small pots or trays: With drainage holes, of course! Terracotta pots are great because they breathe.
- Watering can or spray bottle: For gentle watering.
- Labels: Trust me, you’ll thank me later for labeling your new babies!
- Gloves (optional): Some cacti can be a bit spiky!
Let’s Grow Some ‘Tus!
The most common and successful way to propagate Thelocactus tulensis is through offsets. These are the little baby plants that spring up from the base of the mature parent plant.
- Inspect your parent plant: Look for any small offsets that have emerged from the soil line or directly from the base of the main stem. They should be a decent size, at least an inch or so in diameter, and ideally have started to form their own tiny spines.
- Gently unearth: Carefully use a small trowel or even your fingers to gently brush away the soil around the base of the offset. You want to expose where it’s attached to the mother plant.
- Make the cut: Using your sterilized pruners or knife, make a clean cut to separate the offset from the parent. Try to get a little bit of whatever “base” the offset has. Don’t worry if it’s not a perfectly flat surface; just make a clean separation.
- Callus over: This is super important! Place the separated offset in a dry, well-ventilated spot for a few days to a week. The cut end needs to scab over and form a callous. This prevents rot when you plant it. It’s a bit like a scab forming on a cut on your finger.
- Planting time: Once the cut end has calloused, you can plant it. Use a pot filled with your well-draining cactus mix. Don’t water immediately. Just nestle the offset into the soil so its base is covered and it stands upright.
My “Secret Sauce” Tips
Here are a couple of things I’ve learned over the years that can give you a real edge:
- Bottom heat is your friend: If you can, place your potted offsets on a seedling heat mat set to a low temperature (around 70-80°F or 21-27°C). This gentle warmth from below mimics the soil temperatures the plant loves during its growing season and can significantly speed up root formation. Just remember to use it after the callusing period.
- Don’t rush the watering: After you plant the offset (and you’ve respected that crucial callusing period!), resist the urge to water. Wait for at least a week, or even ten days. I often wait until I see the slightest sign of new growth or a bit of plumpness returning to the offset. This encourages the plant to search for moisture with its new roots.
Aftercare and What to Watch For
Once your offset is planted and has had that initial waiting period, you can start to water it sparingly.
- Gentle watering: Water deeply but infrequently. Let the soil dry out completely between waterings. In the early stages, misting the soil surface lightly every few days might be enough to encourage minimal root growth without waterlogging. As roots develop, you can gradually increase watering to the same frequency as your mature succulents.
- Bright, indirect light: Place your new plant in a spot that gets bright, indirect sunlight. Avoid intense, direct sun until you’re sure it’s well-rooted and established, as it can scorch the tender new growth.
- Signs of success: You’ll know it’s rooting when you see it looking plump and a bit greener. Gently tugging on it (very, very gently!) will reveal resistance if roots have formed.
- Trouble signs: The biggest enemy of a newly planted succulent is rot. If your offset starts to look mushy, discolored (brown or black), or starts to shrink and shrivel in a way that doesn’t look like thirst, it’s likely rotting. This usually happens from too much moisture too soon, or planting a cutting that didn’t callus properly. If you see rot, you might have to trim away the rotten part, let it callus again, and try planting it in fresh, dry soil.
Keep Growing!
Propagating plants is a journey of patience and observation. Don’t be discouraged if your first attempt isn’t perfect. Each plant is a learning experience. Embrace the process, enjoy the quiet satisfaction of nurturing new life, and before you know it, you’ll have a whole windowsill full of Thelocactus tulensis friends! Happy growing!
Resource: