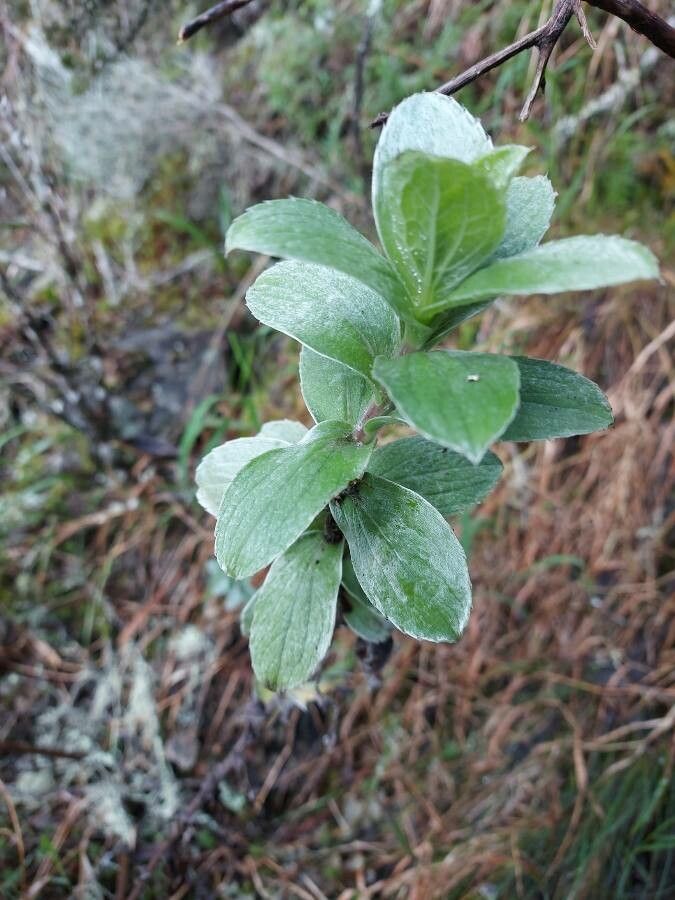
Hello there, fellow plant lovers! Today, we’re diving into something truly special: Psiadia salaziana. If you’re anything like me, you’ve probably admired its delicate, daisy-like blooms and lovely silvery foliage. It’s a plant that just brings a touch of airy elegance to any garden or indoor space. The best part? You can easily multiply this beauty yourself! Propagating Psiadia salaziana is incredibly rewarding, and I’m here to walk you through it, step-by-step. Don’t worry if you’re new to this; while it has a few quirks, it’s definitely achievable with a little care.
The Best Time to Start
When it comes to getting the most bang for your buck, late spring to early summer is your golden window. This is when your Psiadia salaziana is usually in an active growth phase. The stems are more pliable and full of vigor, meaning they’re primed and ready to form new roots. Waiting until after the main flush of flowering in spring is also a good idea.
Supplies You’ll Need
Gathering your supplies beforehand makes the whole process so much smoother. You’ll only need a few things:
- Sharp pruning shears or a clean knife: For making clean cuts.
- Rooting hormone (optional but recommended): A powdered or gel form helps significantly.
- Well-draining potting mix: A 50/50 blend of perlite and peat moss or coco coir works wonderfully. You can also find specialized succulent or cactus mixes.
- Small pots or seedling trays: Ensure they have drainage holes!
- A spray bottle: For gentle misting.
- Plastic bags or propagation domes: To create a humid environment.
Propagation Methods
Psiadia salaziana is quite forgiving and can be propagated through stem cuttings. It’s my go-to method, and honestly, it’s pretty straightforward.
- Take Your Cuttings: Select healthy, non-flowering stems that are at least 4-6 inches long. Using your sharp pruning shears or knife, make a clean cut just below a leaf node (where a leaf attaches to the stem).
- Prepare the Cuttings: Gently remove the lower leaves from the cutting, leaving just a couple of healthy leaves at the top. This helps prevent them from rotting once planted. If you’re using rooting hormone, dip the cut end into it now.
- Plant the Cuttings: Fill your small pots or trays with your well-draining potting mix. Make a small hole in the center of the mix with your finger or a pencil. Insert the cut end of your Psiadia salaziana cutting into the hole, ensuring the leaf nodes you exposed are below the soil line. Gently firm the soil around the cutting.
- Create Humidity: I like to give the soil a light watering so it’s moist but not soggy. Then, cover the pot or tray with a plastic bag or propagation dome. This helps retain moisture and mimics the humid environment cuttings need to root.
The “Secret Sauce” (Pro Tips)
Over the years, I’ve learned a few tricks that make a world of difference:
- Bottom Heat is Your Friend: If you have a propagation mat, placing your pots on it can dramatically speed up root formation. It encourages those roots to venture out and seek warmth.
- Don’t Overwater Initially: It’s tempting to drench the soil, but truly, just keep the soil consistently moist, not waterlogged. Too much water can lead to cuttings rotting before they even have a chance to root. A light misting with your spray bottle every few days is often enough once covered.
- Patience with the Leaves: If you’re doing water propagation (though I find soil cuttings more successful for this plant), make sure none of the leaves are submerged in the water. Any leaf in contact with water will likely rot, taking the whole cutting down with it.
Aftercare & Troubleshooting
Once your cuttings have taken root – usually after 3-6 weeks – you’ll start to see new growth. You can gently tug on a cutting to feel for resistance; that’s a good sign of roots!
- Transplanting: Once they have a decent root system, you can carefully transplant them into their own individual pots. Continue to keep the soil lightly moist and provide bright, indirect light.
- Troubleshooting: The most common issue you’ll face is rot. If your cutting turns black and mushy, it’s usually a sign of too much moisture or poor drainage. Don’t be discouraged! Just toss the rotted cutting and try again with a fresh one, paying close attention to the watering and soil. Yellowing leaves can sometimes indicate too much direct sun or not enough water, especially once they’ve rooted.
A Little Encouragement
Bringing new life into the world through your own hands is a truly magical part of gardening. Propagating Psiadia salaziana is a fantastic way to expand your collection or share these delightful plants with friends. Be patient with the process, observe your new little plants, and most importantly, enjoy every moment! Happy propagating!
Resource:
https://identify.plantnet.org/k-world-flora/species/Psiadia%20salaziana%20Cordem./data