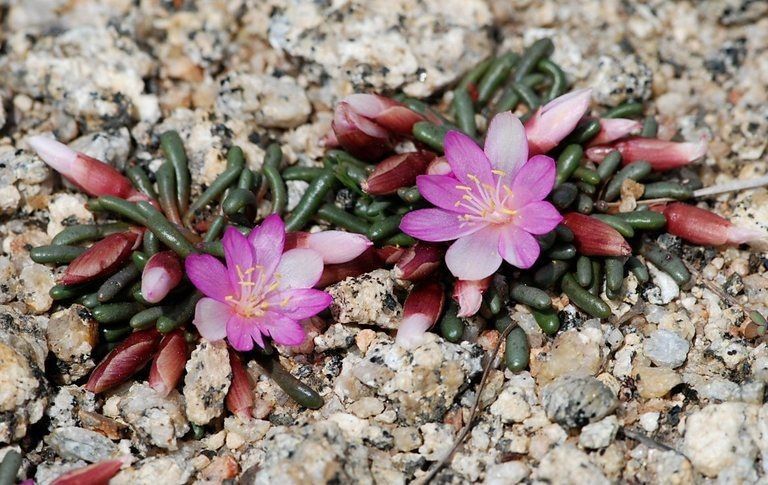
Hey there, fellow plant lovers! Gather ‘round for a little chat about one of my absolute favorites: the Lewisia. If you haven’t met this beauty, imagine a rock garden standout with gorgeous, rosette-forming foliage and an explosion of vibrant, often jewel-toned flowers. They’re just… breathtaking. And the most rewarding part? Being able to create more of these little treasures yourself.
Now, I’ll be honest, propagating Lewisia disepala isn’t usually a “set it and forget it” kind of deal. It can be a tad fiddly, especially for complete beginners. But don’t let that scare you off! With a little patience and a few key techniques, you’ll be well on your way to a whole clan of Lewisias.
The Best Time to Start
For Lewisia disepala, the sweet spot for propagation is generally in the late spring or early summer. This is when the plant is actively growing and has a good amount of energy stored for producing new roots. Think of it as their prime time, when they’re feeling their most robust and ready to send out new shoots.
Supplies You’ll Need
Here’s what you’ll want to have on hand before you dive in:
- Sharp, clean pruning shears or a razor blade: No dull tools here! Cleanliness prevents disease.
- Well-draining potting mix: I usually go for a mix formulated for cacti and succulents, or a blend of regular potting soil with plenty of perlite or coarse sand.
- Small pots or trays: Yogurt cups with drainage holes work in a pinch!
- Rooting hormone (optional but helpful): This encourages faster and stronger root development.
- Soft paintbrush: For dusting off excess rooting hormone or gently handling delicate parts.
- Watering can with a fine rose nozzle: For gentle watering.
- Labels and a marker: To keep track of what you’ve planted and when.
Propagation Methods
Lewisia disepala is most commonly propagated through division and sometimes from stem cuttings, although the latter can be trickier.
Division: The Tried-and-True Method
This is usually the most successful approach for home gardeners.
- Gently unpot your established Lewisia. Do this during the active growing season (late spring/early summer).
- Carefully brush away excess soil from the root ball. You want to see where the plant naturally divides into offsets or smaller crowns.
- Inspect the plant. You’ll often see little baby plants (offsets) growing around the base of the main plant, each with its own root system.
- Separate the offsets. Using your fingers or a clean knife, gently twist or cut the offsets away from the parent plant. Make sure each offset has at least a few roots attached. If an offset doesn’t have roots, don’t despair; you can still try to root it, but a presence of roots gives it a head start.
- Pot up the divisions. Plant each separated offset in its own small pot filled with your well-draining mix.
- Water lightly. Just enough to settle the soil, but not so much that it becomes waterlogged.
Stem Cuttings: A Bit More Advanced
While less common for disepala, you can try taking cuttings if you have a particularly robust plant.
- Select a healthy stem. Look for a side shoot that’s not flowering.
- Make a clean cut with your sharp shears or razor blade, just below a leaf node. You’re looking for a piece about 2-3 inches long.
- Remove the lower leaves. Leave just a couple of leaves at the very top.
- Dip the cut end in rooting hormone. Gently tap off any excess.
- Insert the cutting into a pot filled with your well-draining mix. You want the bottom leaf nodes to be buried.
- Water gently and place in a bright spot, but out of direct, harsh sun.
The “Secret Sauce” (Pro Tips)
Here are a few things I’ve learned over the years that make a real difference:
- Don’t waterlog, ever. This is the golden rule for Lewisias. Their fleshy roots can go from happy to rotten in a heartbeat if they sit in soggy soil. I always err on the side of underwatering.
- Bottom heat is your friend for cuttings. If you’re trying stem cuttings and want to give them an extra boost, placing the pot on a propagation mat set to a gentle warmth (around 70°F) can really encourage root formation.
- Observe the leaves; they’ll tell you what they need. If a cutting or division looks droopy, it might be a sign it needs a tiny bit more moisture. If it looks yellow and weak, it might be getting too much. They’re masters of non-verbal communication!
Aftercare & Troubleshooting
Once your divisions or cuttings are potted up, keep them in a bright location but protect them from direct midday sun, especially when they’re young and vulnerable. Water sparingly – only when the top inch of soil feels dry.
The most common sign of failure you’ll encounter is rot. If you see the leaves turning brown and mushy, or the stem becoming soft and black, it’s likely due to overwatering. Sadly, once rot sets in, it’s very difficult to save the plant. This is why that well-draining soil and judicious watering are so crucial. If a cutting doesn’t show signs of rooting after several weeks, it might just be a dud. Don’t take it personally!
A Encouraging Closing
Propagating Lewisia may take a little patience, and not every attempt will be a roaring success, but that’s all part of the gardening journey. Each small victory, each tiny new plant you help bring into the world, is so incredibly satisfying. So, grab your tools, get your hands dirty, and enjoy the magical process of growing more of these stunning blooms! Happy propagating!
Resource:
https://identify.plantnet.org/k-world-flora/species/Lewisia%20disepala%20Rydb./data