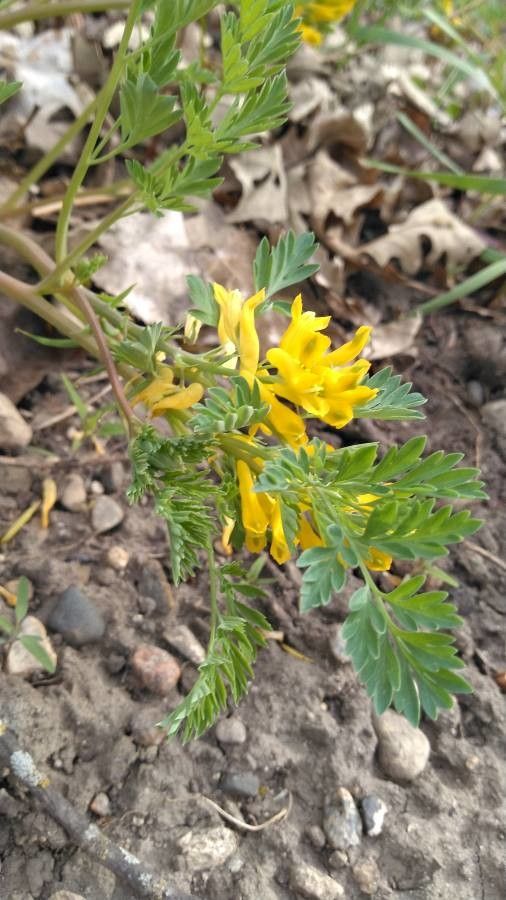
Oh hello there, fellow garden enthusiast! Today, I want to talk to you about a real gem in the shade garden: Corydalis flavula, or Yellow Corydalis. This lovely little plant carpets the ground with delicate, bright yellow flowers that just sing of spring. It’s wonderfully airy and brings a splash of sunshine to even the shadiest spots.
Now, if you’re looking to expand your collection of these beauties, you’ll be pleased to know that propagating Corydalis flavula is quite forgiving, even for those of you just dipping your toes into the world of plant propagation. It’s a truly rewarding endeavor, seeing a tiny piece of your favorite plant grow into a whole new specimen.
The Best Time to Start
For Corydalis flavula, I find the absolute best time to begin propagating is in the late spring to early summer. This is when the plant is actively growing, producing fresh, pliable stems that have a great chance of rooting. You want to catch it before the intense heat of summer sets in, which can stress young cuttings.
Supplies You’ll Need
You won’t need a whole greenhouse full of fancy equipment for this. Here’s what I usually have on hand:
- Sharp pruning shears or scissors: Cleanliness is key to prevent disease.
- Small pots or a propagation tray: Anything that can hold soil and allow for drainage.
- A good quality potting mix: I like to use a blend that’s well-draining, perhaps a mix of peat moss, perlite, and a bit of compost. For Corydalis, I’ll often use a succulent or cactus mix – it’s just the right balance.
- Rooting hormone powder (optional but helpful): This isn’t strictly necessary for Corydalis flavula, but it can give your cuttings a nice little boost.
- A clear plastic bag or dome: This creates a mini-greenhouse effect to keep humidity high.
- A watering can with a fine rose: For gentle watering.
Propagation Methods
- Stem Cuttings: This is my go-to method for Corydalis flavula.
- First, select a healthy, non-flowering stem from your established plant. You’re looking for a stem that’s about 3-4 inches long.
- Using your sharp shears, make a clean cut just below a leaf node. A leaf node is where a leaf attaches to the stem. This is where the magic happens, where roots are most likely to form.
- Gently remove the lower leaves from the stem, leaving just a couple of leaves at the very top. This prevents them from rotting once you put the cutting in the soil.
- (Optional) Dip the cut end of the stem into your rooting hormone powder, tapping off any excess.
- Fill your small pots or propagation tray with your well-draining potting mix. Make a small hole with your finger or a pencil.
- Insert the cutting into the hole, ensuring the leaf nodes are buried in the soil. Gently firm the soil around the stem.
- Water thoroughly but gently, making sure the soil is evenly moist, not waterlogged.
- Cover the pot or tray with your clear plastic bag or dome to maintain high humidity.
- Place the pot in a bright spot, but out of direct sunlight. Too much sun will scorch those delicate cuttings.
The “Secret Sauce” (Pro Tips)
- Don’t be afraid to take more cuttings than you think you’ll need! Not every single one is going to make it, and that’s perfectly normal. Having a few extras gives you a much better chance of success.
- Bottom heat makes a big difference. If you have a heating mat, placing your propagation tray on it can significantly speed up the rooting process. Those roots just love a bit of warmth from below.
- Check the soil moisture regularly, but avoid overwatering. It’s a delicate balance! I always feel the soil with my fingertip. If it feels dry an inch down, it’s time to water.
Aftercare & Troubleshooting
Once your cuttings have developed roots – and you can usually tell by gently tugging on the stem; there will be resistance – it’s time for a little more attention. You can carefully remove the plastic cover for a few hours each day to acclimate them to lower humidity. Then, gradually increase the time they are exposed.
Keep the soil consistently moist but not soggy. As they grow stronger, you can transplant them into their own individual pots.
Now, what if things don’t go as planned? The most common issue you’ll face is rot. This usually happens if the soil stays too wet for too long, or if there isn’t enough air circulation. If you see a cutting looking wilted and mushy, or darkening at the soil line, it’s likely succumbed to rot. Just cleanly remove it, and improve air circulation for the remaining cuttings.
A Encouraging Closing
Don’t get discouraged if your first few attempts aren’t perfect. Gardening is all about learning and experimenting. The most important thing is the process itself. Be patient, enjoy watching those tiny roots form, and before you know it, you’ll have new Corydalis flavula plants to fill your shady corners or share with fellow plant lovers. Happy propagating!
Resource:
https://identify.plantnet.org/k-world-flora/species/Corydalis%20flavula%20(Raf.)%20DC./data