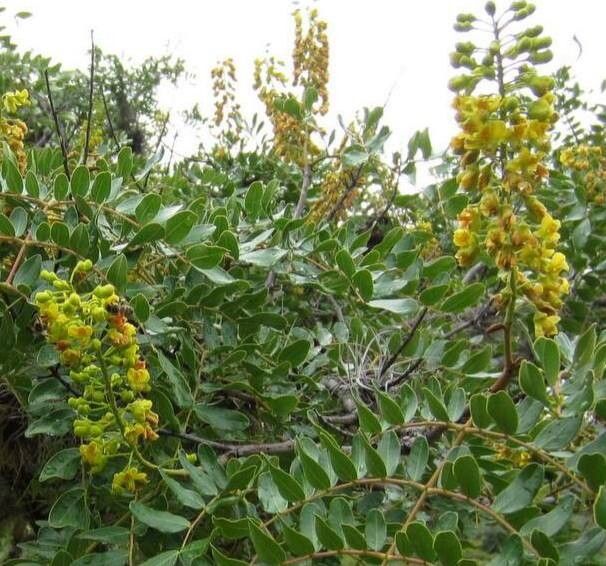
Oh, hello there, fellow plant enthusiast! I’m so glad you’ve stopped by. Today, we’re diving into the wonderful world of propagating Tara spinosa, also known as the tara tree. If you’re looking for a plant that offers beautiful, lacy foliage and those intriguing pods that yield a natural tanning agent (and have some medicinal uses too!), then tara is a fantastic choice for your garden or even as a striking container plant.
Now, about propagation. For beginners, I’d say Tara spinosa is moderately easy. It’s not quite as hands-off as, say, a pothos, but with a little attention and the right approach, you’ll be seeing brand new little tara plants in no time. And the reward? It’s pure joy, isn’t it, watching something you’ve nurtured from a small cutting or seed burst into life!
When to Get Your Hands Dirty
The absolute best time to take cuttings from your Tara spinosa is during its active growing season. For most folks, this means late spring through summer. You’re looking for semi-hardwood cuttings, which means growth that has started to firm up but isn’t completely woody. You’ll know it’s right when a stem bends without snapping cleanly, but it’s not still super floppy. Avoid taking cuttings when the plant is stressed, like during extreme heat or drought.
Your Propagation Toolkit
Gathering your supplies beforehand makes the whole process so much smoother. Here’s what you’ll want:
- Sharp Pruning Shears or a Knife: Sterilized, of course! We don’t want to introduce any nasty bugs.
- Rooting Hormone: This isn’t strictly essential for Tara spinosa, but it can significantly speed up root development and increase success rates. Look for one containing IBA.
- Well-Draining Potting Mix: A good blend is crucial. I like to use a mix of equal parts peat moss or coco coir, perlite, and coarse sand. You can also buy a good quality cactus or succulent mix.
- Small Pots or Trays: Clean pots with drainage holes are a must. Small ones are perfect for starting out.
- Clear Plastic Bag or Humidity Dome: To keep humidity levels high around your cuttings.
- Water: For cleaning your tools and for watering.
- Optional: A Heat Mat: This can be a game-changer, especially if your home tends to be on the cooler side.
Bringing New Tara to Life: Propagation Methods
Let’s get our hands a little dirty! Here are a couple of reliable ways to propagate your Tara spinosa.
Stem Cuttings – My Go-To Method
This is generally the most successful and quickest way to get new plants.
- Select Your Cuttings: Find healthy, vigorous stems on your mature tara plant. You’re looking for stems about 4-6 inches long.
- Make the Cut: Using your sterilized pruning shears or knife, make a clean cut just below a leaf node (where a leaf attaches to the stem). This is where roots are most likely to form.
- Prepare the Cuttings: Gently remove the leaves from the bottom half of the cutting. If the remaining leaves are very large, you can cut them in half horizontally to reduce water loss.
- Dip in Rooting Hormone: If you’re using rooting hormone, lightly dip the cut end of the stem into the powder or gel. Tap off any excess.
- Plant Your Cuttings: Fill your clean pots with your prepared potting mix. Make a small hole with your finger or a pencil. Insert the bottom of the cutting into the hole, making sure the leaf nodes are below the soil surface. Gently firm the soil around the cutting to ensure good contact.
- Water Gently: Water the soil lightly. You want it to be moist, but not soggy.
- Create a Humid Environment: Place the pots inside a clear plastic bag, sealing it loosely, or use a humidity dome. This traps moisture around the cuttings, which is vital for root development.
- Find a Bright Spot: Place your pots in a location that receives bright, indirect light. Avoid direct sunlight, which can scorch the young cuttings.
Water Propagation – A Peek into Progress
While stem cuttings in soil are my preferred method for tara, you can try water propagation. It’s a great way to see the roots forming!
- Take Cuttings: Follow steps 1-3 from the stem cutting method.
- Place in Water: Place the prepared cuttings in a clean jar or glass filled with water. Make sure no leaves are submerged in the water, as this can lead to rot.
- Change Water Regularly: Change the water every 2-3 days to keep it fresh and oxygenated.
- Bright, Indirect Light: Just like with soil cuttings, place your water-propagated cuttings in a spot with bright, indirect light.
- Potting Up: Once you see good root growth (about an inch or two long), you can carefully transplant them into your well-draining potting mix, following the planting steps for stem cuttings. Be extra gentle as these roots are still delicate.
The “Secret Sauce” – Insider Tips for Success
After years of tinkering, I’ve picked up a few tricks that really make a difference.
- The Power of Bottom Heat: If you have a heat mat, use it! Placing your pots on a gentle heat source (around 70-75°F or 21-24°C) encourages root initiation and growth from below, mimicking ideal soil temperatures. It’s like giving your cuttings a warm hug.
- Don’t Be Too Eager to Pot Up: I know it’s tempting to transplant as soon as you see a tiny root. But wait until you have a decent network of roots, at least an inch or two long and well-established. This gives your new plant a much better chance of surviving the transplant shock.
- Air Circulation is Key (Even in Humidity): While we want high humidity, stagnant air can invite fungal issues. If you’re using a plastic bag, open it for a few minutes each day to allow for some fresh air exchange. This helps prevent damping off.
Aftercare and When Things Go Awry
Once your cuttings have established roots and you see new growth emerging (this can take anywhere from 4-8 weeks, sometimes longer!), it’s time for a little extra TLC.
Gradually acclimate your new plants to less humid conditions. You can do this by slowly opening the plastic bag or removing the humidity dome for longer periods each day. Continue to water them when the top inch of soil feels dry. Treat them as young, delicate plants for the first few months.
Now, what if things don’t go as planned? The most common issue you’ll encounter is rotting. If your cutting turns black and mushy at the base, sadly, it’s likely a goner. This usually happens due to:
- Overwatering: The soil stays too wet for too long, suffocating the roots.
- Poor Drainage: If your potting mix isn’t draining well, water will sit around the cutting.
- Lack of Air Circulation: As mentioned, stagnant air can contribute.
Don’t get discouraged if a few don’t make it! It’s all part of the learning process. Take note of what might have gone wrong and try again.
Happy Propagating!
Growing new plants from cuttings is such a fulfilling part of gardening. It’s a little bit of magic, a lot of patience, and a whole lot of love. Don’t be afraid to experiment, observe your plants, and learn from every cutting you take. Enjoy the journey, and before you know it, you’ll have a wonderful collection of tara trees to admire! Happy gardening!
Resource: