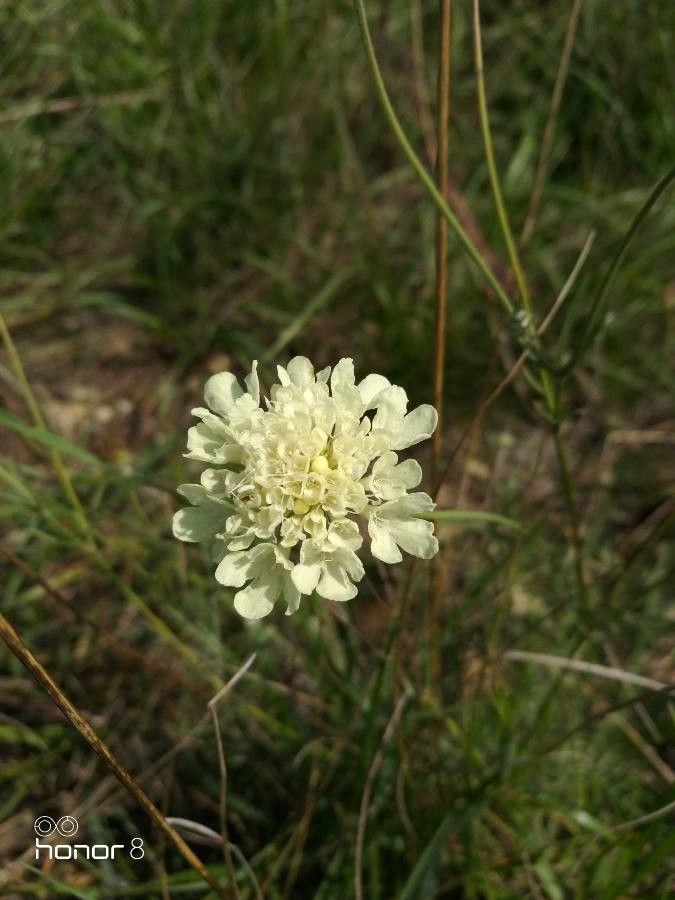
Hello fellow garden lovers! Today, we’re diving into the delightful world of Scabiosa ochroleuca, sometimes called Yellow pincushion because, well, it truly looks like a charming little pincushion bursting with sunshine. These airy beauties, with their delicate, pale yellow blooms, are a magnet for pollinators and add such a lovely, relaxed vibe to any border. Imagine them dancing in the breeze, their soft flowers catching the light.
If you’ve fallen for their charm, you’ll be pleased to know that propagating Scabiosa ochroleuca is absolutely doable. It’s not one of those fussy plants that makes you pull your hair out. In fact, I’d say it’s quite forgiving, a wonderful choice for those new to the propagation game. Getting more of these cheerful plants from a single one feels like a little gardening magic, and it costs next to nothing!
The Best Time to Start
For Scabiosa ochroleuca, the sweet spot for propagation is undeniably late spring to early summer. This is when the plant is actively growing and seems to have the most energy to put into developing new roots. Look for stems that are just starting to look a bit woody at the base but are still pliable. You’re essentially catching it at its peak vigor, which gives your cuttings the best chance of success.
Supplies You’ll Need
Gathering your tools beforehand makes the whole process so much smoother. Here’s what I always have on hand:
- Potting mix: A well-draining seedling or propagation mix is crucial. You can also create your own by mixing equal parts peat moss, perlite, and vermiculite.
- Small pots or seed trays: Clean pots with drainage holes are a must.
- Sharp pruning shears or a clean knife: For taking precise cuttings. Disinfect them with rubbing alcohol between cuts!
- Rooting hormone (optional but helpful): A good quality rooting hormone powder or gel can significantly speed up root development.
- Plastic bags or a propagator lid: To create a humid environment for your cuttings.
- Spray bottle: For misting.
- Water: Of course!
Propagation Methods
While you can start Scabiosa ochroleuca from seed, I find taking stem cuttings to be the most reliable and rewarding method for getting quick results.
Stem Cuttings:
- Take your cuttings: In late spring or early summer, select a healthy, non-flowering stem. Use your sharp shears to make a clean cut just below a leaf node (where a leaf attaches to the stem). Aim for cuttings that are about 4-6 inches long.
- Prepare the cuttings: Gently remove the lower leaves from the cutting, leaving just a few at the very top. This prevents them from rotting once planted and encourages the plant to focus energy on root production. If your cutting has any flower buds, pinch them off.
- Apply rooting hormone (if using): Dip the cut end of the stem into your rooting hormone powder or gel. Tap off any excess.
- Plant the cuttings: Fill your small pots with your prepared potting mix. Make a small hole in the center of the soil with your finger or a pencil. Gently insert the cut end of the Scabiosa cutting into the hole, ensuring the remaining leaves don’t touch the soil surface.
- Water and cover: Water the soil gently around the base of the cutting. Then, cover the pot with a clear plastic bag (supported so it doesn’t touch the leaves) or place the pots inside a propagator with a lid. This creates a mini-greenhouse, keeping humidity high, which is essential for cuttings to root.
The “Secret Sauce” (Pro Tips)
Here are a couple of things I’ve learned over the years that can really give your Scabiosa cuttings a boost:
- Don’t let those leaves touch the water! This is a big one. If you’re rooting in water (which I sometimes do for a quick peek at root development, though soil is generally better for long-term success), make sure no leaves are submerged. They’ll rot quickly and can take the whole cutting with them. For soil cuttings, ensure the soil level is below the lowest leaves.
- Bottom heat is your friend. If you have a heat mat designed for seedlings, placing your pots on it can make a world of difference. It encourages root growth from below, often much faster than waiting for the ambient temperature to do the job. It’s like a cozy foot bath for your little plant babies!
Aftercare & Troubleshooting
Once your cuttings are potted up, find them a bright spot that receives indirect light. Avoid direct sun for the first few weeks, as it can scorch delicate new growth. Mist the leaves occasionally with your spray bottle, especially if you don’t have a propagator lid.
You can gently tug on a cutting after about 3-4 weeks. If you feel resistance, congratulations! It means roots have formed. At this point, you can gradually acclimate them to slightly less humid conditions by opening the plastic bag a little more each day. Once they’re looking sturdy, you can transplant them into slightly larger pots or directly into their final garden spot.
The most common sign of trouble is wilting and yellowing leaves, which can indicate not enough moisture, or conversely, mushy stems or blackening at the soil line, which is a clear sign of rot. If you see rot, it’s usually best to discard that cutting and try again, ensuring your soil is well-draining and you aren’t overwatering.
A Encouraging Closing
Success in gardening, just like in life, often comes down to patience and a little bit of love. Don’t be discouraged if not every cutting takes. Each attempt is a learning experience. Keep trying, observe your plants, and soon you’ll be surrounded by a sea of these cheerful yellow pincushions, all courtesy of your own green thumb. Happy propagating!
Resource:
https://identify.plantnet.org/k-world-flora/species/Scabiosa%20ochroleuca%20L./data