Oh, hello there, fellow garden enthusiast! I’m so glad you stopped by. Today, we’re diving into the wonderfully unique world of Salicornia disarticulata, also known as articulated sea-blite or glasswort. If you’re looking for something a little different for your garden, or even curious about growing an edible coastal gem, you’ve come to the right place.
Why You’ll Love Propagating Sea-Blite
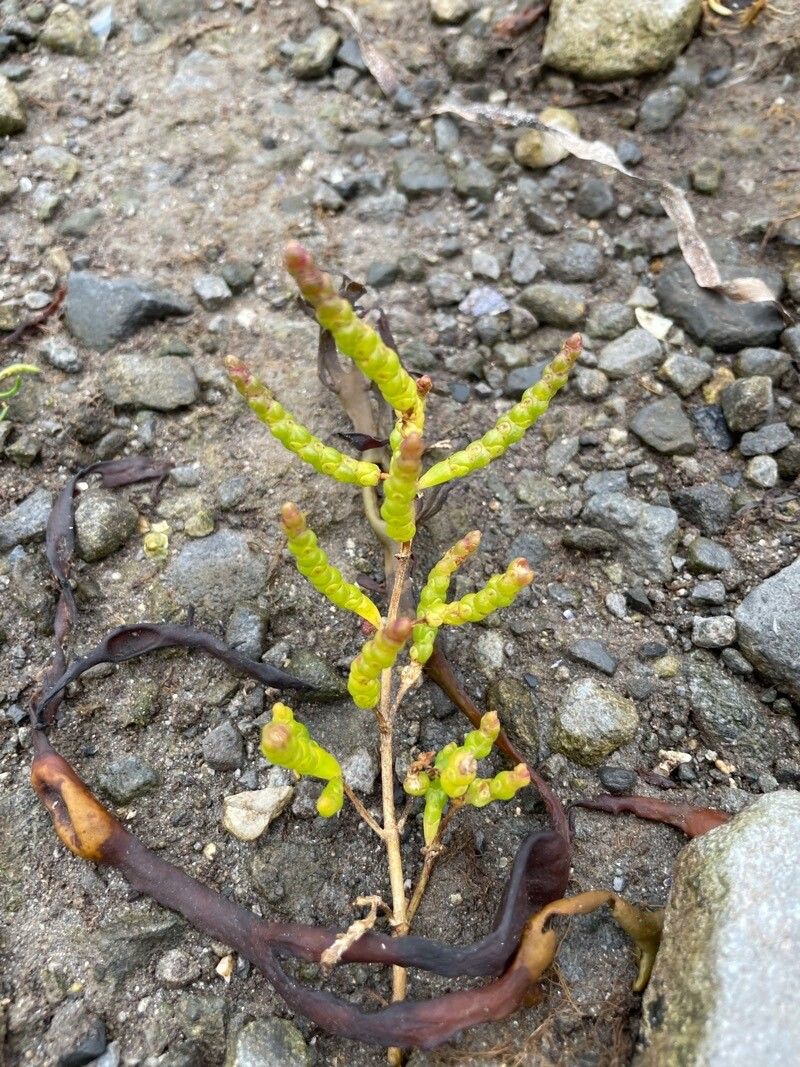
Sea-blite is just fascinating, isn’t it? Its segmented, succulent stems are unlike anything else, and it thrives in places you might not expect, like salty areas or even sandy soils. Beyond its aesthetic appeal, it’s also a delicious edible, offering a crisp, salty crunch that’s a real treat in salads or as a side dish. Propagating it yourself is incredibly rewarding. You get to witness this plant’s resilience firsthand, and soon you’ll have more of these delightful little plants to share or enjoy. For beginners? I’d say it’s moderately easy. It’s not overly fussy, but understanding its salty leanings is key.
When to Get Your Hands Dirty
The best time to start propagating Salicornia disarticulata is when the plant is actively growing and full of vigor. Think late spring through summer. This is when it has the most energy to put into developing new roots and shoots. You’ll want to look for healthy, mature stems.
What You’ll Need for Success
Gathering your tools makes the whole process smoother. Here’s what I typically have on hand:
- Sharp Pruning Shears or a Clean Knife: For making clean cuts.
- Well-Draining Potting Mix: A mix of coarse sand, perlite, and a little bit of coir works beautifully. Standard potting soil can be too rich.
- Small Pots or Trays: Clean and free of any old debris.
- Optional: Rooting Hormone: Not strictly necessary for sea-blite, but it can give cuttings a little boost.
- Watering Can with a Fine Rose: For gentle watering.
- Gloves: If you have sensitive skin, especially when working with any salinity.
Let’s Get Propagating: Stem Cuttings
This is by far my favorite and the most reliable method for Salicornia disarticulata. It’s straightforward and yields great results.
- Select Your Stems: Look for healthy, mature stems on your existing sea-blite plant. Choose segments that are firm and green, not woody or mushy.
- Make the Cut: Using your sharp pruning shears or knife, make a clean cut just below a joint (where a segment meets the next). You’re aiming for cuttings that are about 3-6 inches long. It’s best to take several cuttings, as not every one will be successful.
- Prepare the Cuttings: Gently remove the lower segments from most of your cutting, leaving just a few at the very top. This helps prevent rot when you plant them and encourages root growth from the nodes.
- Optional: Rooting Hormone: If you choose to use it, dip the cut end of each stem into the rooting hormone powder or gel. Tap off any excess.
- Planting: Fill your pots or trays with the well-draining potting mix. Make small holes in the soil with your finger or a pencil. Insert the prepared cuttings into the holes, ensuring that at least one node (where you removed leaves) is buried in the soil. You can plant several cuttings in the same pot, spaced a couple of inches apart.
- Water Gently: Water the soil thoroughly but gently. You want the soil to be moist but not waterlogged.
My Little “Secret Sauce” for Sea-Blite
Now, here are a couple of things I’ve learned over the years that can really make a difference:
- Don’t Overcrowd Your Cuttings: While it might be tempting to cram as many cuttings as possible into a pot, give them a little breathing room. Good air circulation is vital to prevent fungal issues.
- Mimic Their Natural Habitat (a Bit): Sea-blite loves a good bit of salt. When you water your cuttings during the initial rooting phase, I sometimes add a tiny pinch of sea salt to the water. Just a whisper of salt, mind you – too much will harm young cuttings and adult plants alike. It helps them feel more “at home.”
- Bottom Heat is Your Friend: If you have a greenhouse or a spare sunny windowsill, placing your pots on a seedling heat mat can significantly speed up root development. It mimics the warmth of the soil surface in their natural environment.
Aftercare and What to Watch For
Once your cuttings are in their pots, keep the soil consistently moist but never soggy. Place them in a bright spot, but out of direct, harsh sunlight, especially during the hottest part of the day. They’ll do well in part shade or dappled light.
You’ll know they’re rooting when you see new growth appearing at the top of the stem. It can take anywhere from a few weeks to a couple of months. Be patient!
The most common issue you might encounter is rot. If your cuttings turn black, mushy, or limp, it’s usually a sign of too much moisture or poor drainage. If you see this happening, try to remove the affected cuttings immediately and check your soil mix and watering habits. Ensure good airflow around the plants.
Go Forth and Grow!
Propagating Salicornia disarticulata is a truly rewarding endeavor. It’s a chance to connect with a unique plant and expand your gardening horizons. Don’t be discouraged if a few don’t make it; that’s part of the learning process! Just keep trying, observe your plants, and most importantly, enjoy the journey of bringing more of these salty, succulent beauties into your world. Happy gardening!
Resource:
https://identify.plantnet.org/k-world-flora/species/Salicornia%20disarticulata%20Moss/data