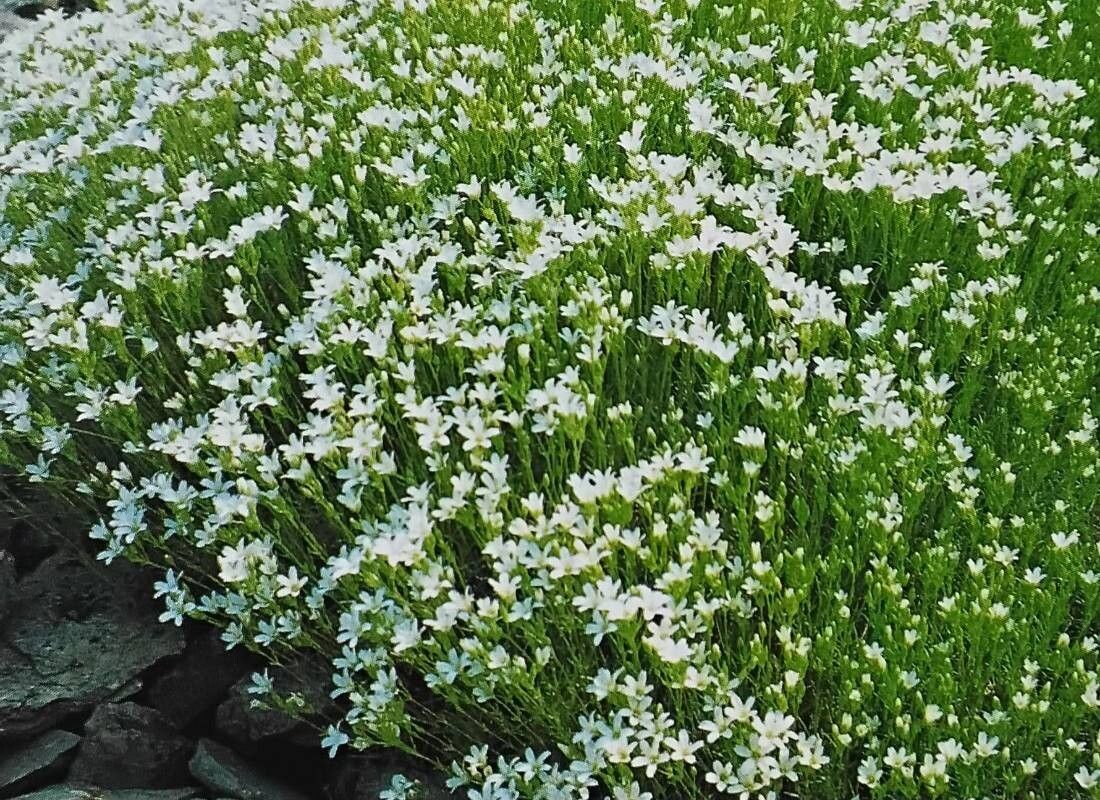
Oh, the beautiful Sabulina juniperina! If you’ve ever admired those delicate, feathery sprays cascading from a planter or gracing a garden bed, you know exactly why I’m so excited to share this with you today. This little evergreen is a real gem, and the joy of coaxing new life from it is incredibly rewarding.
Now, for the big question: is it an easy plant for beginners to propagate? Honestly, I’d say it’s moderately easy. It’s not as foolproof as some succulents, but with a little care and attention, you’ll be well on your way to success. Think of it as a wonderful learning curve that delivers beautiful results.
The Best Time to Start
My favorite time to take cuttings of Sabulina juniperina is in late spring to early summer. This is when the plant is in its active growth phase. The new growth, often called “softwood,” is flexible and has a greater ability to root. Waiting until the growth has firmed up slightly, becoming “semi-hardwood,” is also a good option in mid to late summer. We’re looking for stems that have grown this year, but aren’t so old and woody that they’re tough to root.
Supplies You’ll Need
Before we get our hands dirty, let’s gather our tools. Having everything ready makes the process so much smoother:
- Sharp Pruning Shears or a Craft Knife: Clean, sharp tools are crucial for making clean cuts that heal faster.
- Rooting Hormone: A powder or gel helps encourage root development.
- Small Pots or Seedling Trays: About 4-6 inches deep is ideal.
- Well-Draining Potting Mix: I like a mix of equal parts peat moss (or coco coir), perlite, and coarse sand. This ensures good aeration and prevents soggy soil.
- Watering Can or Spray Bottle: For gentle watering.
- Clear Plastic Bag or Dome: To maintain humidity.
- Optional: Heating Mat: To provide bottom warmth, which can significantly speed up rooting.
Propagation Methods
Let’s dive into the two most reliable ways to get more Sabulina juniperina:
1. Stem Cuttings (The Most Common Method)
This is where we’ll get most of our success.
- Take Your Cuttings: Using your sharp shears, select healthy, vigorous shoots from your mature plant. Cut stems that are about 4-6 inches long. Make your cut just below a leaf node (where a leaf attaches to the stem).
- Prepare the Cuttings: Gently strip off the lower leaves from the bottom 2-3 inches of each cutting. This is important because any leaves below the soil line will rot and introduce disease. You can trim longer needles if they seem overly dense, but don’t go overboard.
- Apply Rooting Hormone: Dip the cut end of each stem into your rooting hormone, tapping off any excess. This gives them a helpful nudge.
- Plant Your Cuttings: Fill your small pots with your prepared potting mix. Make a hole with a pencil or your finger and gently insert the calloused end of the cutting. Firm the soil around it.
- Water Gently: Water the soil until it’s moist but not waterlogged.
- Create a Humid Environment: Place a clear plastic bag over the pot, securing it with a rubber band, or use a propagation dome. This traps humidity, which is vital for cuttings that can’t yet absorb water through roots. Make sure no leaves are touching the plastic if possible, as this can cause rot.
- Provide Light and Warmth: Place the pots in a bright location, but out of direct, harsh sunlight. If you have a heating mat, place the pots on it. This gently warms the soil from below, which is a real game-changer for rooting.
2. Water Propagation (A More Visual Method)
While less common for woody evergreens, sometimes you can get a few cuttings to root in water, though it’s often a bit trickier with junipers.
- Take and Prepare Cuttings: Follow the same steps as above for taking and preparing your cuttings.
- Place in Water: Fill a clean glass or jar with water. Place the prepared cuttings into the water, ensuring no leaves are submerged.
- Change Water Regularly: Change the water every few days to keep it fresh and prevent bacterial growth.
- Watch for Roots: You should start to see tiny white root nubs forming in a few weeks. Once the roots are about an inch long, it’s time to transplant them into soil. This stage needs to be timed carefully.
The “Secret Sauce” (Pro Tips)
Here are a few little tricks I’ve learned over the years that can really make a difference:
- The “Healing” Trick: Before dipping in rooting hormone, I sometimes let the cut end of the stem sit out in the air for an hour or two. This allows a protective callus to form, which can reduce the risk of rot and improve rooting success, especially in humid conditions.
- Bottom Heat is Your Best Friend: I cannot stress this enough. Providing consistent, gentle warmth from below (around 70-75°F / 21-24°C) is like giving your cuttings a cozy greenhouse experience. It encourages root development much faster than relying on ambient room temperature alone.
- Don’t Overwater, but Don’t Let Them Dry Out: This is a delicate balance. The soil should be consistently moist, like a wrung-out sponge. If the cuttings wilt, it’s a sign they’re too dry. If they look mushy and develop dark spots, they might be too wet.
Aftercare & Troubleshooting
Once you see new growth on your cuttings, that’s a fantastic sign they’re starting to establish roots! You can gently tug on a cutting; if there’s resistance, you’ve got roots.
- Gradually Acclimate: Begin to slowly remove the plastic bag or dome over a week or two. This allows the new plants to adjust to the humidity levels of your home or garden.
- Water as Needed: Continue to water them when the top inch of soil feels dry.
- Transplant When Ready: Once they have a good root system and are showing sturdy top growth, you can carefully transplant them into slightly larger pots with your regular potting mix.
Now, what if things don’t go as planned?
- Rot: This is the most common culprit. It usually happens from too much moisture and not enough airflow. Cuttings will turn mushy and dark, often smelling unpleasant. If you see this, unfortunately, those cuttings are lost. Prevention is key: ensure excellent drainage and good airflow.
- Wilting: If your cuttings wilt and droop significantly, they’re likely too dry. Increase watering and ensure their humid environment is properly maintained.
A Encouraging Closing
Growing new plants from cuttings is a journey, and like any good journey, it requires a bit of patience. Not every cutting will make it, and that’s perfectly okay! Celebrate the successes, learn from the challenges, and most importantly, enjoy the process of nurturing new life. You’ve got this, and the reward of seeing your Sabulina juniperina thrive in its new home will be well worth the effort. Happy propagating!
Resource: