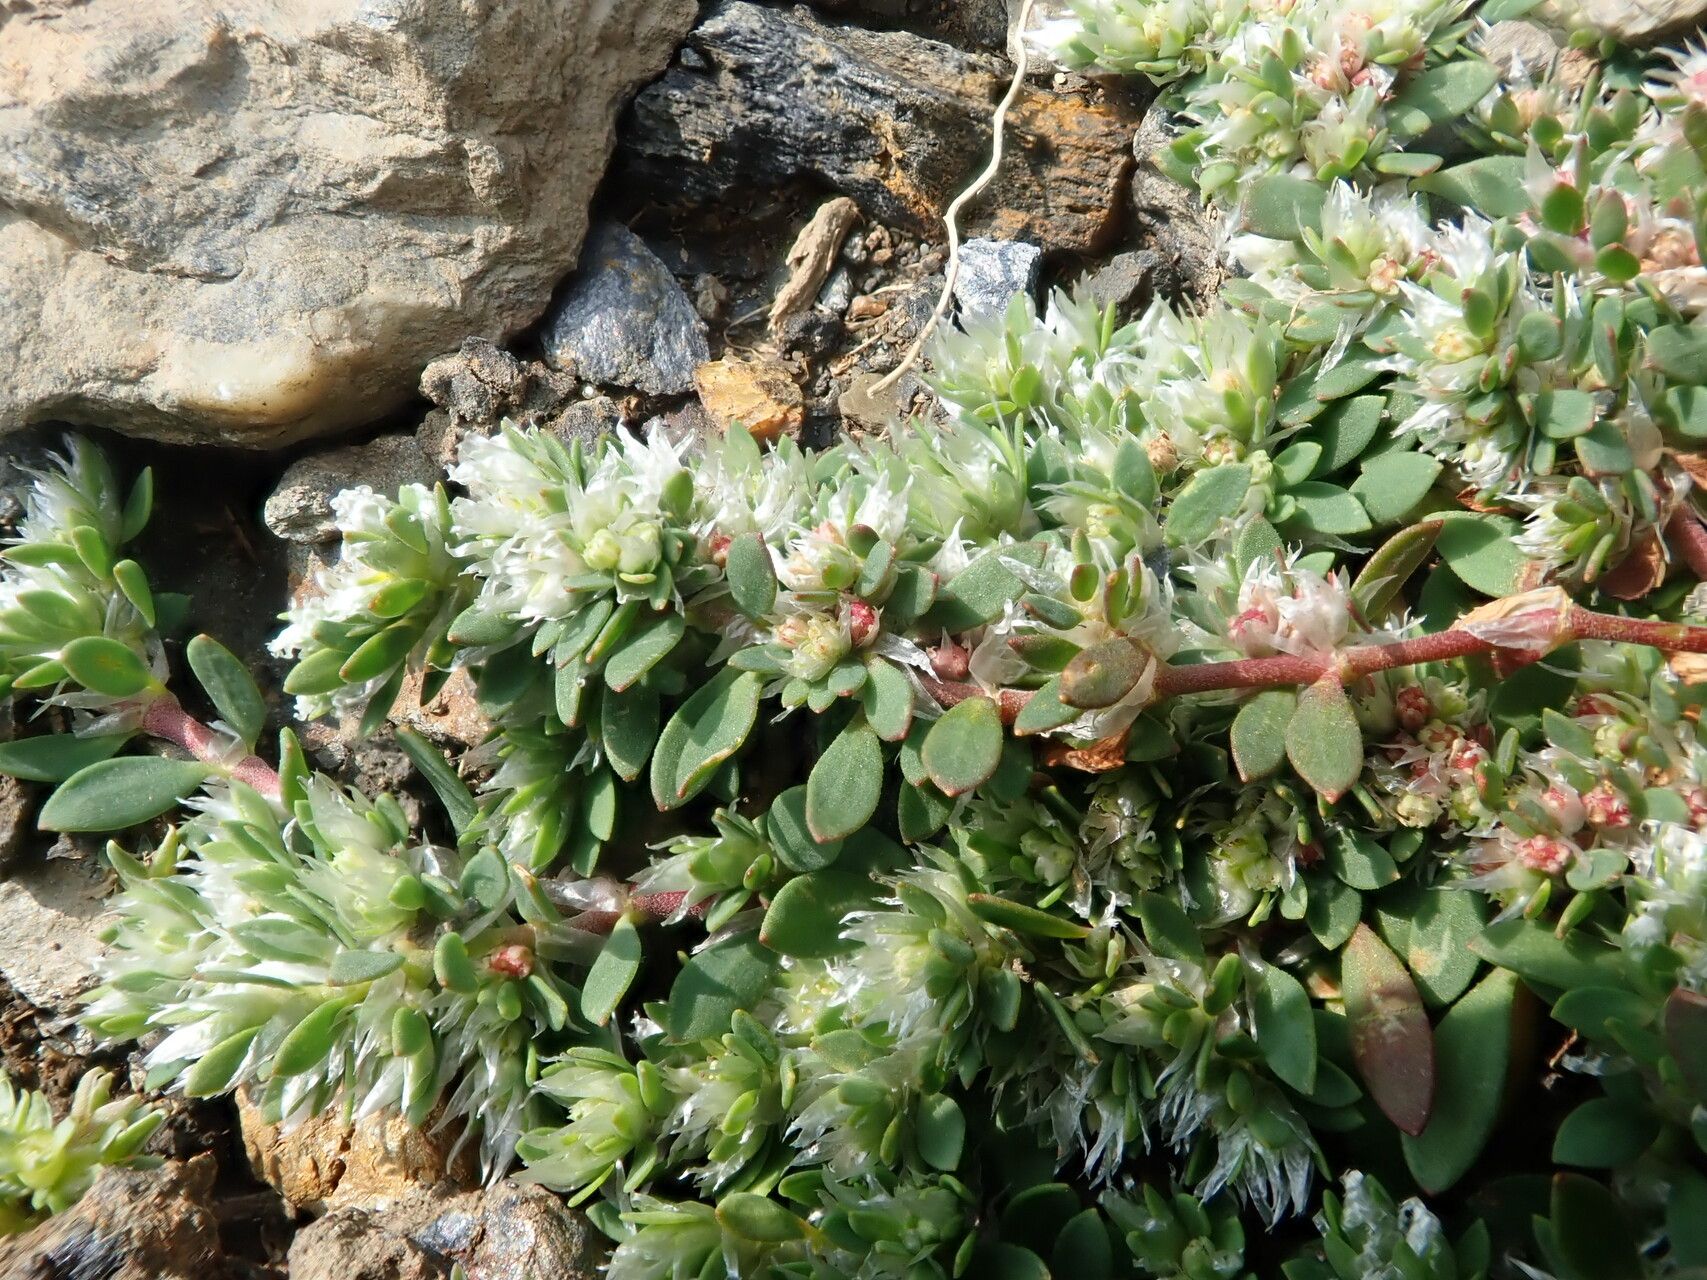
Hello, fellow plant lovers! I’ve been chatting with my plants, and they’ve been whispering secrets about their friends, the charming Paronychia polygonifolia. If you’re anything like me, you’ve probably admired its delicate, silver-frosted foliage and tiny white flowers, often tucked away in a rock garden or spilling over a pot. It’s a little gem, isn’t it?
Propagating Paronychia polygonifolia is a wonderfully rewarding experience. It allows you to multiply this delightful plant, share it with friends (or just keep all the beauty for yourself!), and gain a deeper understanding of its life cycle. Don’t worry, it’s not an overly fussy plant to work with, making it a great choice even if you’re dipping your toes into propagation for the first time.
The Best Time to Start
For the absolute highest success rate with Paronychia polygonifolia, the late spring to early summer is your golden window. This is when the plant is actively growing and has plenty of plump, healthy stems to work with. You want to propagate from softwood or semi-hardwood cuttings, which are flexible enough to root but not so immature that they’re easily damaged. Think of it as taking cuttings when the plant is feeling particularly robust and ready to offer up a piece of itself for a new adventure.
Supplies You’ll Need
You won’t need a whole shed full of fancy equipment, just a few well-chosen items to give your cuttings the best start.
- Sharp pruning shears or a clean, sharp knife: For making clean cuts.
- A well-draining potting mix: A good blend for succulents or cacti works beautifully, or you can mix equal parts peat moss, perlite, and coarse sand.
- Small pots or seed trays: Clean ones, please!
- Rooting hormone (optional but recommended): A powder or gel to encourage root development.
- A clear plastic bag or a propagation dome: To create a humid environment.
- A misting bottle: For keeping the cuttings hydrated.
- A small trowel or dibber: For making planting holes.
Propagation Methods
I find that stem cuttings are the most reliable and straightforward way to propagate Paronychia polygonifolia. It’s like giving a little piece of the plant a chance to grow into its own beautiful self.
Stem Cuttings:
- Select your cutting: Look for healthy, non-flowering stems that are about 3-4 inches long. Using your sharp pruning shears or knife, make a clean cut just below a leaf node. This is the point where a leaf attaches to the stem, and it’s where roots are most likely to form.
- Prepare the cutting: Gently remove the leaves from the bottom half of the cutting. You don’t want any foliage submerged in the soil or water later on, as this can lead to rot. You can leave the top couple of leaves on, as these will help the cutting photosynthesize.
- Apply rooting hormone (optional): If you’re using rooting hormone, dip the cut end of the stem into the powder or gel, tapping off any excess.
- Plant your cuttings: Fill your small pots with your well-draining potting mix. Make a small hole with your trowel or dibber, then carefully insert the cut end of the stem into the hole. Gently firm the soil around the base of the cutting to ensure good contact.
- Water gently: Water the newly potted cuttings thoroughly but gently with your misting bottle or a very fine-rose watering can. You want the soil to be moist, not waterlogged.
- Create humidity: Cover the pots with a clear plastic bag or place them under a propagation dome. This is crucial for keeping the cuttings from drying out while they’re trying to develop roots. Make sure the plastic isn’t touching the leaves too much.
- Provide light and warmth: Place the pots in a bright location that receives indirect sunlight. Avoid direct sun, which can scorch the delicate cuttings. A warm spot is also beneficial.
The “Secret Sauce” (Pro Tips)
Here are a couple of little tricks I’ve learned over the years that can really boost your success rates:
- Don’t overcrowd your pots: Give each cutting a little space to breathe and grow. If you pack them too tightly, you increase the risk of fungal diseases spreading.
- Bottom heat is your friend: If you have a seedling heat mat, placing your pots on it can significantly speed up the rooting process. This gentle warmth encourages root development from below.
- Watch for the “clinch”: Sometimes, you can tell a cutting has rooted when you see a slight resistance when you gently tug on it. Don’t pull too hard, though!
Aftercare & Troubleshooting
Once your Paronychia polygonifolia cuttings have rooted – this can take anywhere from 3-8 weeks depending on conditions – you’ll want to transition them.
- Acclimatize gradually: If you’ve used a plastic bag or dome, begin by removing it for increasing periods each day to get the new plants used to the ambient humidity.
- Watering: Continue to water when the top inch of soil feels dry. Avoid overwatering, as this is the most common culprit for failure.
- Potting up: Once the little plants are showing good new growth and have a healthy root system (you can check by gently tipping the pot out to look at the roots), you can pot them into slightly larger individual pots with fresh, well-draining soil.
Now, what if things don’t go as planned? Don’t despair! We all have those moments.
- Rot: This is usually a sign of too much moisture and not enough drainage. The stems will turn mushy and black. If you see this, discard the affected cuttings to prevent it from spreading. Make sure your soil mix is airy and your pots have drainage holes.
- Wilting: If a cutting wilts and doesn’t perk up after watering, it might not have rooted yet and is drying out. Ensure your humidity cover is in place and the soil is consistently moist but not wet.
- No growth: Patience is key here. Sometimes, a cutting just needs a little extra time. If it’s still firm and green after several weeks, it might just be a slow starter.
A Warm Encouraging Closing
Growing new plants from cuttings is an incredibly satisfying journey. Each tiny new Paronychia polygonifolia you nurture into existence is a testament to your care and understanding of nature’s magic. Be patient with yourself and your little green charges. Enjoy the process of watching them unfurl, develop roots, and eventually become beautiful additions to your garden. Happy propagating!
Resource:
https://identify.plantnet.org/k-world-flora/species/Paronychia%20polygonifolia%20(Vill.)%20DC./data