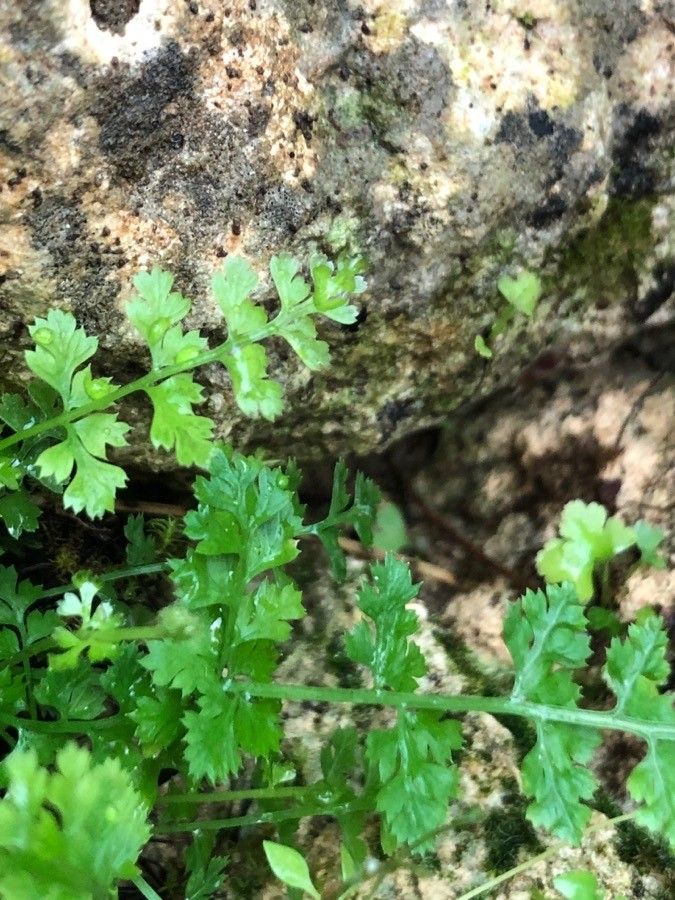
Hello, fellow plant lovers! It’s so good to be chatting with you today. I wanted to share a little secret with you – my love for the Asplenium exiguum, or the wee primrose fern. Its delicate, almost feathery fronds bring such a graceful touch to any shady corner. And the best part? You can easily multiply this beauty yourself!
Why Propagate Asplenium exiguum?
For me, propagating plants is like getting a little nod from nature, a chance to share the joy. With the wee primrose fern, it’s incredibly rewarding because those tiny new plants are just as charming as their parent. Now, I’ll be honest, this isn’t the ABSOLUTE easiest plant to get started with for a complete novice, but with a little attention, you’ll be celebrating success in no time! Don’t let that deter you one bit. Think of it as a delightful challenge.
The Sweet Spot for Starting
The absolute best time to embark on your propagation journey with Asplenium exiguum is generally in spring or early summer. This is when the plant is actively growing and has the most energy to put into new roots. You’re looking for healthy, established fronds that are vibrant and free from any signs of stress or disease.
Your Propagation Toolkit
To give your wee primrose fern the best start, gather these essentials:
- Sharp, clean pruning shears or a sharp knife: For making precise cuts.
- Sterilized pots or propagation trays: Cleanliness is key to preventing fungal issues.
- A well-draining potting mix: I like to use a blend of equal parts peat moss, perlite, and a bit of orchid bark. This gives it the aeration and moisture retention it craves.
- Water spray bottle: For keeping things consistently moist.
- Rooting hormone (optional but recommended): A little boost can help!
- Plastic wrap or a clear plastic bag: To create a humid microclimate.
Spreading the Fern Love: Propagation Methods
Wee primrose ferns are best propagated through division or by carefully taking frond cuttings. Let’s dive into how we’ll do it.
Method 1: Division (My Personal Favorite!)
This method is fantastic because you’re essentially dividing a mature plant into smaller, viable pieces.
- Gently remove the parent plant from its pot. If it’s been in there a while, you might need to loosen the soil around the edges with a trowel.
- Inspect the root ball. You’re looking for natural divisions – places where the rhizome (the thick stem that grows horizontally) has branched out.
- Using your fingers or a clean knife, carefully separate the divisions. Try to ensure each new piece has both roots and at least one or two healthy fronds. Don’t worry if you break a few of the smaller roots; the plant is resilient.
- Pot up each division into its own small pot. Use your prepared, well-draining potting mix.
- Water gently but thoroughly. You want the soil to be moist, not soggy.
- Place the newly potted divisions in a bright spot with indirect light. Keep them consistently moist and covered with a plastic bag or wrap to maintain high humidity.
Method 2: Frond Cuttings
This method feels a bit more like magic, taking a single frond and coaxing it into a new plant.
- Select a healthy, mature frond. Make sure it’s attached to the rhizome.
- Using your sharp shears, carefully cut the frond as close to the rhizome as possible. This ensures you get a bit of the stem.
- Optional: Dip the cut end into rooting hormone. This can really give it a head start.
- Plant the cutting into your prepared potting mix. Just tuck the cut end into the soil so it stands upright. Don’t bury the whole frond!
- Water gently.
- Cover the pot with a plastic bag or dome. This is crucial for maintaining humidity, which is what these delicate cuttings need to survive and form roots.
- Place in bright, indirect light.
The “Secret Sauce”: My Insider Tips
Here are a couple of things I’ve learned over the years that make a big difference:
- Don’t let the fronds touch the water (if doing water propagation, though division is preferred): If you happen to try water propagation with a stem, ensure the leaves are above the water line. Too much moisture on the foliage can lead to rot! For cuttings, it’s about keeping the soil consistently moist, not waterlogged.
- Humidity, humidity, humidity! Ferns, especially young ones, absolutely thrive in high humidity. That plastic bag or dome isn’t just for show; it’s creating a mini tropical environment. If you live in a dry climate, this is your best friend.
- Bottom heat is your friend: If you can, placing your pots on a gentle heating mat can significantly speed up root development. It mimics the warmth of spring and encourages those roots to take hold.
Aftercare and When Things Go Wrong
Once you see new growth emerging – little unfurling fronds – you know your propagation is on its way! You can start to gradually acclimate your new plants to lower humidity by opening the plastic bag a little each day over a week. Keep the soil consistently moist, and continue to provide bright, indirect light.
Now, what if things aren’t going as planned? The most common sign of trouble is rot. If your cuttings turn mushy and black, or if the parent plant’s divisions look limp and unhealthy, it’s usually a sign of overwatering or insufficient drainage. Make sure your soil mix is airy, and tap down on the watering can – less is often more. If you see yellowing leaves, it could be a sign of too much direct sun.
Keep Growing and Enjoying!
Propagating plants is a journey, so be patient with yourself and your leafy babies. Watch them closely, learn from each attempt, and celebrate every tiny new frond. The reward of nurturing a new life from an existing one is truly special. Happy growing!
Resource:
https://identify.plantnet.org/k-world-flora/species/Asplenium%20exiguum%20Bedd./data