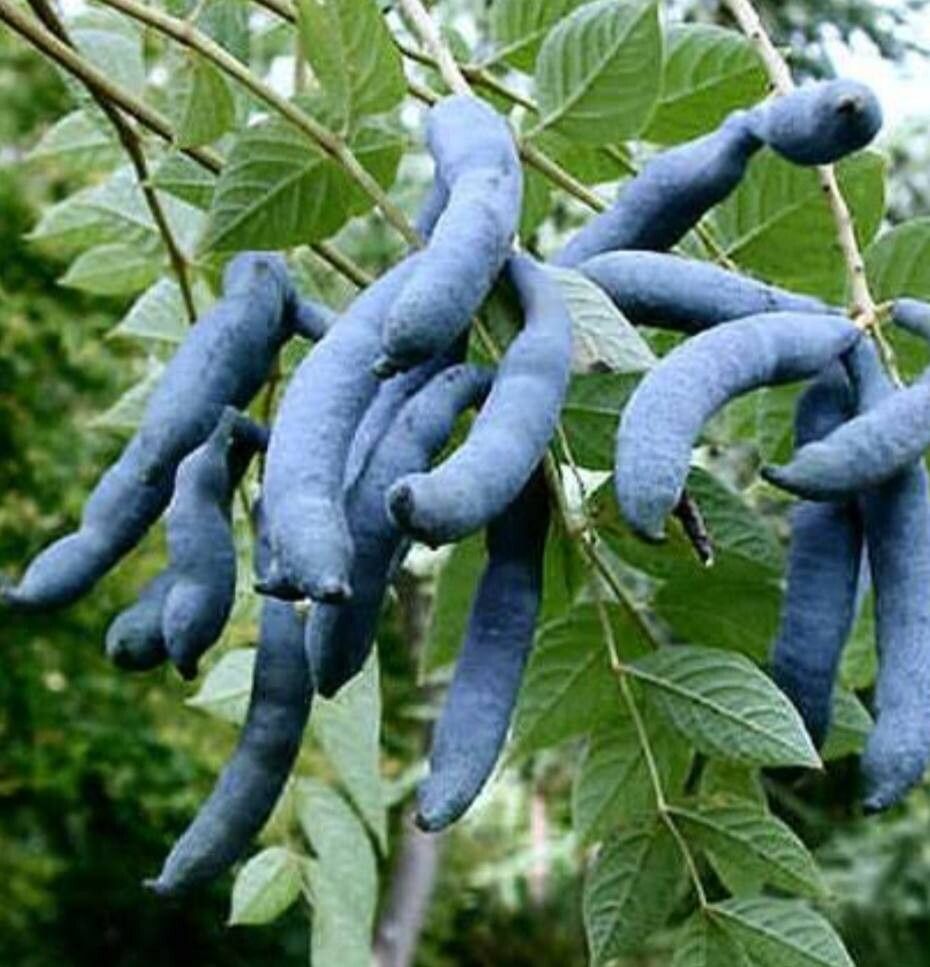
Oh, hello there, fellow plant enthusiast! Come on in, grab a mug of your favorite brew. Today, we’re going to chat about a truly delightful and rather uncommon plant: Decaisnea fargesii, also known as the Blue Bean or Dead Man’s Finger. If you’ve ever seen its long, dangling pods with those intriguing blue seeds inside, you’ll understand why I’m so smitten. Growing them from scratch is incredibly rewarding, and while it has a little bit of a learning curve, it’s absolutely achievable and worth every bit of effort.
The Best Time to Start
For Decaisnea fargesii, the timing is key. You’ll see the best success when you focus on propagating in late spring to early summer. This is when the plant is actively growing and has plenty of energy to put into developing new roots. Think of it as giving it a good boost at the peak of its vigor.
Supplies You’ll Need
Alright, let’s gather our tools. You don’t need a whole shed full of fancy gadgets, just a few essentials:
- Sharp Pruning Shears or a Knife: Cleanliness is paramount here. We don’t want to introduce any unwelcome guests.
- Rooting Hormone Powder or Gel: This is a real lifesaver for encouraging strong root development.
- Well-Draining Potting Mix: A mix of peat moss, perlite, and perhaps some coarse sand works wonders. You can also buy specific “cutting and seedling” mixes.
- Small Pots or Trays: Clean ones, of course!
- Plastic Bags or a Humidity Dome: To keep things nice and moist.
- Labels: So you don’t forget what you planted where!
- Watering Can with a Fine Rose: For gentle watering.
Propagation Methods
Now, for the exciting part! My preferred method for Decaisnea fargesii is through stem cuttings. It’s a reliable way to get a good number of new plants.
- Take Your Cuttings: On a healthy, actively growing stem, look for sections that are semi-hardwood. This means they’re not brand new and floppy, but also not old and woody. Aim for cuttings about 4-6 inches long. Make your cut just below a leaf node (where a leaf attaches to the stem).
- Prepare the Cuttings: Gently remove the lower leaves, leaving just a couple at the top. This prevents them from rotting in the soil. If your leaves are very large, you can even cut them in half to reduce water loss.
- Apply Rooting Hormone: Dip the cut end of each stem into your rooting hormone, tapping off any excess. This step is crucial for encouraging quick root formation.
- Plant Your Cuttings: Fill your small pots with your moistened potting mix. Make a hole in the center of the soil with a pencil or your finger. Insert the prepared cutting into the hole, making sure the rooting hormone-coated end is well covered. Gently firm the soil around the base of the cutting.
- Create a Humid Environment: Water the soil lightly. Then, place a plastic bag over the pot, creating a mini greenhouse effect. You can also use a clear plastic lid or a humidity dome. Ensure the bag doesn’t directly touch the leaves of the cutting if possible.
- Provide Bright, Indirect Light: Place your pots in a location that receives plenty of bright, indirect light. Avoid direct sunlight, as it can scorch the delicate cuttings.
The “Secret Sauce” (Pro Tips)
Here are a couple of things I’ve learned over the years that make a real difference:
- Bottom Heat: If you can, place your pots on a propagation mat or a sunny windowsill that receives gentle warmth from the bottom. This warmth signals to the plant that it’s time to get those roots going. It feels like spring to them!
- Gentle Air Circulation: While humidity is essential, you don’t want stagnant air, which can lead to fungal issues. Every few days, lift the plastic bag or dome for a few minutes to allow for some fresh air exchange. This helps prevent rot and mildew.
Aftercare & Troubleshooting
Once your cuttings are nestled in their humid little homes, be patient! It can take anywhere from 4 to 8 weeks, sometimes even longer, for roots to develop. You’ll know they’re ready when you gently tug on a cutting and feel resistance, or when you see new leaf growth appearing at the top.
When you see those signs of life, it’s time to gradually acclimate them. Slowly start removing the plastic bag or dome over a week or two, giving them time to adjust to normal humidity levels. Continue to keep the soil consistently moist but not waterlogged.
The most common problem you might encounter is rot. If a cutting turns mushy or black, it’s usually a sign of too much moisture and not enough air circulation. Unfortunately, rotten cuttings usually can’t be saved, but don’t get discouraged! It’s just part of the learning process. Simply discard the failed cutting and try again.
A Encouraging Closing
Growing new plants is such a joyful part of gardening. It’s a tangible way of connecting with the natural world and extending the beauty in your garden. So, go ahead, give propagating Decaisnea fargesii a shot! Be patient, be observant, and most importantly, enjoy the process of nurturing these little green shoots into future treasures. Happy gardening!
Resource:
https://identify.plantnet.org/k-world-flora/species/Decaisnea%20fargesii%20Franch./data