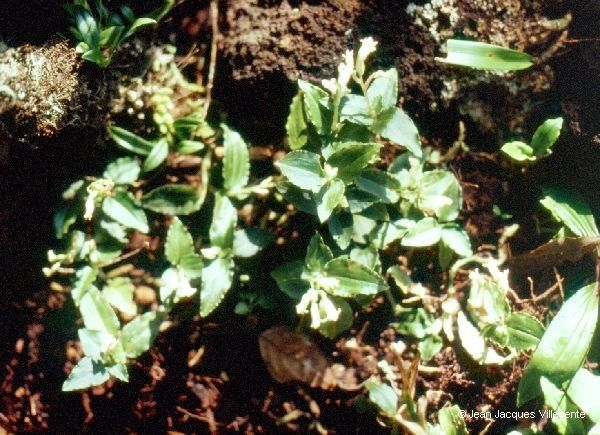
Oh, Odontochilus montanus! If you’ve ever fallen for those delicate, velvety leaves and the promise of its shy blooms, you’re in for a treat. This lovely little orchid isn’t as intimidating as some of its greenhouse-dwelling cousins, but it definitely has its own personality. Propagating it is a wonderfully rewarding journey, like watching a tiny miracle unfold right on your windowsill. It’s a project that’s accessible to most plant lovers, though a touch of patience is key.
The Best Time to Start
When the days start getting longer and the plant is showing signs of active new growth – usually in the spring or early summer – is the sweet spot. You want to catch your mature Odontochilus when it’s feeling robust and ready to put its energy into making new life. Avoid trying to propagate when the plant is stressed, perhaps from extreme heat or cold, or if it’s just finished flowering.
Supplies You’ll Need
Here’s a handy list of what I usually gather before I get my hands dirty:
- Clean, sharp pruning shears or a sterile knife
- A well-draining potting mix: I find a blend of orchid bark, perlite, and a bit of coco coir works beautifully. It needs to let water flow through quickly.
- Small pots or propagation trays with drainage holes.
- Optional: Rooting hormone powder (I sometimes skip this, but it can give an extra boost).
- A spray bottle for misting.
- Clear plastic bags or a humidity dome.
- Optional: Bottom heat source, like a seedling heat mat.
Propagation Methods
For Odontochilus montanus, division is often the easiest and most successful route for home growers.
Division: Sharing the Wealth
This is my go-to method for this lovely plant. It’s like giving your plant a haircut and getting new plants to show for it!
- Gently remove the plant from its pot. You want to disturb the roots as little as possible.
- Inspect the root ball. Look for natural divisions where a new shoot is emerging from the main rhizome, with its own set of roots.
- Using your clean shears or knife, carefully separate the divisions. Try to ensure each piece has at least one or two healthy pseudobulbs (the swollen stem bases) and some good roots.
- Trim away any dead or mushy roots.
- Pot each division into its own small pot filled with your special orchid mix. Make sure the top of the rhizome is just at or slightly above the soil surface.
- Water very lightly to settle the mix. Don’t drench it.
- Place the newly potted divisions in a spot with bright, indirect light. Keep them consistently moist but not waterlogged. Use your spray bottle to mist the leaves every day or so, especially if you’re not using a humidity dome.
The “Secret Sauce” (Pro Tips)
Here are a couple of things I’ve learned that make a real difference:
- Don’t overpot. Start your new divisions in small pots. They hate sitting in too much damp media, which can lead to rot. It’s better to pot them up later when they’ve clearly outgrown their first home.
- Mimic its native habitat. Odontochilus often grows in humid, mossy environments. This means consistent humidity is your best friend. Covering your pots with a clear plastic bag (poke some air holes!) or using a humidity dome is super helpful until they establish.
Aftercare & Troubleshooting
Once your divisions are potted, the key is consistent, gentle care. Keep the potting mix evenly moist but not soaking. Mist the leaves periodically. If you’ve used rooting hormone, you might see root growth within a few weeks. Look for new leaf shoots emerging from the base.
The most common issue you’ll face is rot. If you see leaves turning yellow and mushy, or the pseudobulbs looking sunken and brown, it’s usually a sign of too much moisture and not enough air circulation. In this case, you might need to unpot, trim away the rot with a sterile tool, let it air dry for a day, and repot into fresh, drier medium. Don’t be discouraged if you lose one; it happens to the best of us!
A Little Patience Goes a Long Way
Propagating Odontochilus montanus is a journey, not a race. Celebrate the small wins – a new root tip, a fresh green shoot. Enjoy the process of nurturing these tiny pieces of your beloved plant. With a little care and a lot of encouragement, you’ll soon be rewarded with beautiful new additions to your collection. Happy gardening!
Resource: