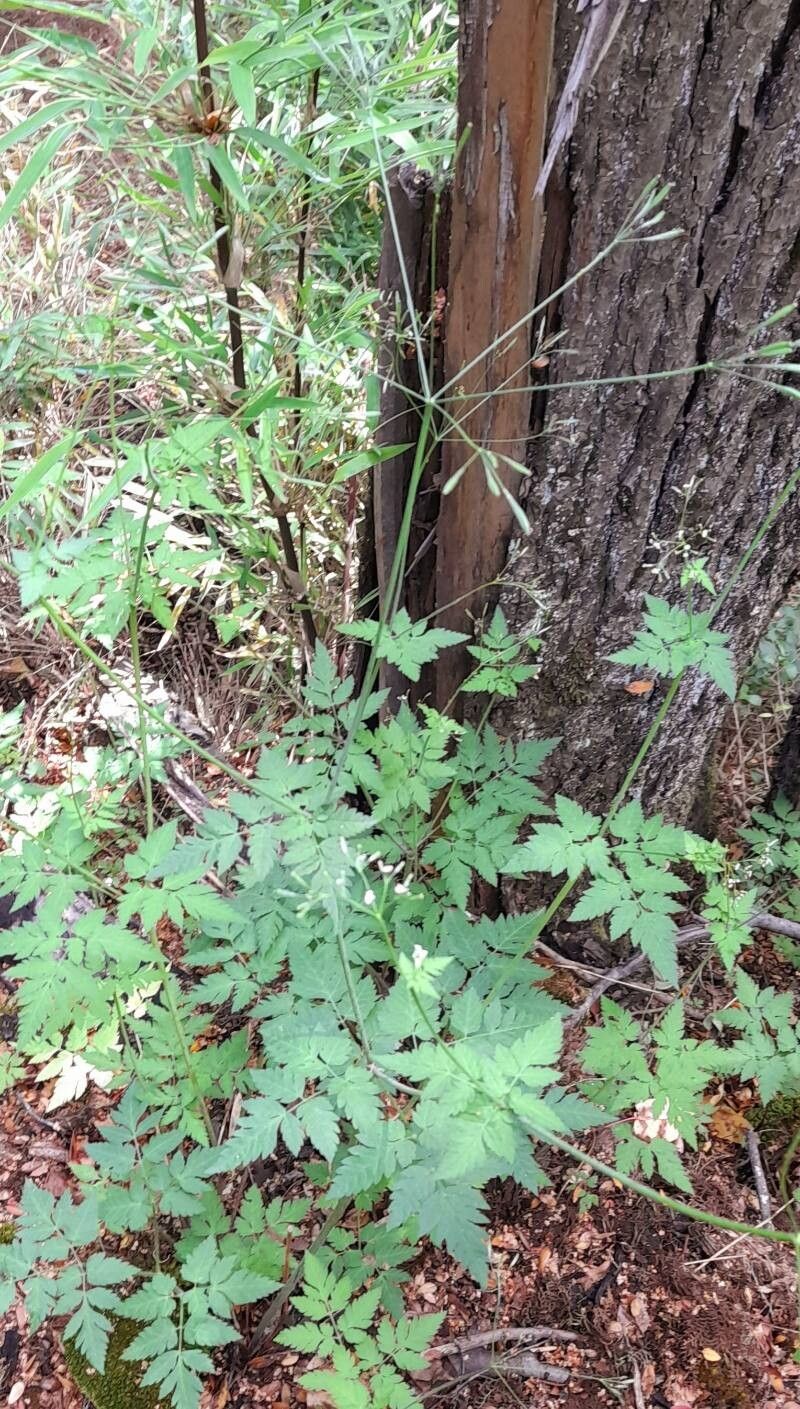
Hey there, fellow garden lovers! I’m so excited to chat with you today about a plant that holds a special place in my heart: Osmorhiza berteroi, commonly known as Chilean sweet-scented anise or mountain sweet-root. If you’ve ever been lucky enough to encounter this beauty, you’ll know its charming, fern-like foliage and delicate white flowers that grace the garden with a subtle, lovely fragrance. It’s a plant that adds a touch of wild elegance, and propagating it yourself is incredibly rewarding. Now, for beginners wondering if this is an easy one to tackle – I’d say it’s moderately easy with a bit of patience. Nothing too daunting, I promise!
The Best Time to Start
When it comes to giving your Osmorhiza berteroi cuttings the best chance, late spring to early summer is your sweet spot. This is when the plant is in a robust growth phase. You’re looking for stems that are semi-hardwood, meaning they’re not brand new and flimsy, but not woody and old either. Think of it like a pencil – firm, but with a little give.
Supplies You’ll Need
Gathering your supplies beforehand makes the whole process smoother. Here’s what I always have on hand:
- Sharp pruning shears or a clean knife: For making those crucial, clean cuts.
- Potting mix: A well-draining mix is key. I like a blend of equal parts peat moss or coco coir, perlite, and a bit of compost.
- Small pots or seed trays: Clean ones, of course!
- Rooting hormone (optional but recommended): A powder or gel will help those roots form faster.
- Plastic bags or a clear plastic dome: To create a humid environment for your cuttings.
- Watering can with a fine rose: For gentle watering.
- A warm location: With bright, indirect light.
Propagation Methods
While Osmorhiza berteroi can be divided, I find stem cuttings to be the most reliable way to increase your stock. It’s straightforward and yields great results.
- Take Your Cuttings: Select healthy, semi-hardwood stems. Using your clean shears or knife, cut a piece of stem that is about 4-6 inches long. Make a clean cut just below a leaf node (where a leaf attaches to the stem).
- Prepare the Cuttings: Gently remove the lower leaves, leaving only the top two or three. This reduces water loss. If your cuttings are very long, you can carefully prune them back slightly.
- Apply Rooting Hormone: Dip the cut end of each stem into your rooting hormone. Tap off any excess.
- Plant Your Cuttings: Fill your small pots or trays with your prepared potting mix. Make a small hole in the center of each with your finger or a pencil. Insert the cut end of the stem into the hole, ensuring it makes good contact with the soil. Gently firm the soil around the base of the cutting.
- Create Humidity: Water the soil gently. Then, cover the pots with a plastic bag (propped up with skewers or stakes so it doesn’t touch the foliage) or a clear plastic dome. This creates a mini-greenhouse effect.
- Place and Wait: Put your potted cuttings in a spot that receives bright, indirect light. Avoid direct sun, which can scorch the young leaves.
The “Secret Sauce” (Pro Tips)
Here are a few little tricks that have made all the difference for me over the years:
- The “Dip and Breathe” Trick: After dipping your cutting in rooting hormone, before you plant it, let it air dry for just a minute or two. This allows the hormone to form a slightly tacky surface that adheres better to the stem. It’s a small step, but it can encourage better root formation.
- Bottom Heat is Your Friend: If you have the means, placing your pots on a heat mat designed for seedlings can significantly speed up the rooting process. Warm soil encourages root development. Just make sure it’s not too hot – aim for a gentle warmth.
- Don’t Overwater (Seriously!): This is where many go wrong. You want the soil to be consistently moist, but never waterlogged. Soggy soil is a recipe for rot. A good check is to gently poke the soil with your finger; if it feels wet, hold off on watering.
Aftercare & Troubleshooting
Once you start seeing new leaf growth or feel a gentle resistance when you lightly tug on the cutting, you know roots have formed! This usually takes 4-8 weeks, but can vary. At this point, you can gradually acclimate your new plants to less humid conditions by opening the plastic bag a little more each day. Once hardened off, you can transplant them into their own individual pots filled with more of that lovely, well-draining mix.
The most common problem you’ll encounter is rot. If a cutting turns yellow, then brown and mushy, it’s likely rotted. This is usually due to too much moisture and not enough air circulation. If you see this happening, pull out the affected cutting immediately to prevent it from spreading and check your watering habits. Fungal issues can also arise if the environment is too damp and stagnant for too long.
A Little Encouragement
Propagating plants is a journey, and like any good garden endeavor, it requires a bit of patience and observation. Don’t be discouraged if a few cuttings don’t make it – it happens to all of us! Each attempt is a learning experience. Enjoy the process of nurturing these little bits of life, and soon you’ll be enjoying the beauty of Osmorhiza berteroi all over your garden. Happy gardening!
Resource:
https://identify.plantnet.org/k-world-flora/species/Osmorhiza%20berteroi%20DC./data