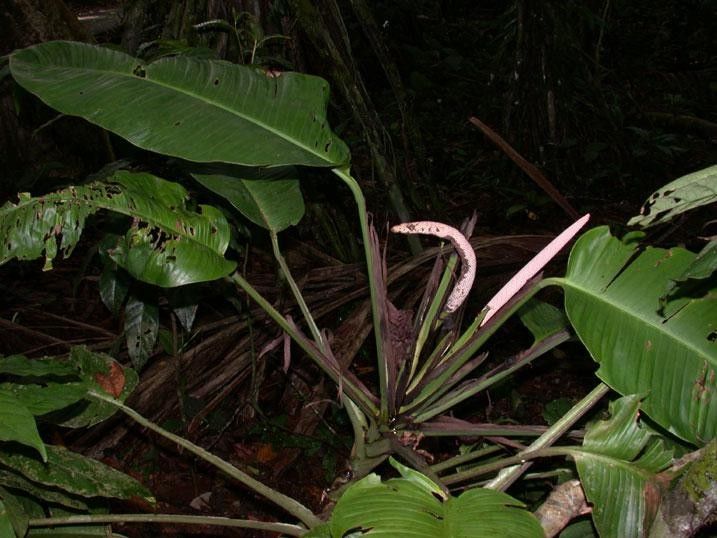
Hello, fellow plant lovers! Today, we’re diving into the wonderful world of Rhodospatha wendlandii, a plant that brings such a lush, tropical vibe to any space. Its glossy, deep green leaves, often with elegant streaks or patterns, are simply captivating. Plus, there’s a special kind of joy in coaxing a brand new plant into existence from a piece of your existing one. It makes you feel like a bit of a plant rockstar, honestly!
Now, I’ll be straight with you. While Rhodospatha wendlandii isn’t an expert-level challenge, it’s not quite a “stick it in the ground and hope for the best” plant either. It requires a little thoughtfulness, but that’s what makes the success so much sweeter. I’d say it’s a fantastic project for the enthusiastic beginner looking to level up their propagation game.
The Best Time to Start
For Rhodospatha wendlandii, like most tropical plants, spring and early summer are your golden ticket. This is when the plant is actively growing and has the most energy to dedicate to forming new roots. You want to look for stems that are firm and have just finished a growth spurt, not the wispy new growth that’s still a bit floppy.
Supplies You’ll Need
Gathering your tools before you start makes the whole process smoother. Here’s what I always have on hand:
- Sharp & Clean Pruning Shears or Knife: Crucial for a clean cut that heals well.
- Well-Draining Potting Mix: I usually go for a blend of perlite, coco coir, and a good quality potting soil. A little orchid bark can be nice too.
- Small Pots or Propagation Trays: Clean pots are a must to prevent disease.
- Rooting Hormone (Optional but Recommended): A little dip can significantly boost your success. I like the powder form.
- Plastic Bag or Clear Dome: To create a humid environment.
- Watering Can with a Fine Rose: For gentle watering.
Propagation Methods
Rhodospatha wendlandii is wonderfully amenable to stem cuttings. It’s my go-to method for multiplying these beauties.
Stem Cuttings
- Select Your Stem: Look for a healthy stem that has at least two or three nodes. Nodes are those little bumps on the stem where leaves emerge. Roots love to form here.
- Make the Cut: Using your clean shears or knife, make a cut just below a node. Aim for a cutting that’s about 4-6 inches long.
- Strip Excess Leaves: Remove any leaves from the bottom half of the cutting. You want to expose at least one or two nodes. If the remaining leaves are very large, consider cutting them in half horizontally to reduce water loss. Don’t remove too many leaves, though; they still need to photosynthesize!
- Apply Rooting Hormone (Optional): If you’re using it, lightly dip the cut end of the stem into the rooting hormone, tapping off any excess.
- Plant Your Cutting: Fill your small pot or propagation tray with your well-draining mix. Make a small hole with your finger or a pencil and gently insert the bottom of the cutting, ensuring the nodes are buried.
- Water Gently: Water the soil thoroughly but gently, allowing excess water to drain away.
- Create Humidity: Place the potted cutting inside a clear plastic bag, sealing it with a twist tie or rubber band. Alternatively, use a clear plastic dome. Make sure the leaves aren’t pressed tightly against the plastic if possible. This creates a mini-greenhouse effect.
- Find a Bright Spot: Place the pot in a bright, indirect light location. Avoid direct sun, which can scorch the cuttings.
The “Secret Sauce” (Pro Tips)
Here are a couple of things I’ve learned over the years that really make a difference:
- Don’t Let Leaves Touch the Water (or Wet Soil for too Long): If you’re doing water propagation, make absolutely sure that no leaves are submerged. They’ll rot quickly. When using soil, water thoroughly initially, then let the top inch or so dry out before watering again. Overwatering is the enemy!
- Bottom Heat is Your Friend: For those stubborn propagations, a little warmth from below can work wonders. A seedling heat mat designed for plants can really speed up root development. Just place your potted cuttings on top of it, and you’ll see a noticeable difference.
Aftercare & Troubleshooting
Be patient! It can take anywhere from 4 to 8 weeks, sometimes longer, for your Rhodospatha wendlandii cuttings to develop a healthy root system. You’ll know roots have formed when you see new leaf growth or feel a gentle resistance when you lightly tug on the cutting.
Once you see signs of good root development, it’s time to gradually acclimate your new plant to normal conditions. Start by opening the plastic bag for a few hours each day, slowly increasing the duration. Eventually, you can remove the bag entirely. Continue to water as needed, allowing the soil to dry slightly between waterings.
The most common issue you’ll encounter is rot. If your cutting turns mushy and black, or smells foul, it’s likely rotted. This is usually due to too much moisture and poor air circulation. If you catch it early, you might be able to salvage a healthy cutting by recutting just above the rotten part and starting again in fresh, dry medium.
A Warm Farewell
Propagating Rhodospatha wendlandii is such a rewarding journey. It teaches you to observe, to be patient, and to trust the incredible power of nature. Don’t get discouraged if your first attempt isn’t perfect. Every plant parent has had their share of propagation mishaps! Just keep learning, keep trying, and most importantly, enjoy the beautiful process of growing something new. Happy propagating!
Resource:
https://identify.plantnet.org/k-world-flora/species/Rhodospatha%20wendlandii%20Schott/data